Step-by-step guides for the things you actually do, like logging hours, adding expenses, creating contracts, and running payroll, plus a full feature reference.
/
How-To Guides
Short, practical walkthroughs organized by task. Each one tells you who can do it, where to find it, and every step from start to finish.
Signing In & Account Setup
Everything you need to get into your account and keep it secure, signing in with a password, Google, or biometrics; setting up two-factor authentication; managing your trusted devices and sessions; and keeping your profile and notification preferences up to date. These tasks apply to everyone with an account (Provider, Client, Agent, Supervisor, or Admin).
How to sign in with your email or phone number and password
Any userSign-in page
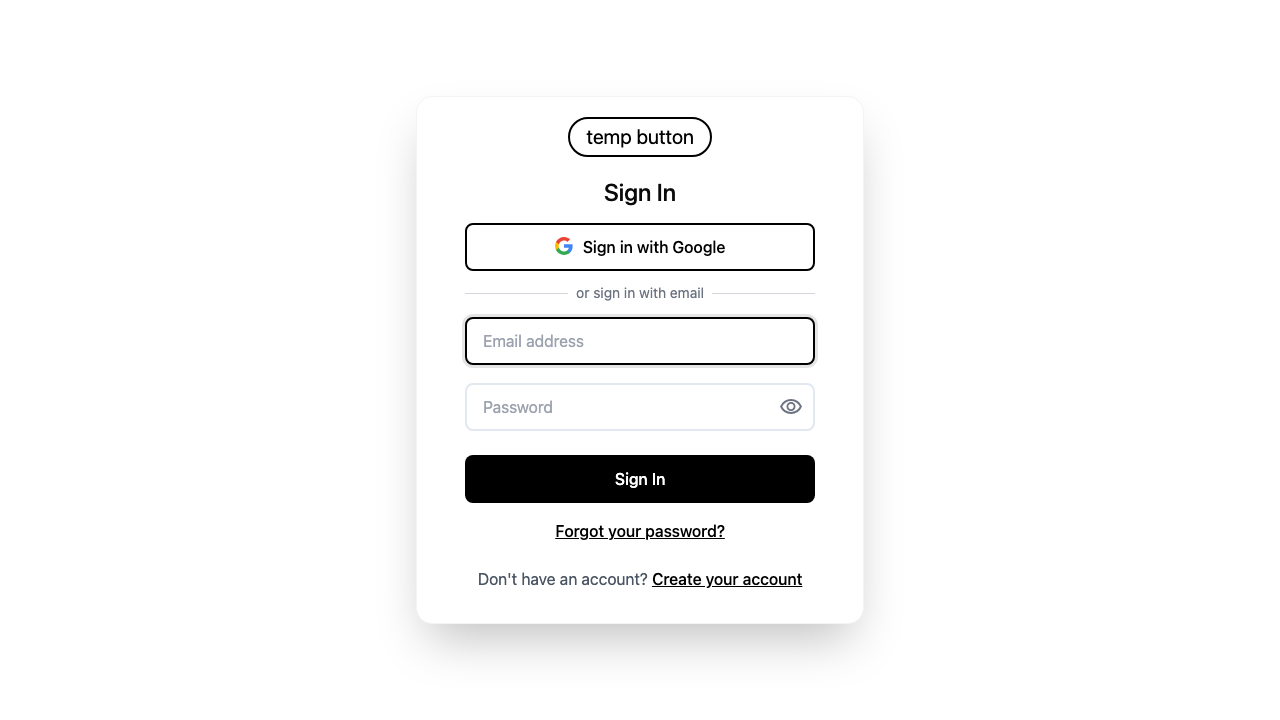
Open your company's TempButton sign-in page. You'll see the Sign In heading.
In the first field, type your email address (or the phone number on your account).
In the Password field, type your password. To check what you typed, click the eye icon at the end of the field to show or hide it.
Screenshot: the Sign In page with the email and password fields and the "Sign In" button highlighted.
Click Sign In.
If your company uses two-factor authentication, you'll be asked to confirm your identity next (see the two-factor how-to below). Otherwise you'll land on your dashboard, which means you're signed in.
Tip: If a "Trust this device for 30 days" option appears, tick it on a device that's only yours to save a step next time you sign in.
How to sign in with Google
Any user with a matching Google accountSign-in page
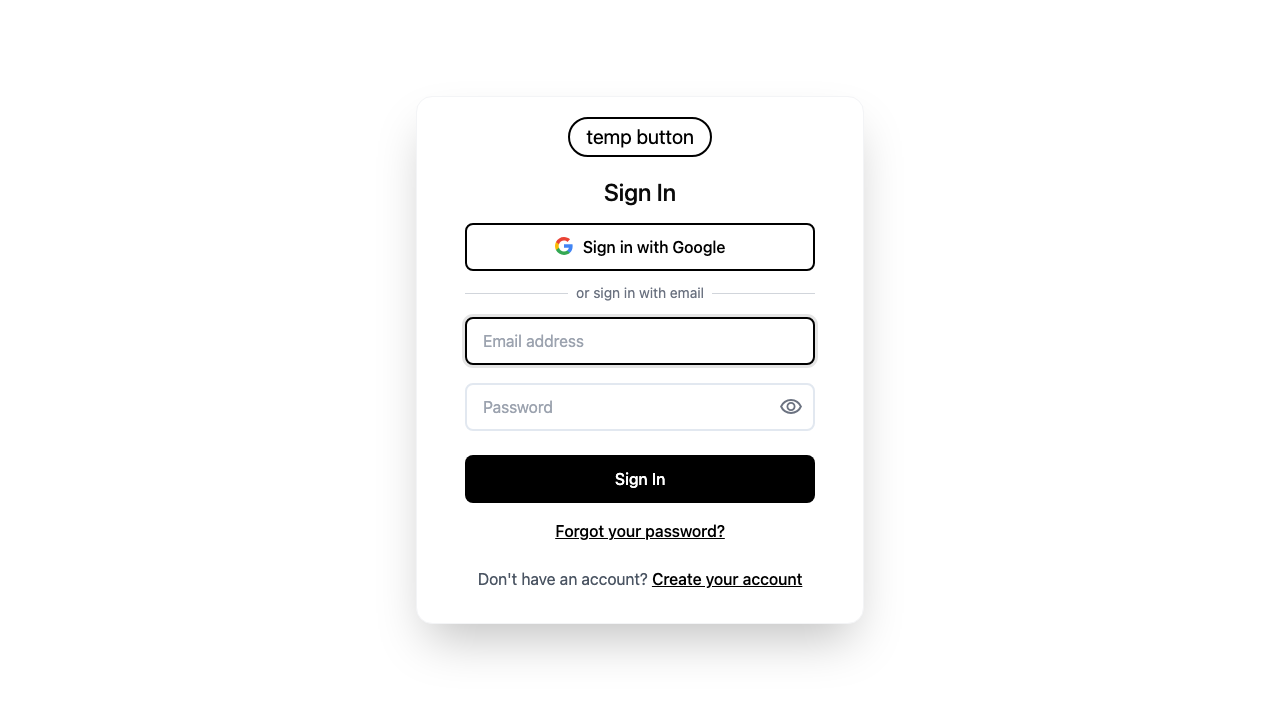
Open your company's sign-in page.
Click Sign in with Google at the top of the form.
Screenshot: the Sign In page with the "Sign in with Google" button highlighted above the "or sign in with email" divider.
Choose the Google account you want to use, and approve the sign-in when Google asks.
You'll be returned to TempButton and taken to your dashboard once you're signed in.
Tip: Use the same email address that's on your TempButton account so Google can match you to the right profile.
How to reset a forgotten password
Any userSign-in page → Forgot your password?
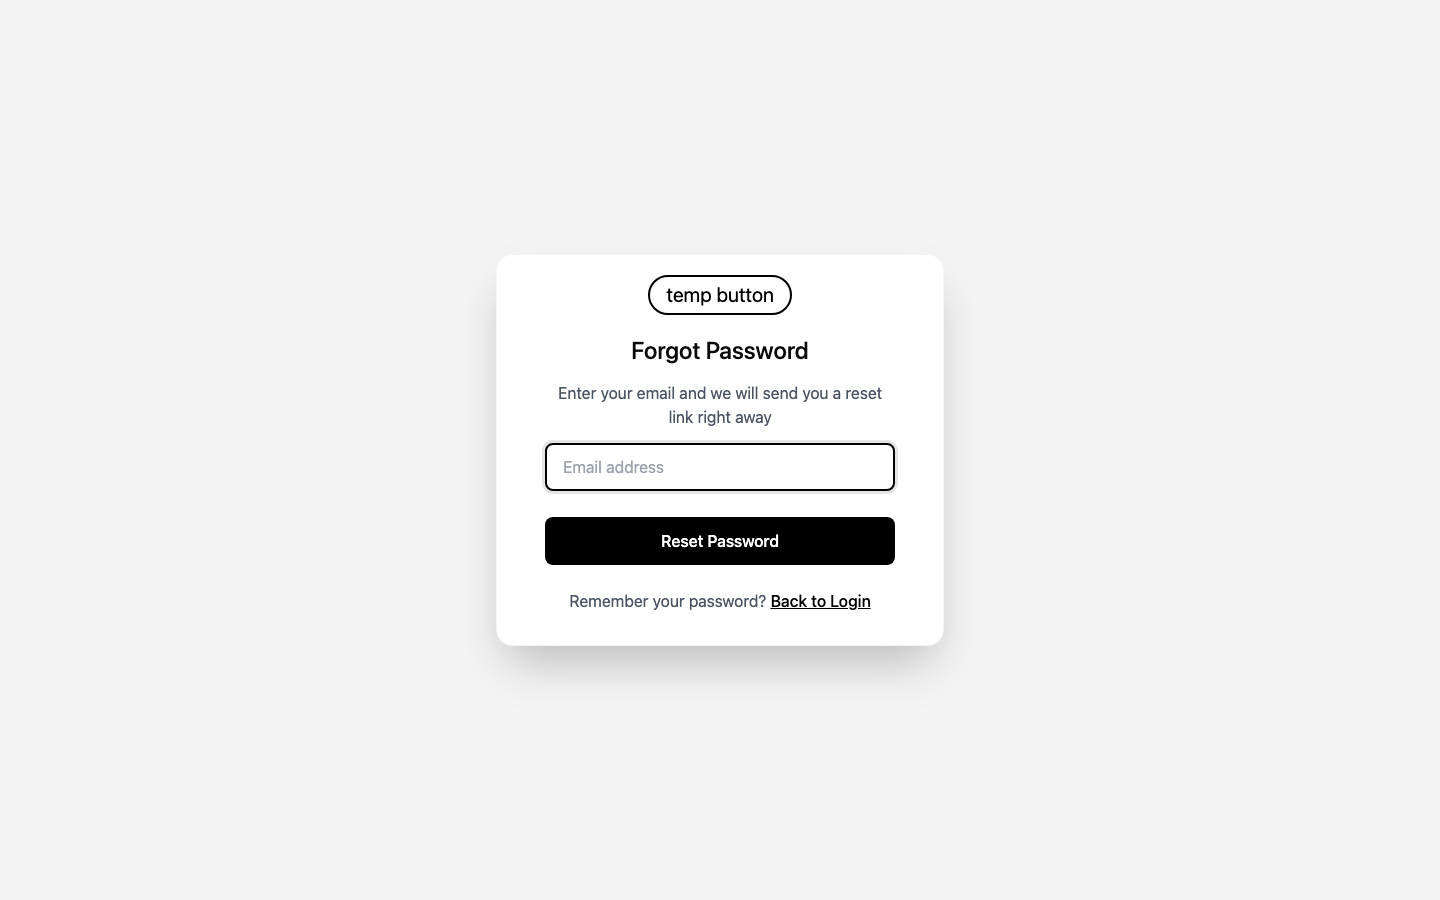
On the sign-in page, click Forgot your password? below the sign-in button.
Enter your email address and click the button to send the reset link. You'll see a confirmation that a reset link is on its way.
Screenshot: the "Forgot password" page with the email field and the send-reset-link button highlighted.
Open the email you receive and click the reset link.
On the reset page, type your New password, retype it in Confirm new password, then submit.
You can now sign in with your new password.
Tip: If the email doesn't arrive within a few minutes, check your spam or junk folder before requesting another link.
How to verify your email with a one-time code when creating an account
New account ownerSign-in page → Create your account
On the sign-in page, click Create your account and fill in the sign-up details.
After you submit, we email you a 6-digit verification code and show a code-entry page.
Type the 6-digit verification code from the email into the box.
Screenshot: the verification page with the "6-digit verification code" field and the Verify button highlighted.
Click Verify. If you don't see the email, use Resend Code to get a new one.
Once the code is accepted, your account is set up and you're taken into the app.
Tip: The code is time-sensitive, if it expires, just request a new one with Resend Code.
How to set up two-factor authentication
Any user (required by some companies, optional for others)Profile → Security Settings
Open the profile menu (top right) and click Profile, then expand Security Settings.
Turn on Enable MFA for Your Account to add an extra layer of security. You'll see a confirmation that multi-factor authentication is enabled.
Screenshot: the Security Settings panel with the "Enable MFA for Your Account" toggle highlighted.
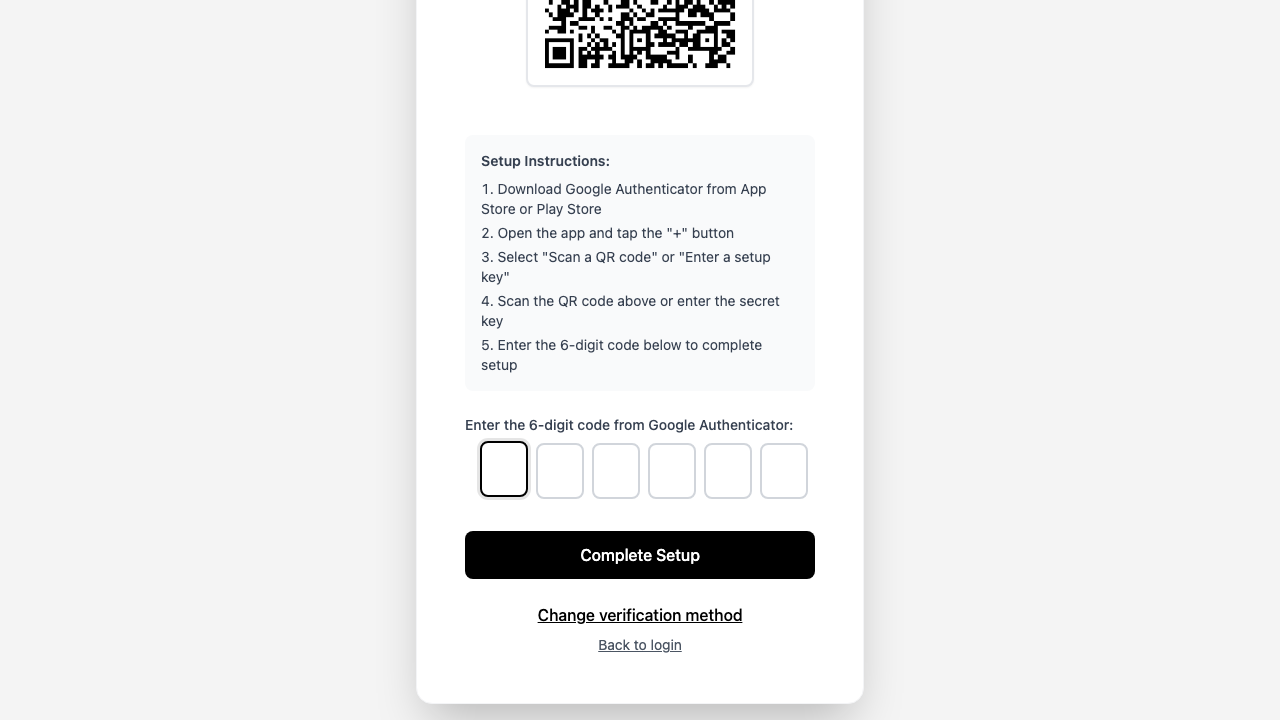
To use an authenticator app, find Two-Factor Authentication and choose to set up Google Authenticator. Scan the QR code shown with your authenticator app (such as Google Authenticator), then enter the 6-digit code the app displays to confirm.
Screenshot: the Two-Factor Authentication section showing the QR code and the field to enter the 6-digit code from the authenticator app.
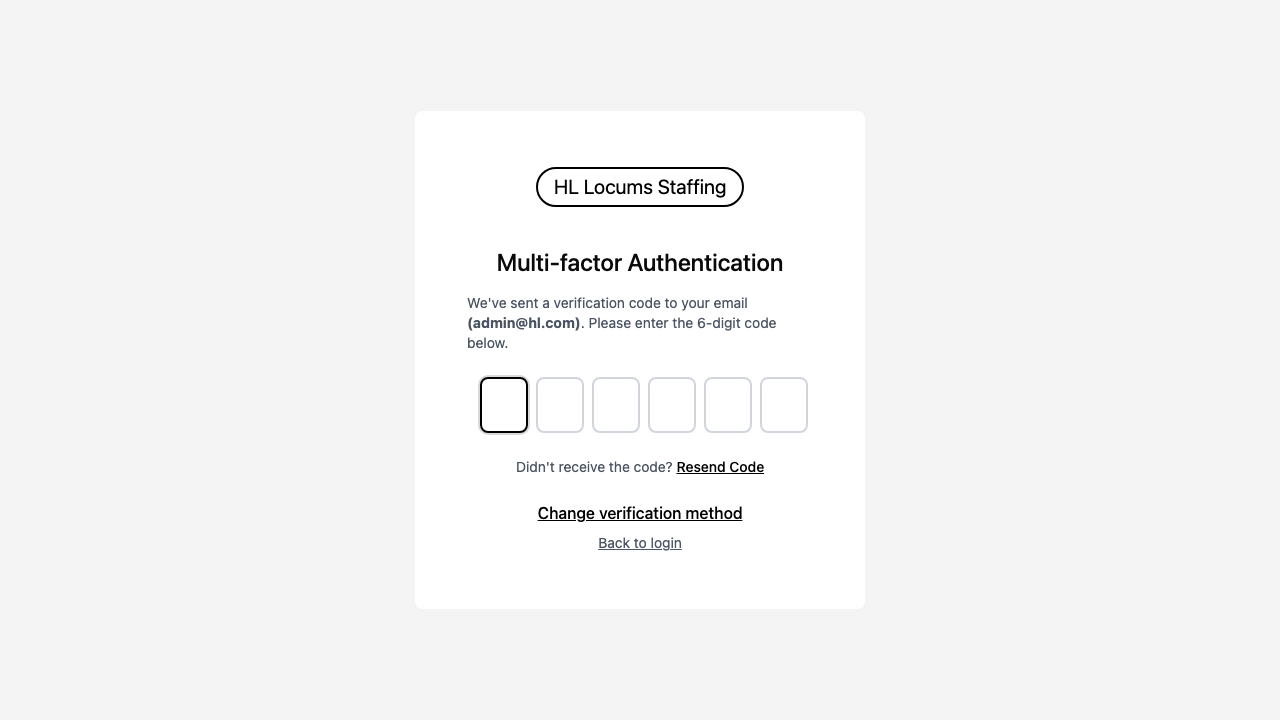
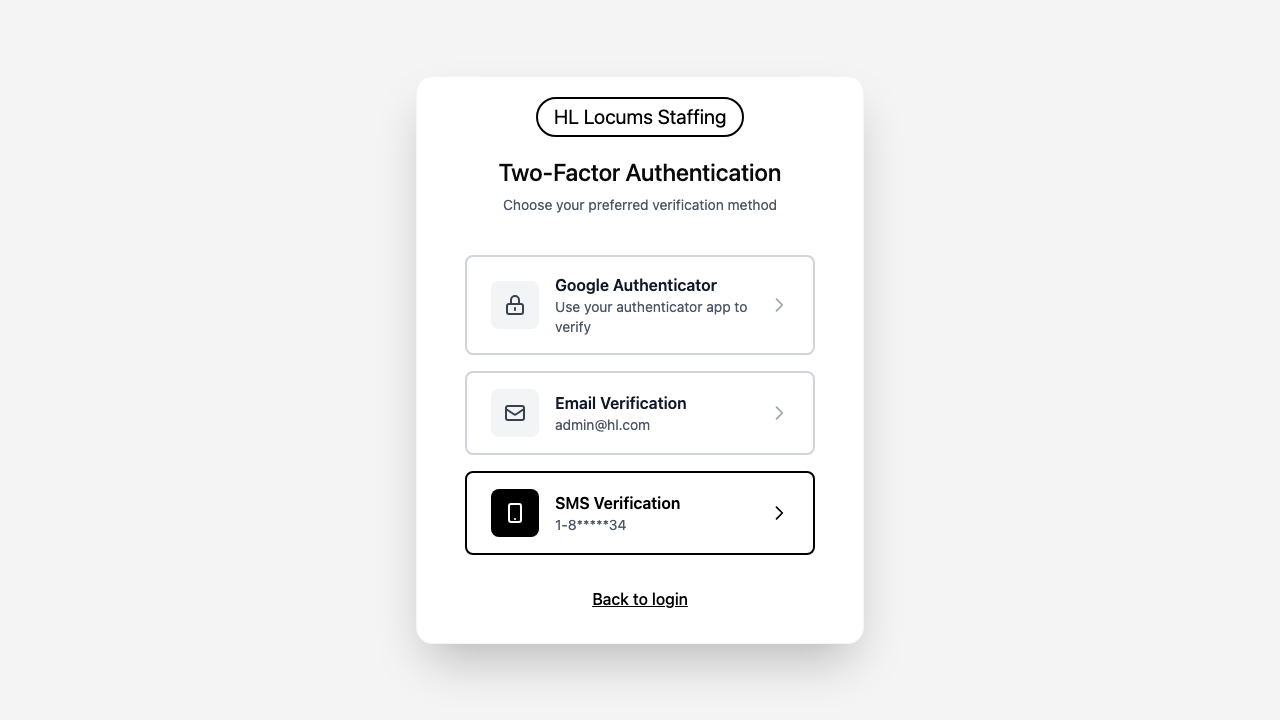
The next time you sign in, you'll be asked to choose how to verify. You can pick an authenticator app, an email verification code, or a text message code sent to your phone, then enter the 6-digit code to finish signing in.
On the verification screen you can tick Trust this device for 30 days so you won't be asked again on that device.
Tip: Set up more than one method where offered, that way you always have a backup way to verify if you don't have your phone handy.
How to enable biometric / passkey sign-in and manage trusted devices
Any user on a supported deviceProfile → Security Settings
Go to Profile → Security Settings and find the Passkeys section.
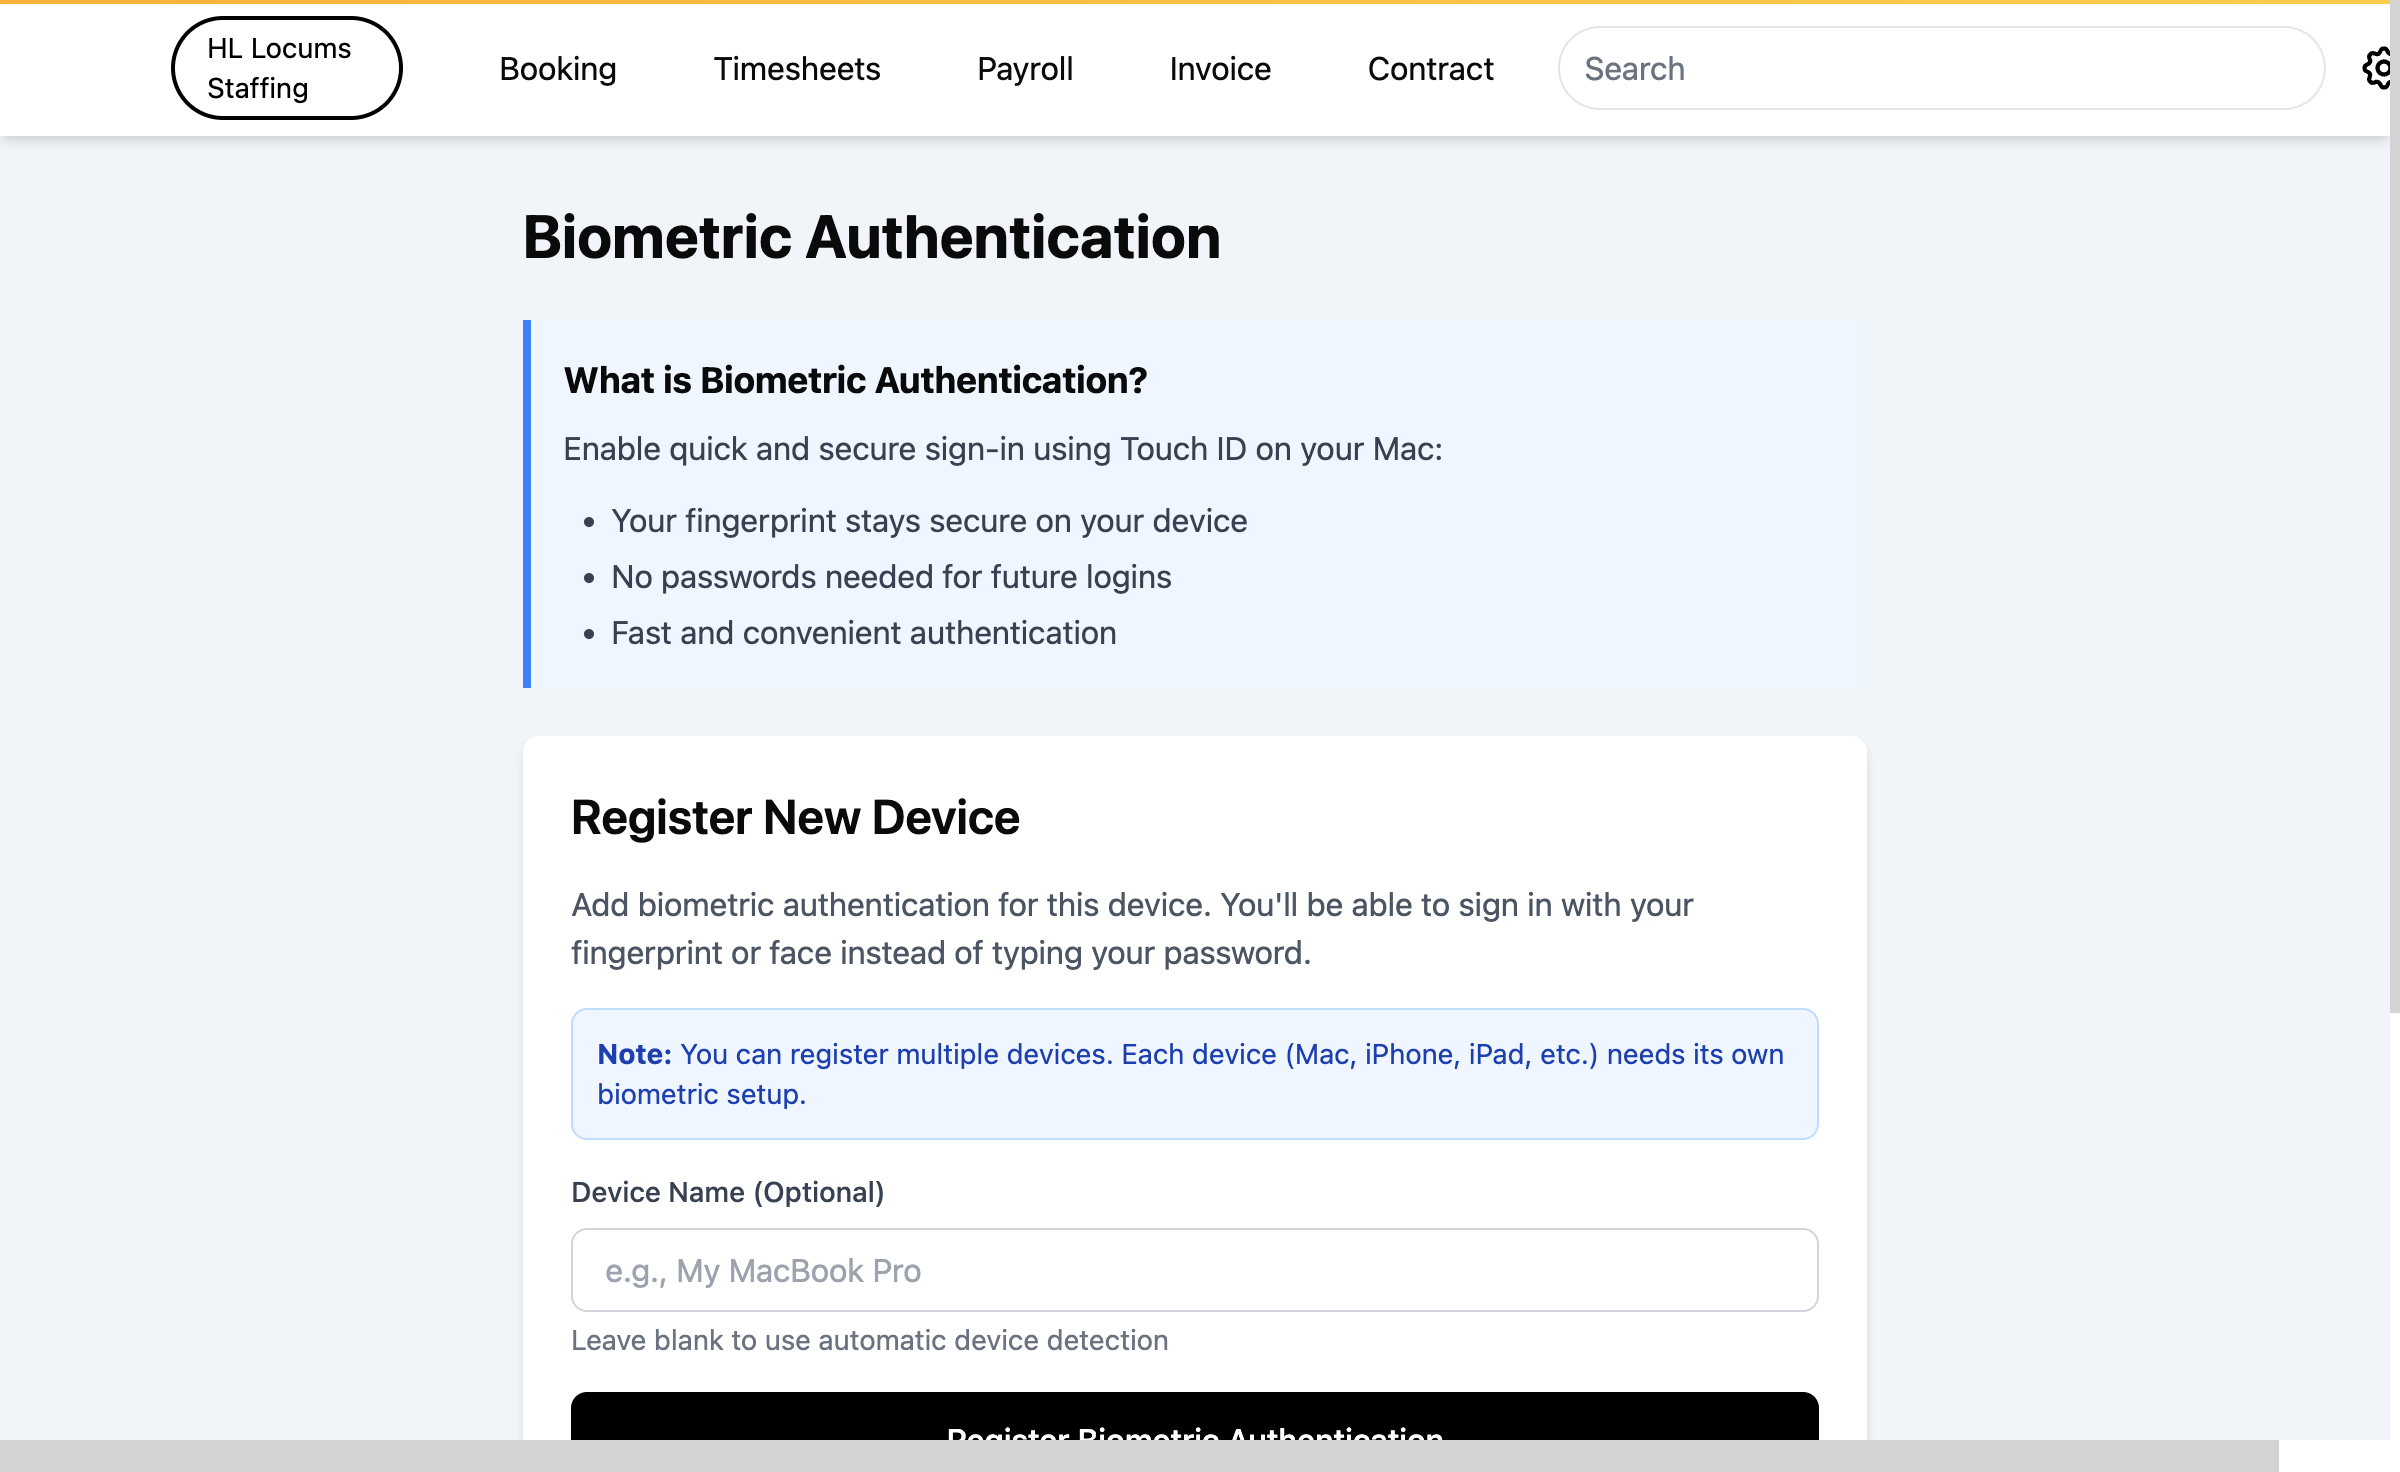
Click + Add Passkey and follow your device's prompt to confirm with Touch ID, Face ID, or Windows Hello. Give the passkey a recognizable name if asked.
Screenshot: the Passkeys section with the "+ Add Passkey" button highlighted.
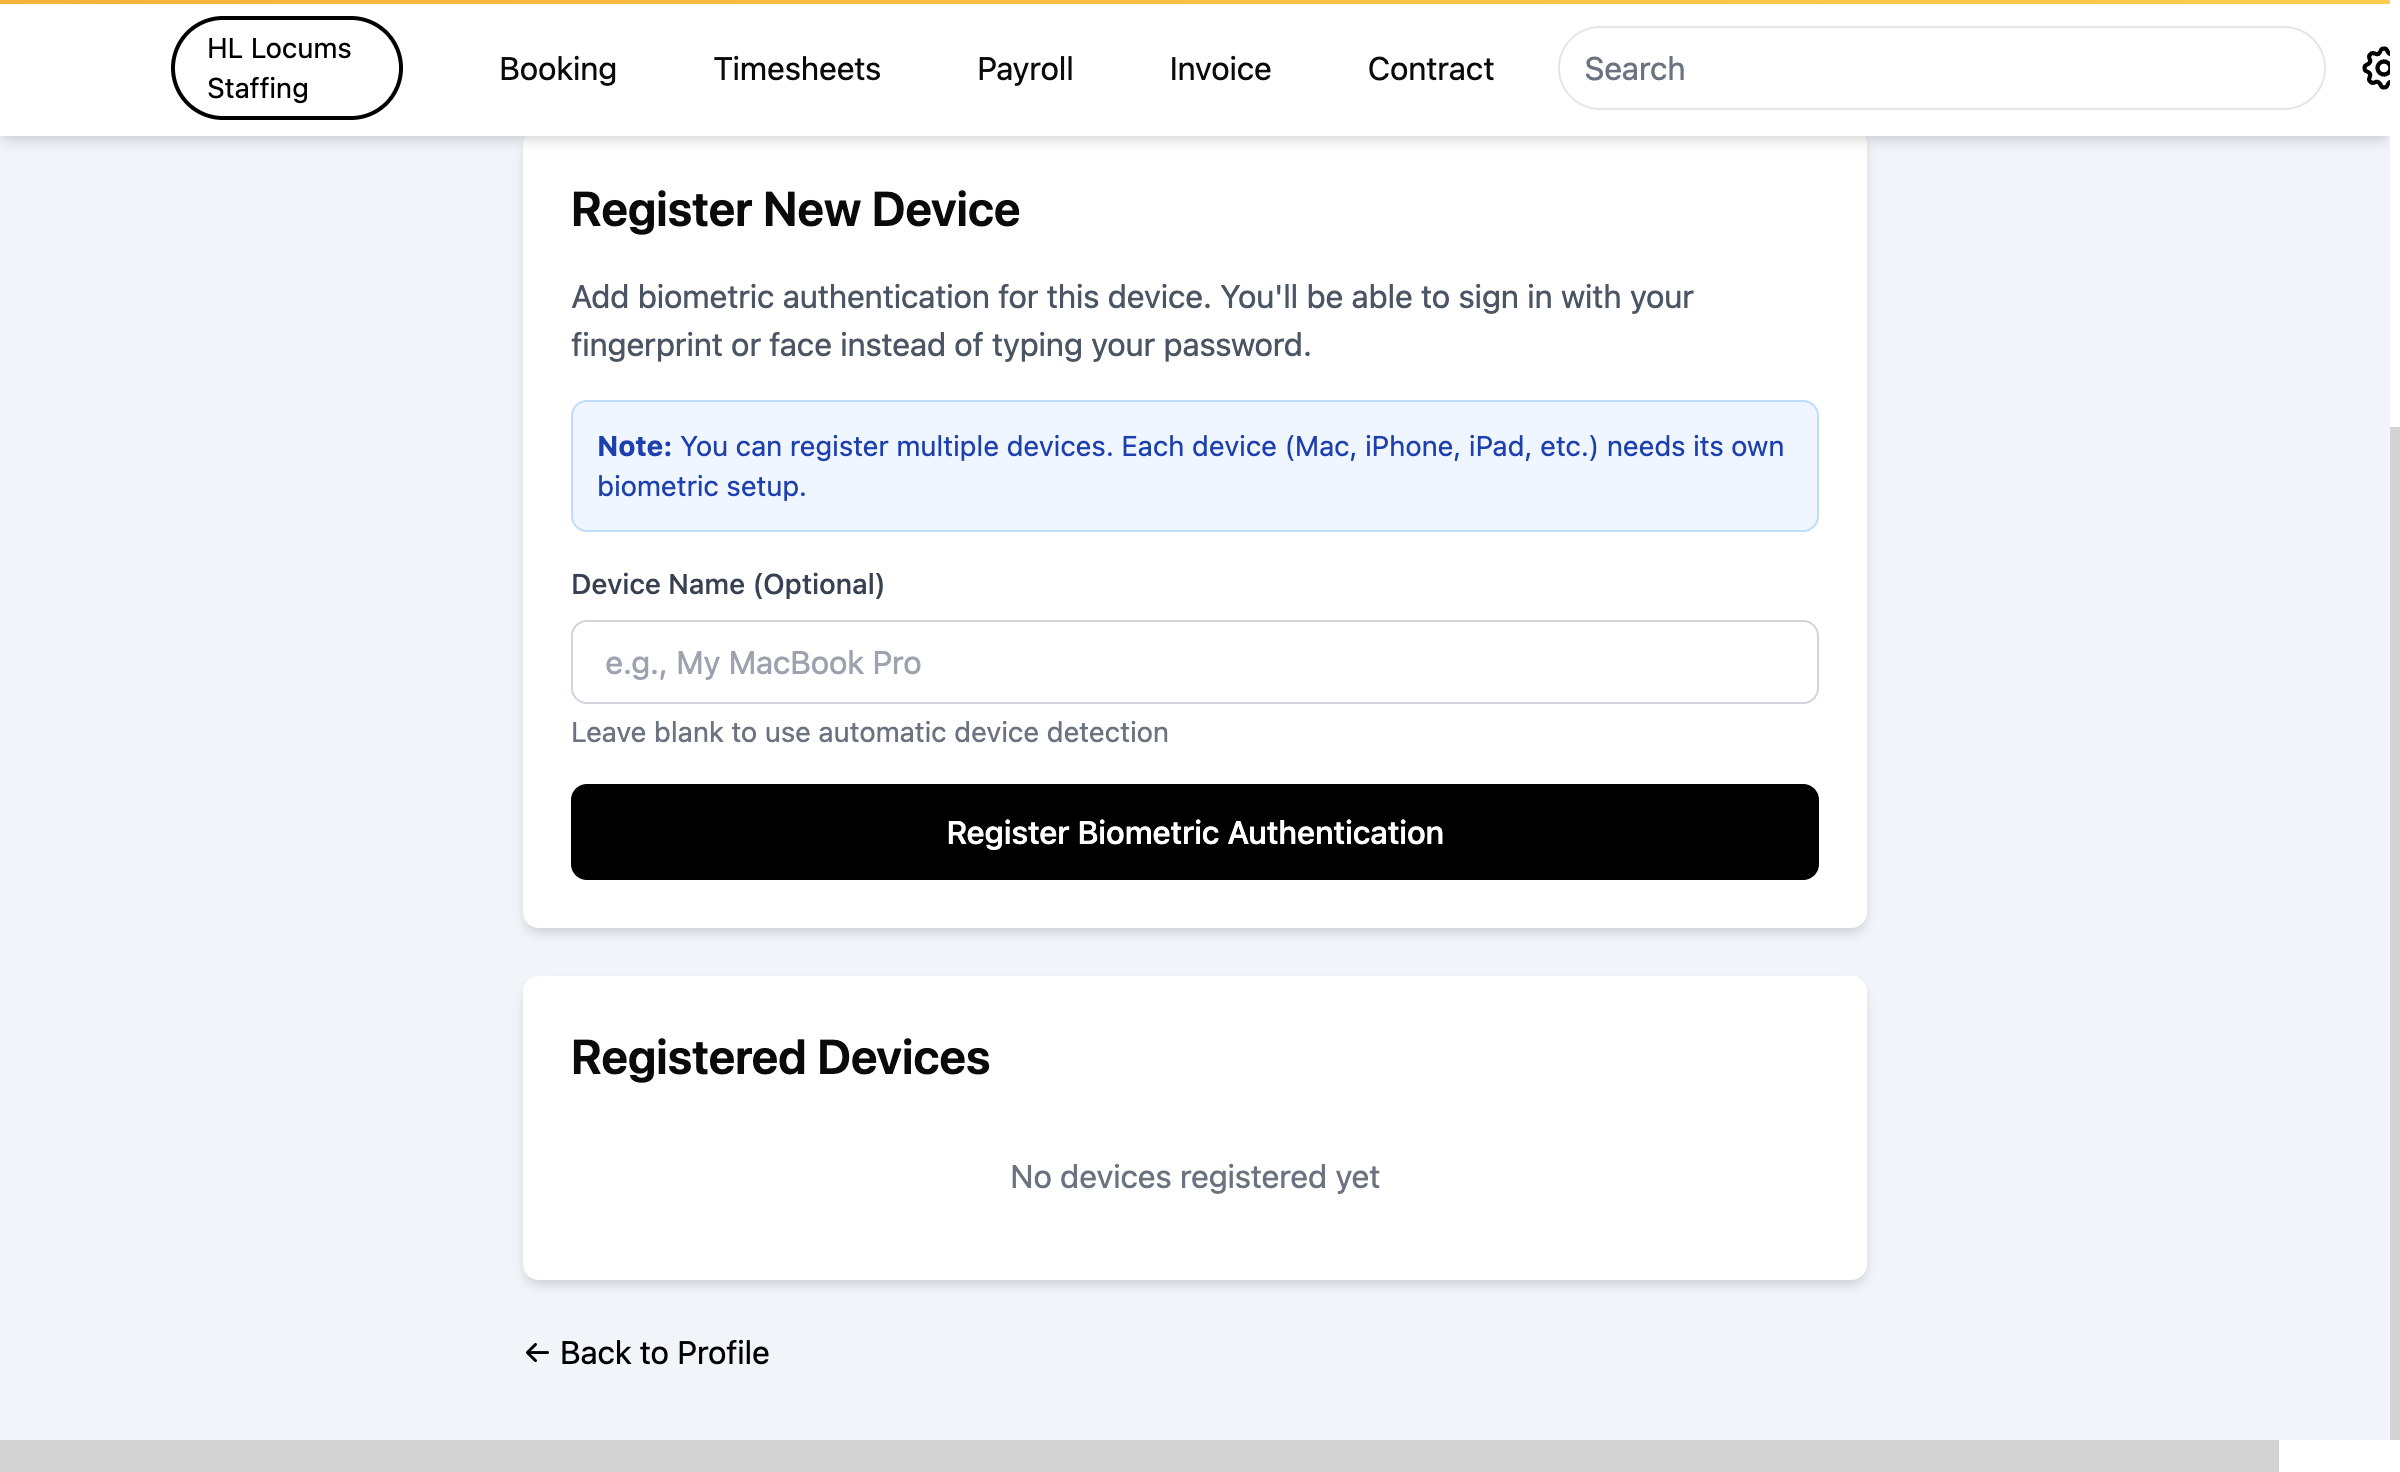
Your passkey now appears in the list with the date it was added. Next time you sign in, choose Biometric Login and confirm with your fingerprint or face.
To review devices that skip two-factor verification, open the Trusted Devices section. To stop trusting a device, remove it from the list, you'll then complete two-factor authentication again the next time you sign in from that device.
Screenshot: the Trusted Devices table with a device row and its remove action highlighted.
To remove a passkey you no longer use, click its remove action in the Passkeys list and confirm.
Tip: Register a passkey on each device you regularly use so you can sign in quickly and securely from any of them.
How to review your active sessions and login activity
Any userProfile → Security Settings
Go to Profile → Security Settings.
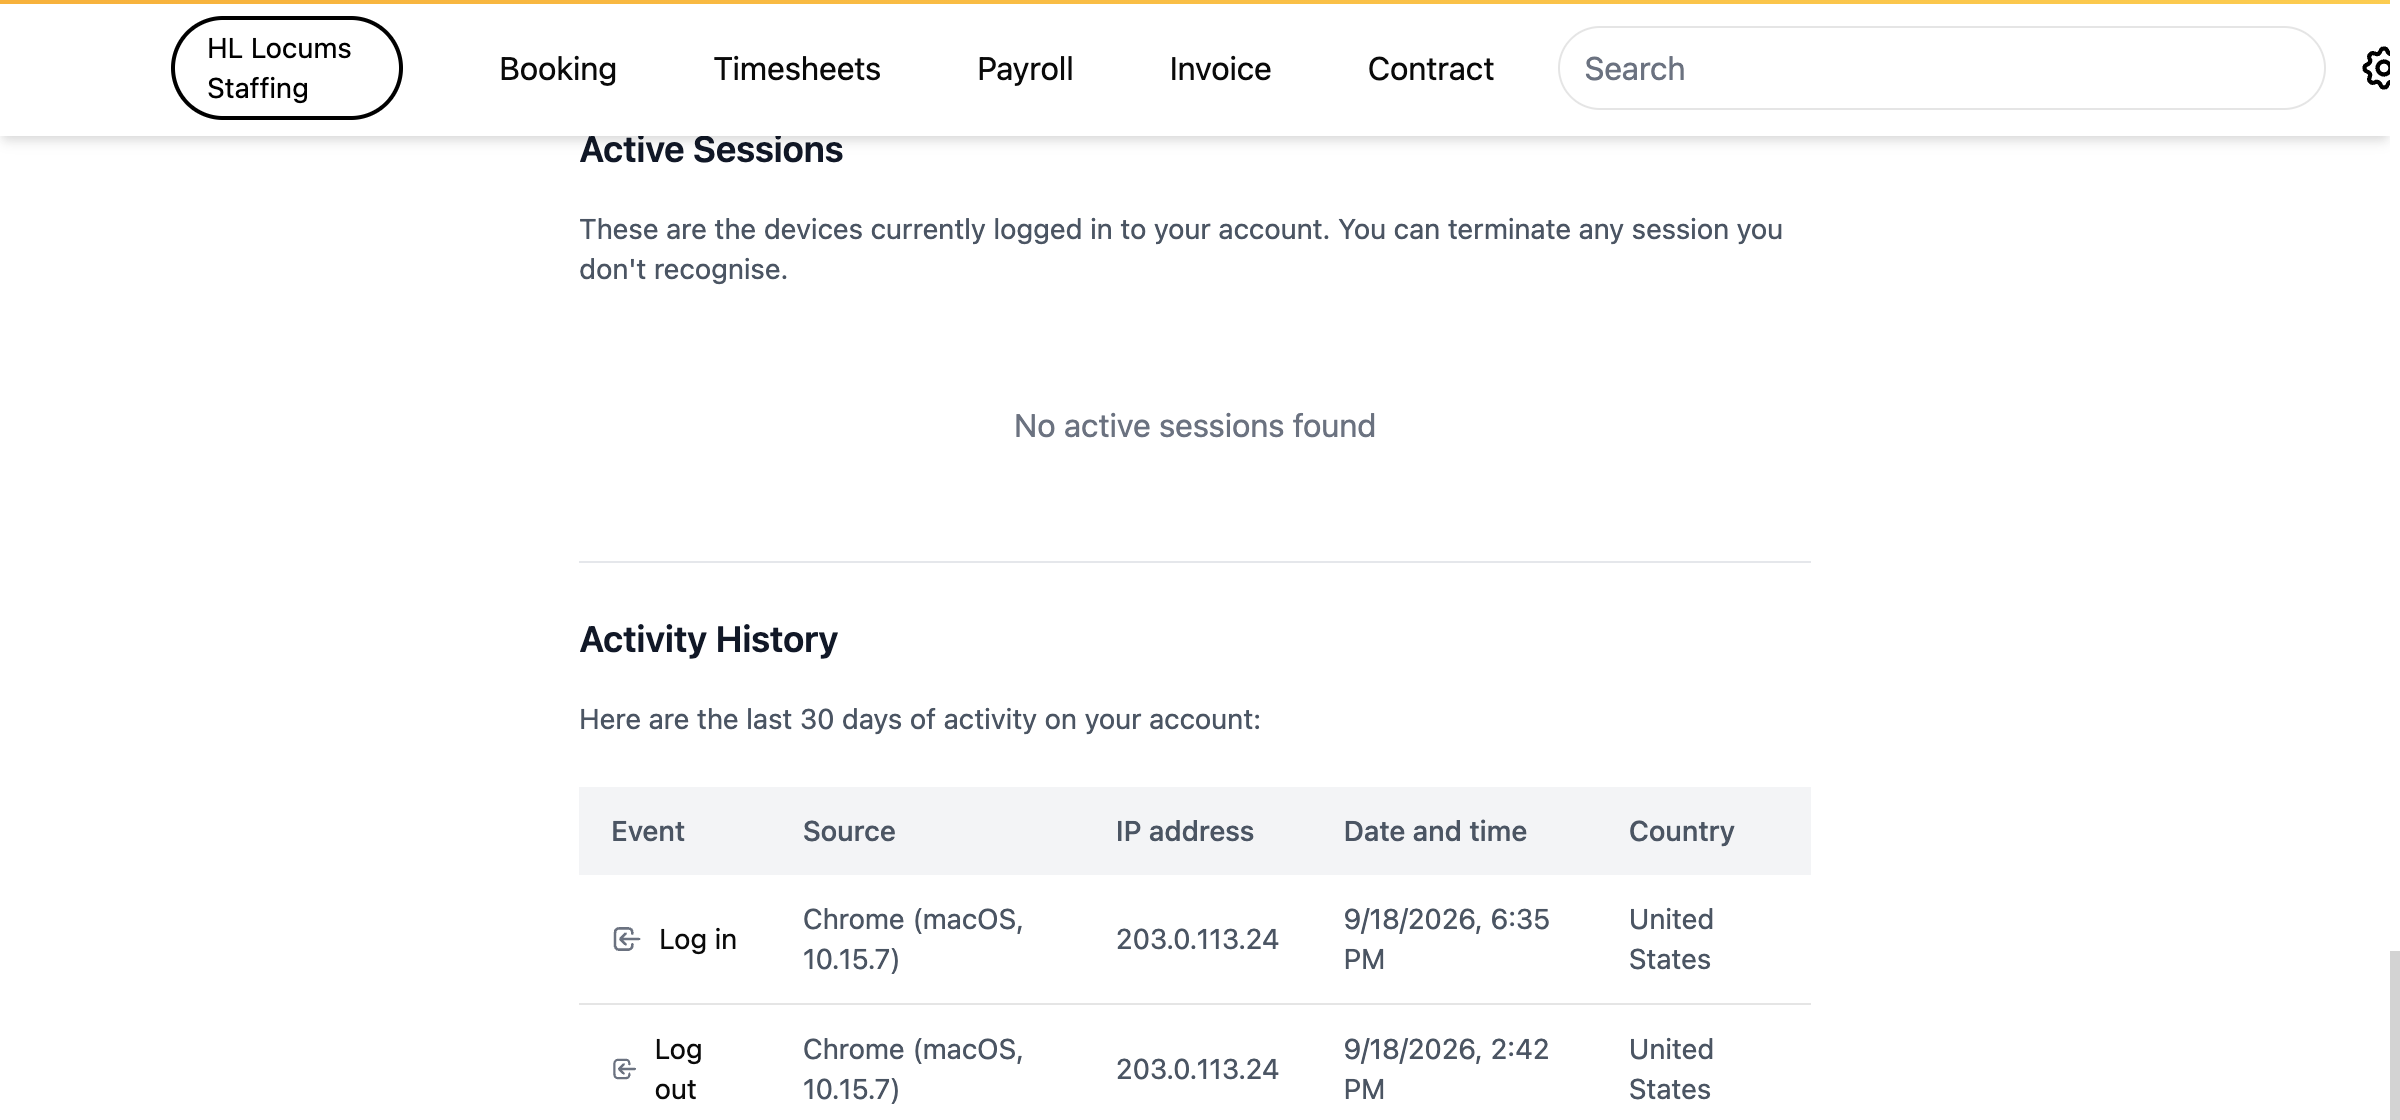
Open Active Sessions to see where you're currently signed in, along with details such as the IP address for each session.
Screenshot: the Active Sessions table listing current sessions with the end-session action highlighted on a row.
If you spot a session you don't recognize, end it from the list to sign that device out remotely.
Scroll to Activity History to review your recent sign-ins, including the date and IP address of each one.
Tip: Reviewing your sessions and history now and then is a quick way to confirm only your own devices are signed in.
How to edit your profile details
Any signed-in userProfile menu → Profile
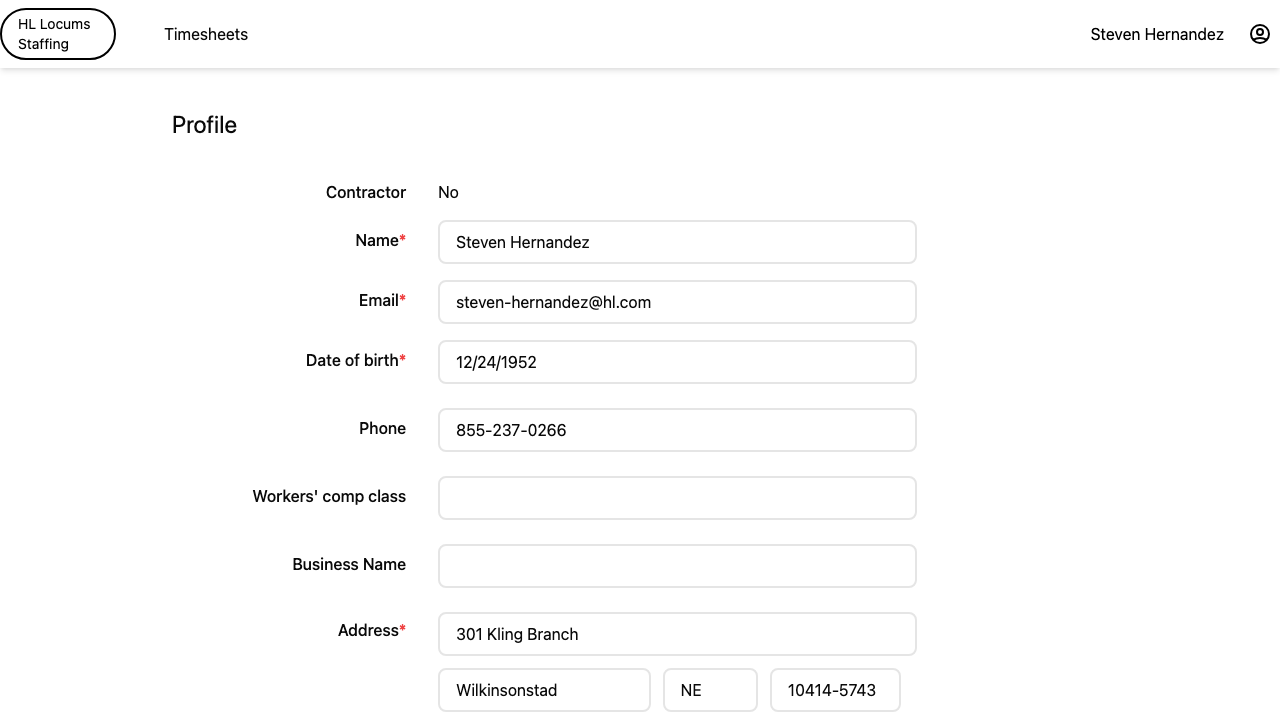
Open the profile menu (top right) and click Profile.
Update your details at the top of the page, for example your name, Email, Phone, and address.
Screenshot: the profile details form with the name, Email, and Phone fields and the Update button highlighted.
Click Update to save your changes.
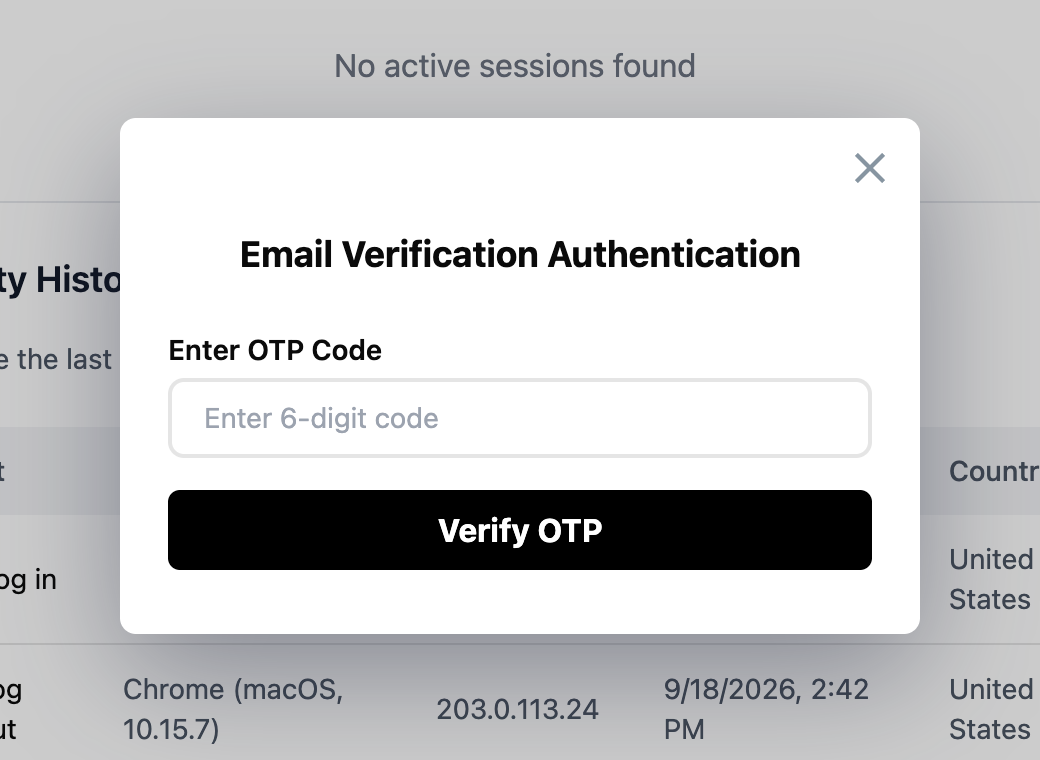
If you change your email address, a verification step appears. Enter the 6-digit code sent to the new address to confirm it's yours, then your update is saved.
Screenshot: the "Email Verification" dialog with the "Enter 6-digit code" field and confirm button highlighted.
Tip: Verifying a new email keeps your account secure and makes sure password resets and notifications reach the right inbox.
How to set your notification preferences
Any signed-in user (available options depend on your role and company)Profile menu → Profile → Notification Settings
Open the profile menu and click Profile.
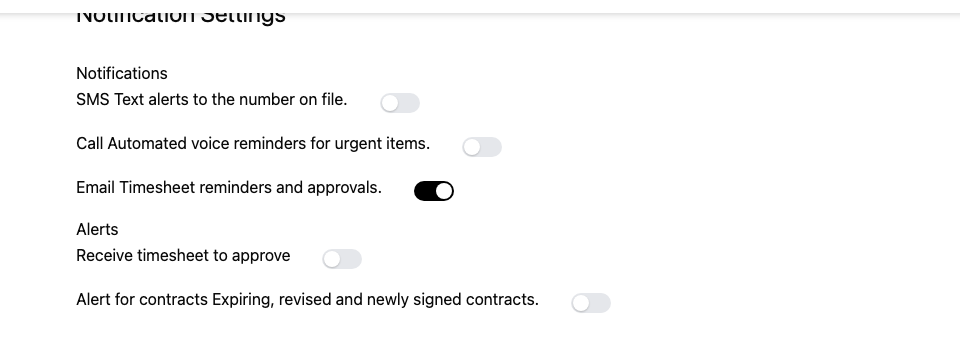
Find the Notification Settings section on the page.
Screenshot: the "Notification Settings" heading and the toggles beneath it highlighted.
Turn the available toggles on or off to choose which updates you'd like to receive.
Your choices save as you make them, so you can close the page when you're done.
Tip: If you'd like to receive text-message updates, watch for a consent prompt and accept it so those messages can reach your phone.
How to switch between roles and sign out
Sign out: any user · Switch roles: users with more than one roleProfile menu (top right)
Click your account in the top-right corner to open the profile menu.
Screenshot: the open profile menu with "Switch to…" options and "Sign out" highlighted.
If your account holds more than one role, click the matching option, for example Switch to Admin, Switch to Supervisor, or Switch to Temp, to move between roles without signing in again.
The app reloads into the role you chose, showing the features available to that role.
When you're finished, open the profile menu and click Sign out to end your session securely.
Tip: The "Switch to…" options only appear if your account is set up with more than one role. If you don't see them, your account has a single role.
Provider (Temp) Daily Tasks
Everything you do for yourself each week as a provider: logging the hours you work, adding expenses and receipts, recording leave, submitting your week for approval, and checking your pay and time-off history. Most of this happens on your weekly timesheet, the screen you land on when you sign in.
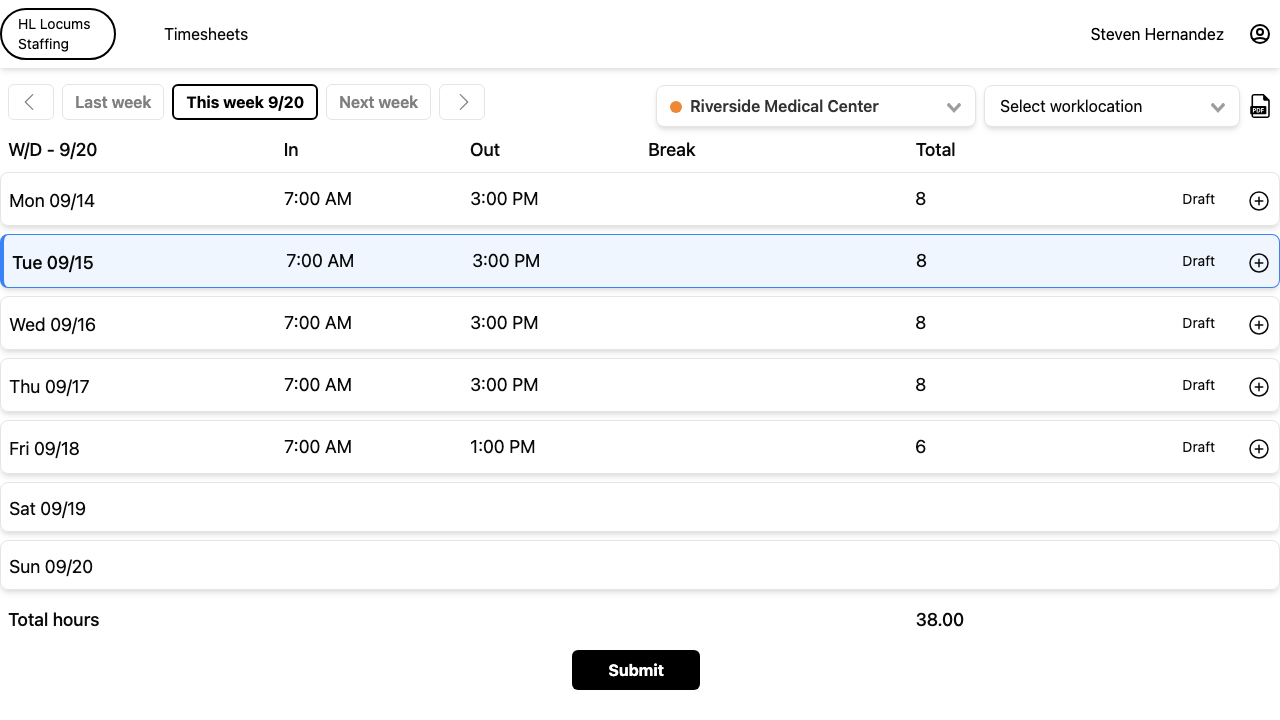
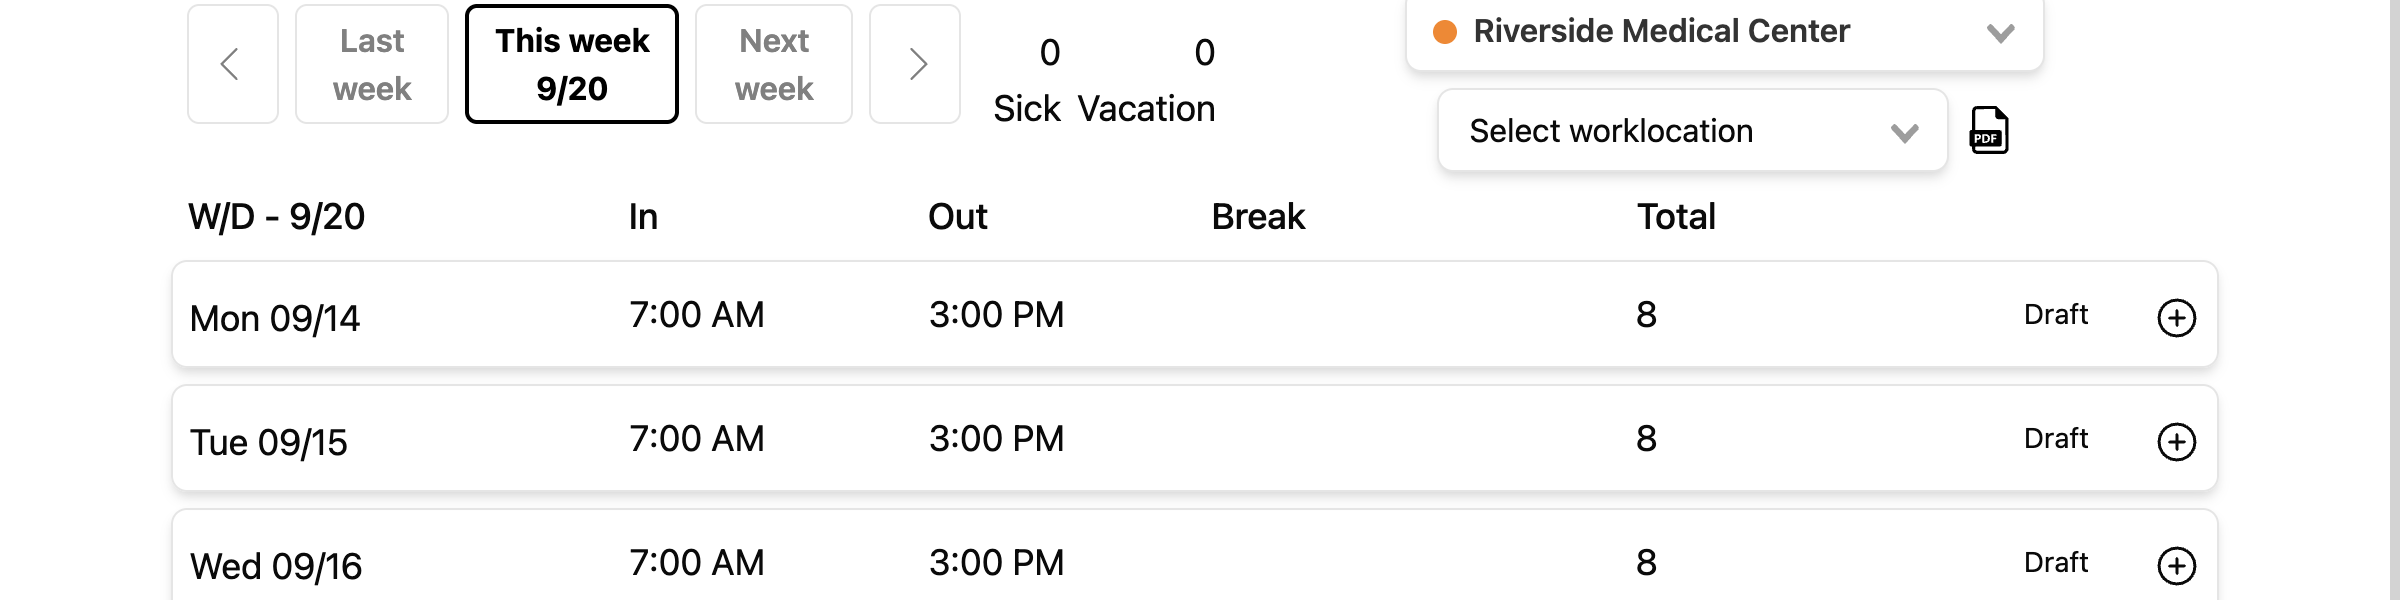
Sign in. You land on your weekly timesheet, with one row for each day of the week.
If you work at more than one place, use the location selector near the top to choose the client/location this week is for. Use the week selector to move to the correct week.
Screenshot: the top of the weekly timesheet with the week selector and the location dropdown highlighted.
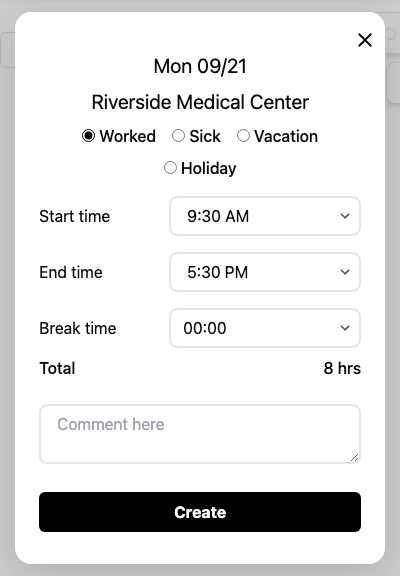
Click the day you worked to open the day entry window.
Leave the entry type set to Worked (the default). Depending on your company, you may first choose your facility and pay rate from the dropdowns at the top of the window.
Set your start time (in) and end time (out), and enter any unpaid break time. The window adds up your total hours as you go.
Screenshot: the day entry window with the in-time, out-time and break fields highlighted, and the running total hours shown below.
Optionally type a note in the comment box for that day.
Click Create. The day now shows your hours on the timesheet as a draft you can still change.
Tip: If your times overlap another entry, or you go over a daily hours limit your company has set, the system tells you and won't save until it's fixed. Some companies also let you add more than one entry (shift) on the same day.
How to add expenses and receipts to your timesheet
Provider (Temp)Timesheet app → Workdays → Expenses and Other Earnings
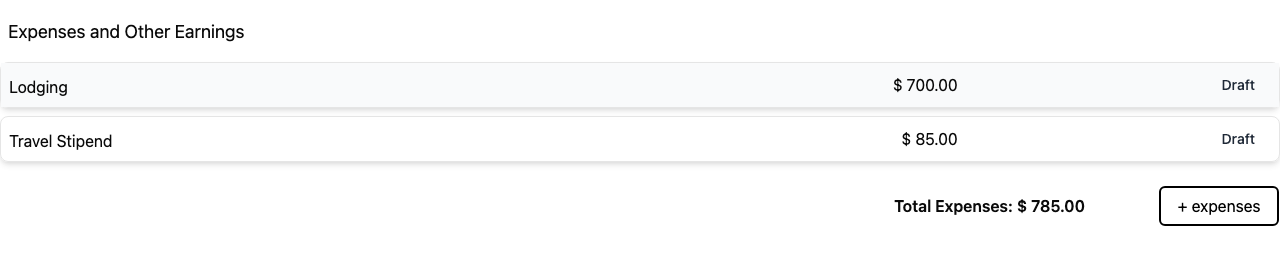
Open the week you want to add an expense to. Below your daily hours you'll find the Expenses and Other Earnings panel.
Click + expenses to open the expense window.
Screenshot: the Expenses and Other Earnings panel with the "+ expenses" button highlighted.
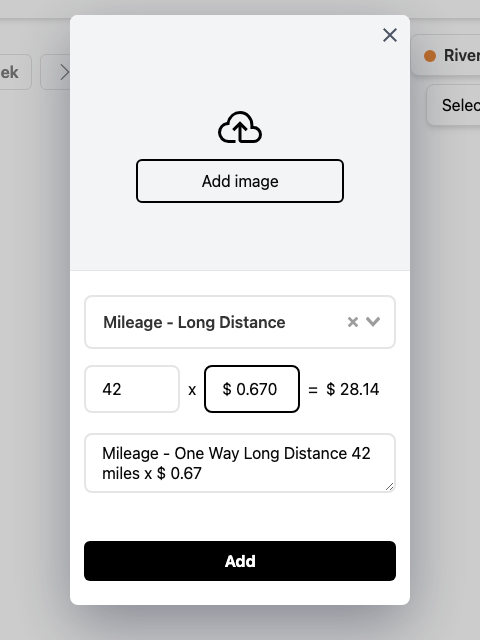
Choose an Expense type from the list (for example mileage, meals, or lodging, the choices depend on your company). The note field fills in with the type name, which you can edit.
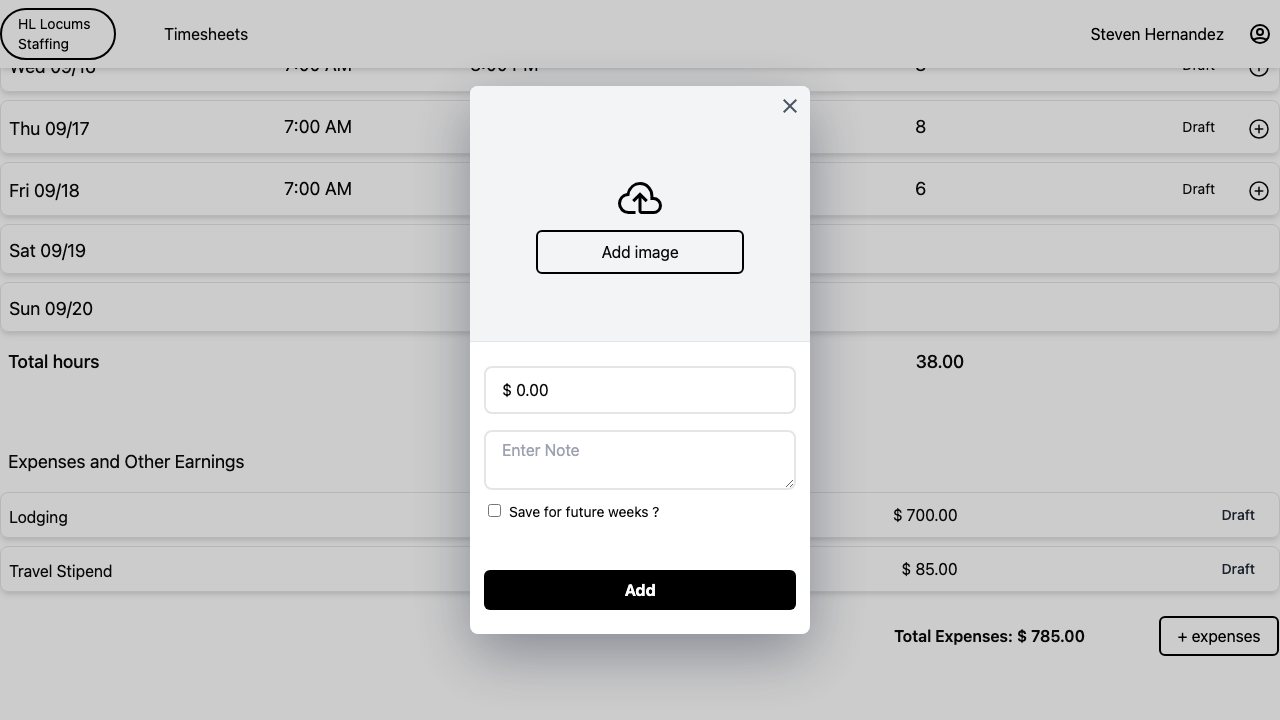
Enter the amount. Type the dollar amount in the amount box.
For mileage: if you pick a mileage type, you instead enter the number of Miles and the rate per mile; the total dollar amount is calculated for you.
Screenshot: the expense window in mileage mode showing the Miles field, the rate field, and the auto-calculated total.
Attach a receipt. Click Add image at the top of the window and select a photo of your receipt (JPG, PNG or GIF, up to 16 MB). A preview appears; you can rotate it or remove it and try again. Some expense types instead accept a PDF attachment.
Screenshot: the expense window with the "Add image" drop area highlighted and a receipt preview shown above the amount field.
Optionally tick Save for future weeks? to have this expense repeat automatically on upcoming weeks.
Click Add. The expense appears in the Expenses and Other Earnings list with its amount and a draft marker.
Tip: Wait for the receipt preview to finish loading before you click Add, if it's still uploading you'll be asked to wait a moment. To change an expense later, click it in the list to reopen it; use Update to save changes or Remove to delete it. Adding an expense after you've already submitted the week means you'll need to resubmit.
How to edit or delete a draft workday
Provider (Temp)Timesheet app → Workdays
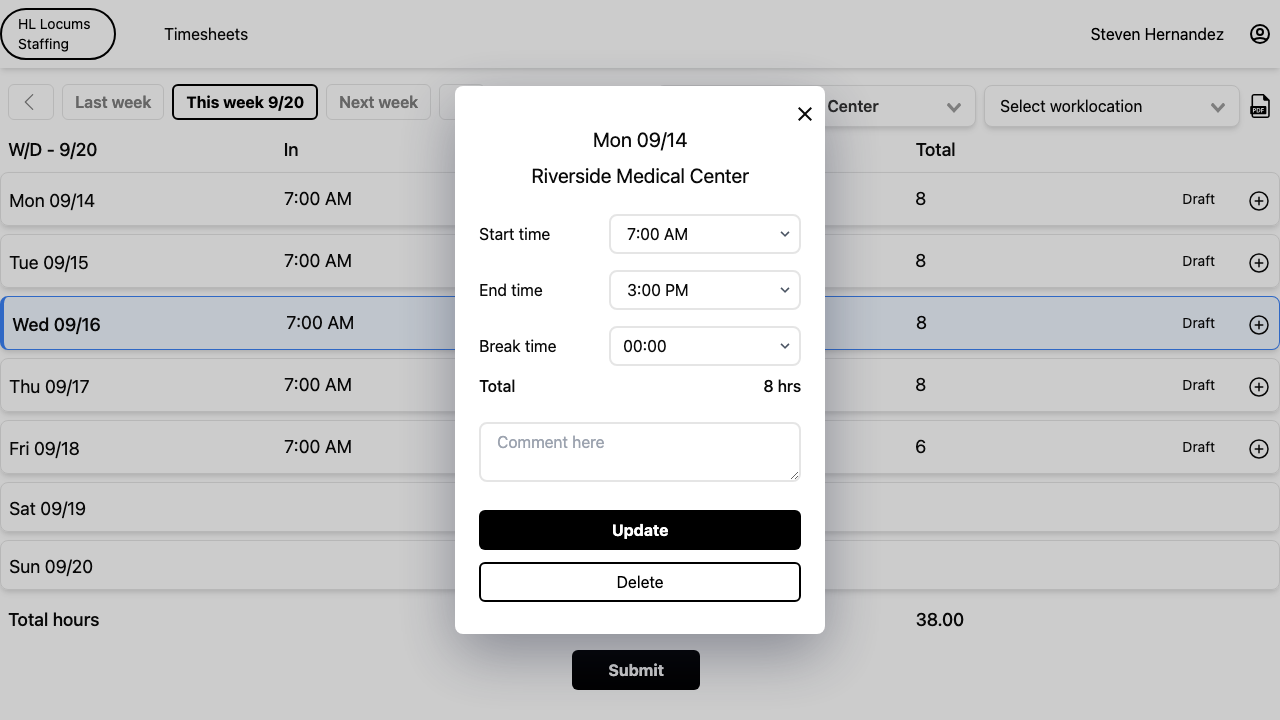
On your weekly timesheet, click the day you want to change.
Update any field, entry type, in/out times, breaks, or the comment, then save your changes.
To remove the entry entirely, use the delete/remove option on that day and confirm.
Screenshot: an opened day entry showing the editable time fields and the delete/remove control.
The day updates on your timesheet right away.
Tip: You can freely edit your own entries while they're still a draft. If you edit a day on a week you've already submitted, you'll be reminded to resubmit the timesheet so your approver sees the change.
How to log Holiday, Sick, PTO or Vacation time
Provider (Temp)Timesheet app → Workdays
Click the day you want to record time off for.
At the top of the day window, choose the entry type that applies, Sick, PTO, Vacation, or Holiday. Which types appear depends on your company and your assignment.
Screenshot: the day entry window with the entry-type buttons (Worked / Sick / PTO / Vacation / Holiday) highlighted.
Enter the hours as prompted and add a comment if you like.
For a holiday, some companies ask whether you Worked the holiday or did Not Work it, pick the one that matches so you're paid correctly.
Click Create. The day now shows your leave on the timesheet.
Tip: If you request more hours than your available balance, the system stops you before saving. You can check your accrued, used and available balances any time, see "View your PTO and accrual history."
How to add a comment on a workday
Provider (Temp)Timesheet app → Workdays
On your weekly timesheet, find the day you want to add a note to.
Click the comment icon on that day to open its comment thread.
Type your message and post it.
Your comment is saved on that day and is visible to you and to the approver reviewing the week.
Tip: The week's activity feed lists every submit, approve, reject and comment in order, so you and your approver can follow the full history of the timesheet.
How to submit a week's timesheet for approval
Provider (Temp)Timesheet app → Workdays
Make sure every day you worked (plus any leave and expenses) is entered for the week and the totals look right.
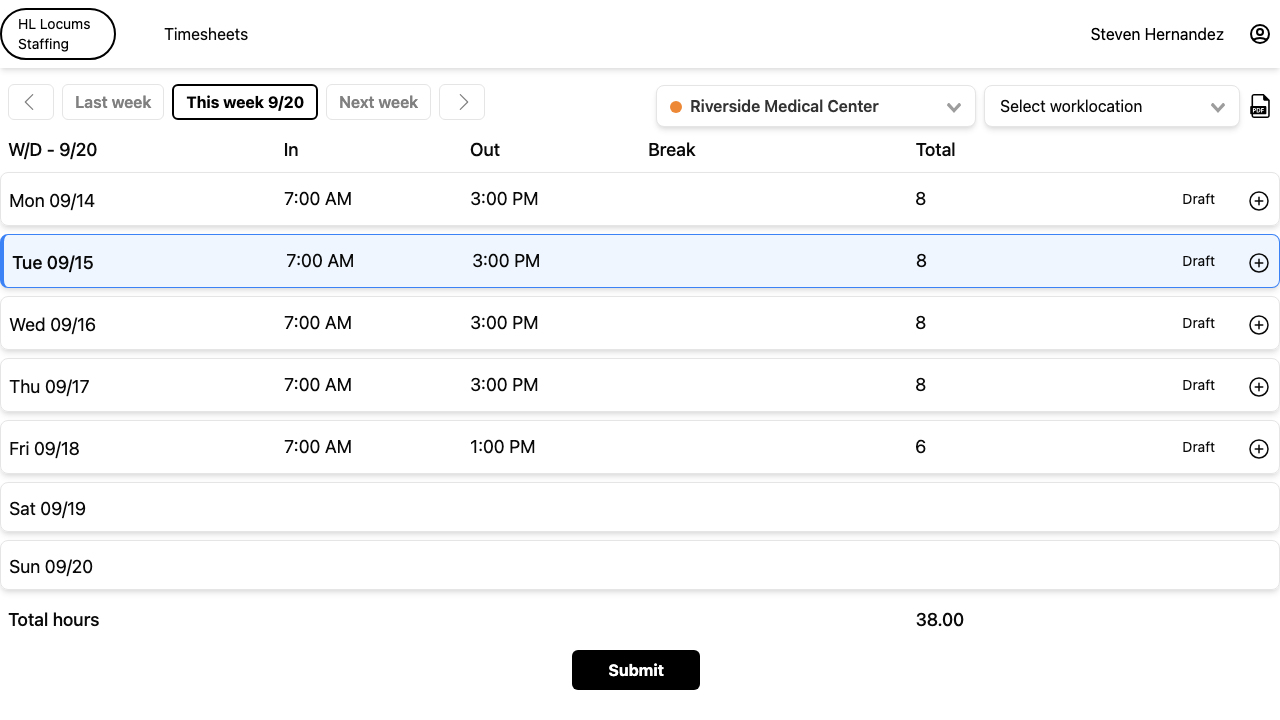
Click Submit at the bottom of the timesheet.
Screenshot: the bottom of the weekly timesheet with the "Submit" button highlighted.
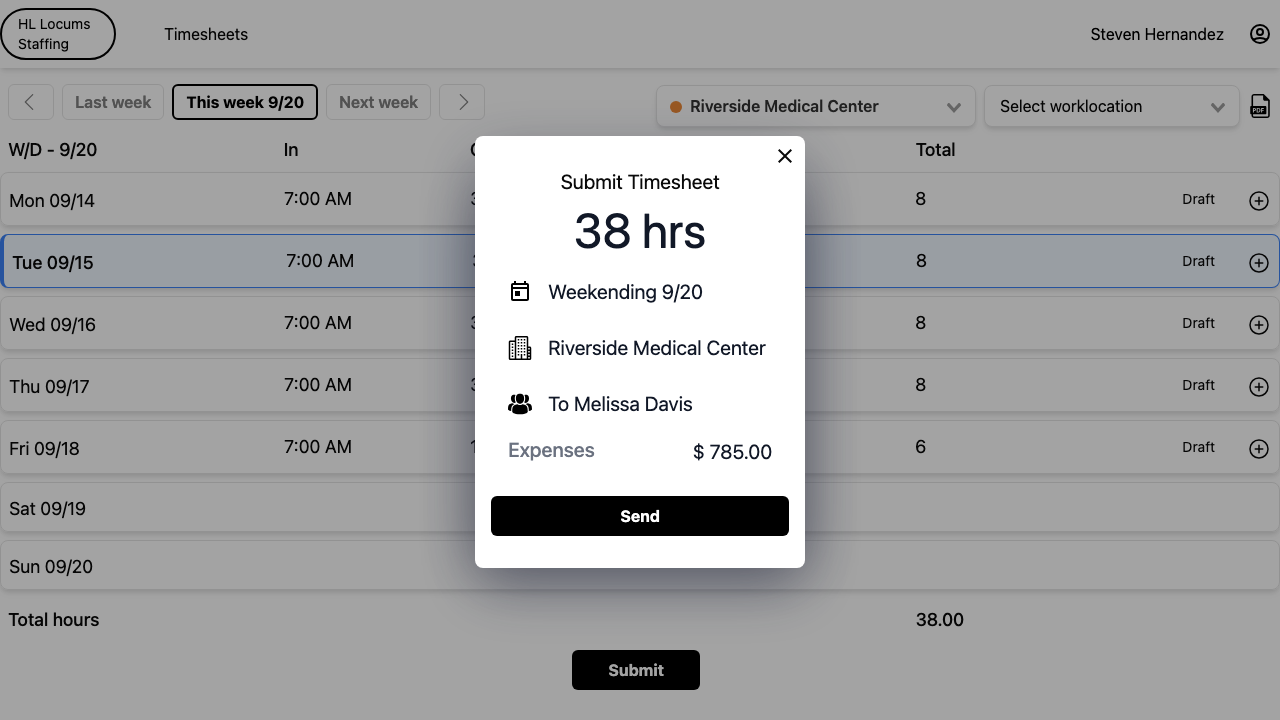
In the window that opens, tick the supervisor(s) who should review and approve your week. One may already be selected for you.
Screenshot: the submit window listing supervisors as checkboxes, with the Submit button below.
If you're submitting for a week in the past or the future, tick the confirmation box that appears so the system knows it's intentional.
Click Submit. You'll see a confirmation with your total hours and who it was sent to.
Tip: If you later edit the week, the button changes to Resubmit, use it to send the updated week again. If you don't see any supervisor to choose, contact your agency so one can be added.
How to report that you did not work a week ("Did Not Work")
Provider (Temp)Reminder email → Did Not Work page
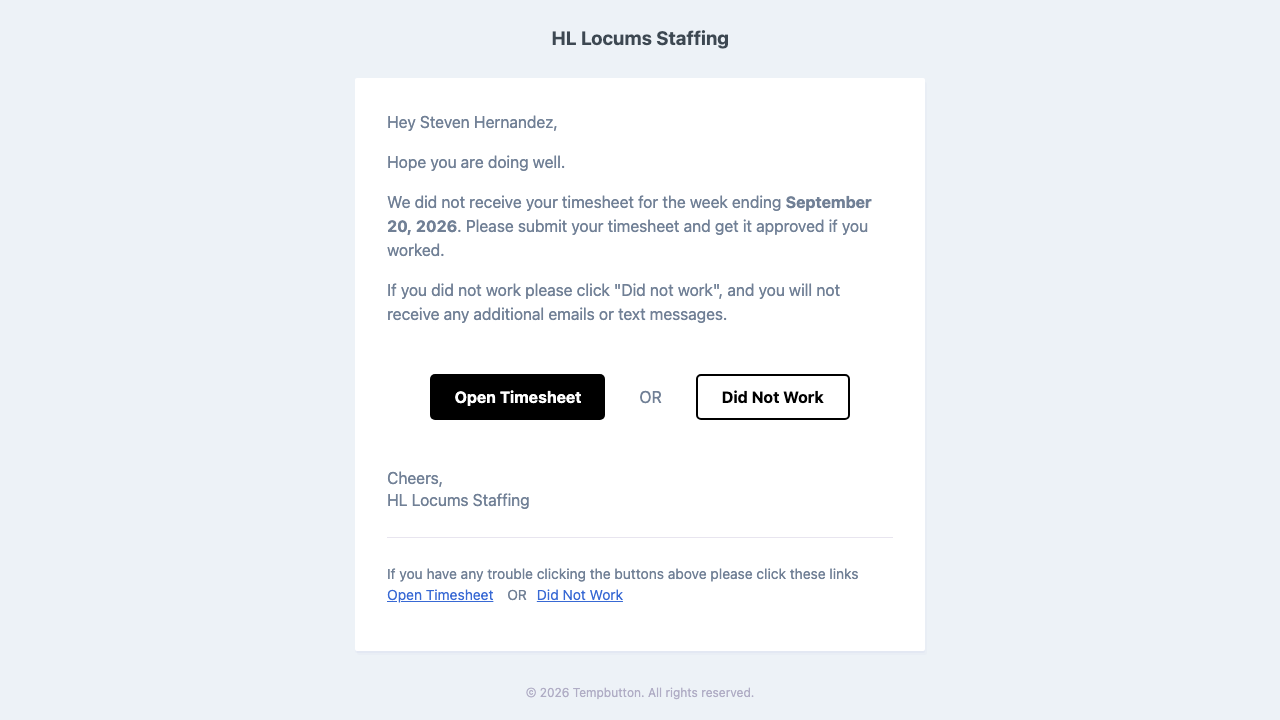
When a week's timesheet is still empty, you may get a reminder email (or text) asking you to submit it.
If you didn't work that week, click the Did Not Work button in that reminder, no sign-in needed.
Screenshot: the reminder email with the "Did Not Work" button highlighted.
On the page that opens, confirm with Confirm, I did not work.
You'll see an "All Set!" confirmation, and you'll stop getting reminders and calls about that week.
Tip: These reminder links expire after a while. If yours has expired, just sign in, you can mark the week not worked (or submit it) from your timesheet instead.
How to view "My Earnings" and download your pay documents
Provider (Temp)Timesheet app → profile menu → My Earnings; and Workdays
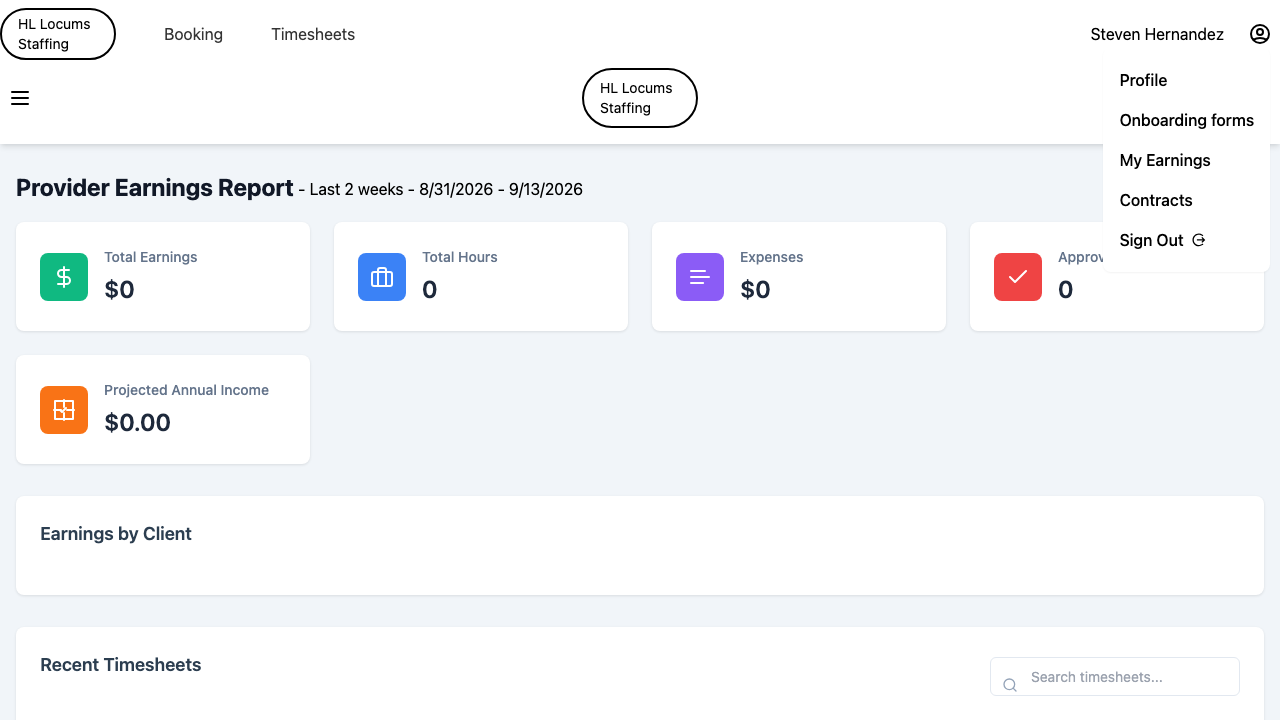
Open the profile menu at the top-right of the screen and choose My Earnings.
Screenshot: the top-right profile menu open, with "My Earnings" highlighted.
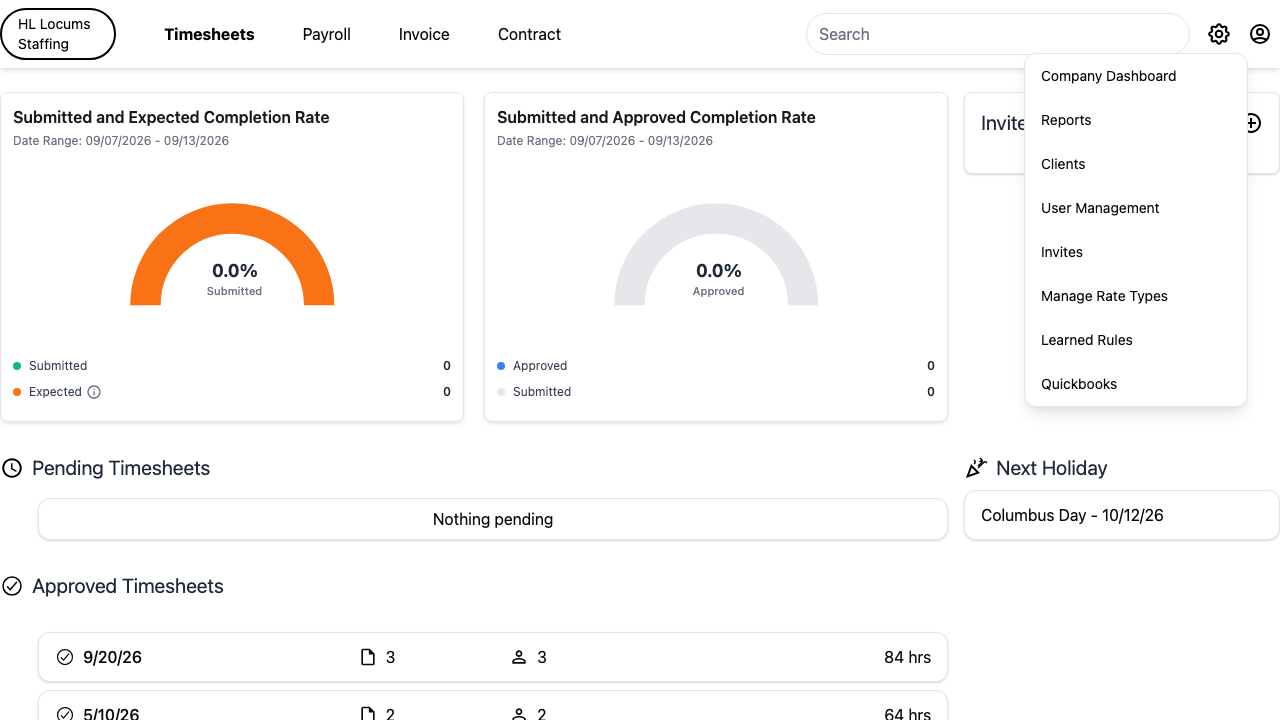
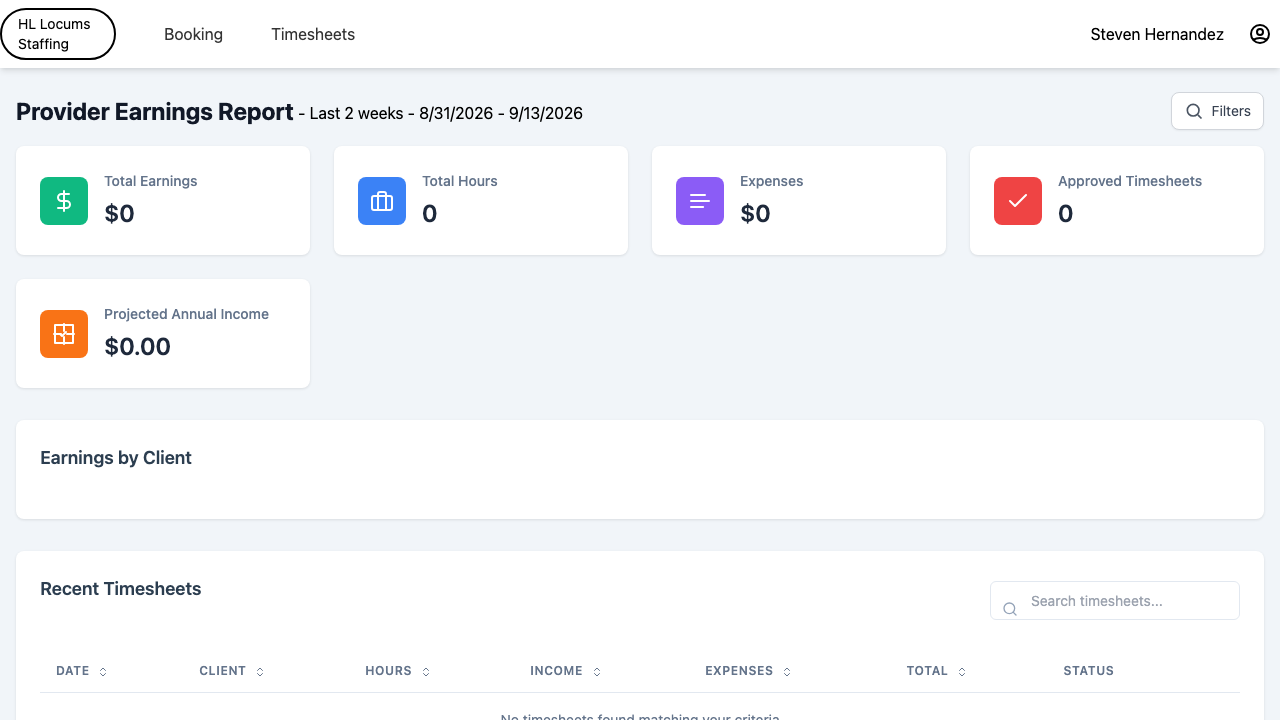
Pick a date range (it defaults to the last 6 weeks) and click Run Report. You'll see cards for Total Earnings, Total Hours, Expenses and Approved Timesheets, along with charts and a table of recent weeks.
Screenshot: the My Earnings page showing the summary cards and the recent-timesheets table.
To download everything at once, use the bulk buttons above the table: Timesheets, Invoices, and Expenses. You can also export the table to a spreadsheet.
To grab a single week's documents, open that week on your timesheet and use the PDF icons in the header to open your Timesheet PDF or provider-bill / invoice PDF.
Screenshot: the weekly timesheet header with the Timesheet PDF and provider-bill/invoice PDF icons highlighted.
Once a week is approved and paid, a View Paystub button appears on that timesheet, click it to open your paystub.
Tip: Paystubs are available after a timesheet has been approved and marked paid; before that, you can still download the timesheet and provider-bill PDFs.
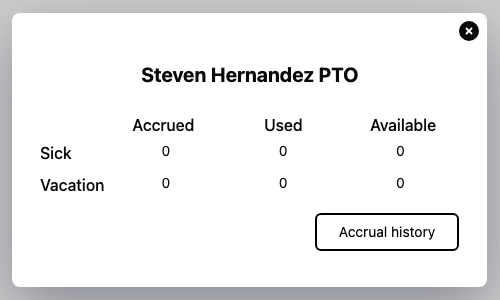
On your weekly timesheet, click your leave balance shown near your name (for example your Sick or PTO/Vacation hours).
Screenshot: the timesheet header with the Sick / PTO balance figure highlighted.
The balance popup opens, showing your Accrued, Used and Available hours, plus a list of the days you've used sick or PTO/vacation time.
Click Accrual history to open your full history report.
Screenshot: the leave-balance popup with the "Accrual history" button highlighted.
On the report you can search the entries and export them to a spreadsheet.
Tip: Balances update as your timesheets are approved, so checking here before requesting leave tells you exactly how many hours you have left.
How to refer a friend
Provider (Temp)Timesheet app → profile menu → My Referrals
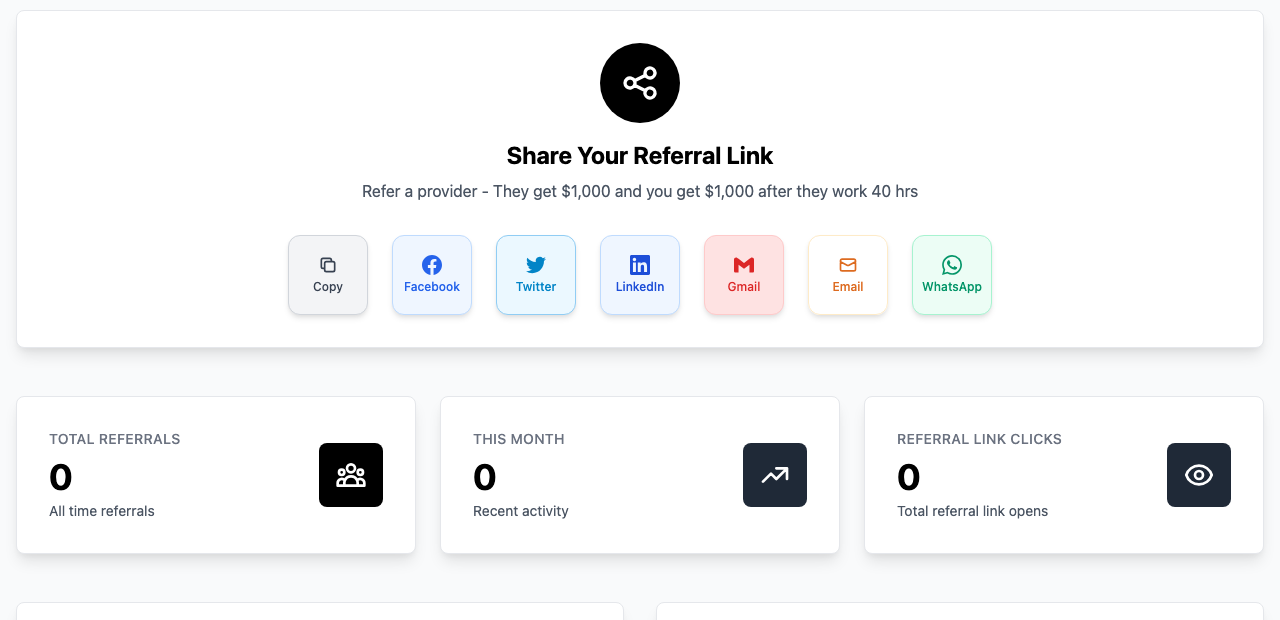
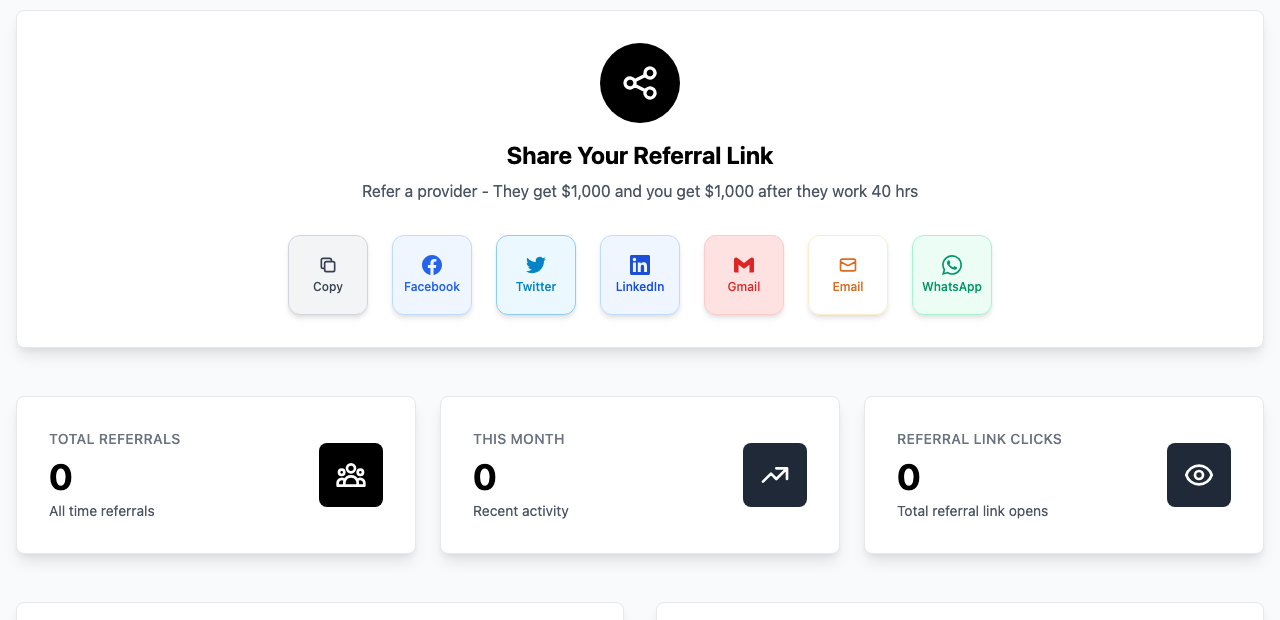
Open the profile menu at the top-right and choose My Referrals (some companies also show a Refer a Friend button on your timesheet).
On the Share Your Referral Link page, click Copy to copy your personal link, or pick a sharing option, Facebook, Twitter, LinkedIn, Email, or WhatsApp.
Screenshot: the Share Your Referral Link section with the Copy button and the social share buttons highlighted.
Send the link to your friend. When they sign up and start working through your link, it's tracked to you.
Tip: Depending on your company, you and the person you refer may both earn a referral bonus once they've worked a set number of hours. You can track people who joined through your link on the same page.
Reviewing & approving timesheets
This is the day-to-day approval loop for people who review other people's hours, client supervisors, agents, and admins. It covers finding the weeks waiting on you, approving or sending a day back with a reason, leaving comments, approving on a client's behalf, downloading PDFs, marking a timesheet paid, and reading the assisted-review warnings that appear before you approve.
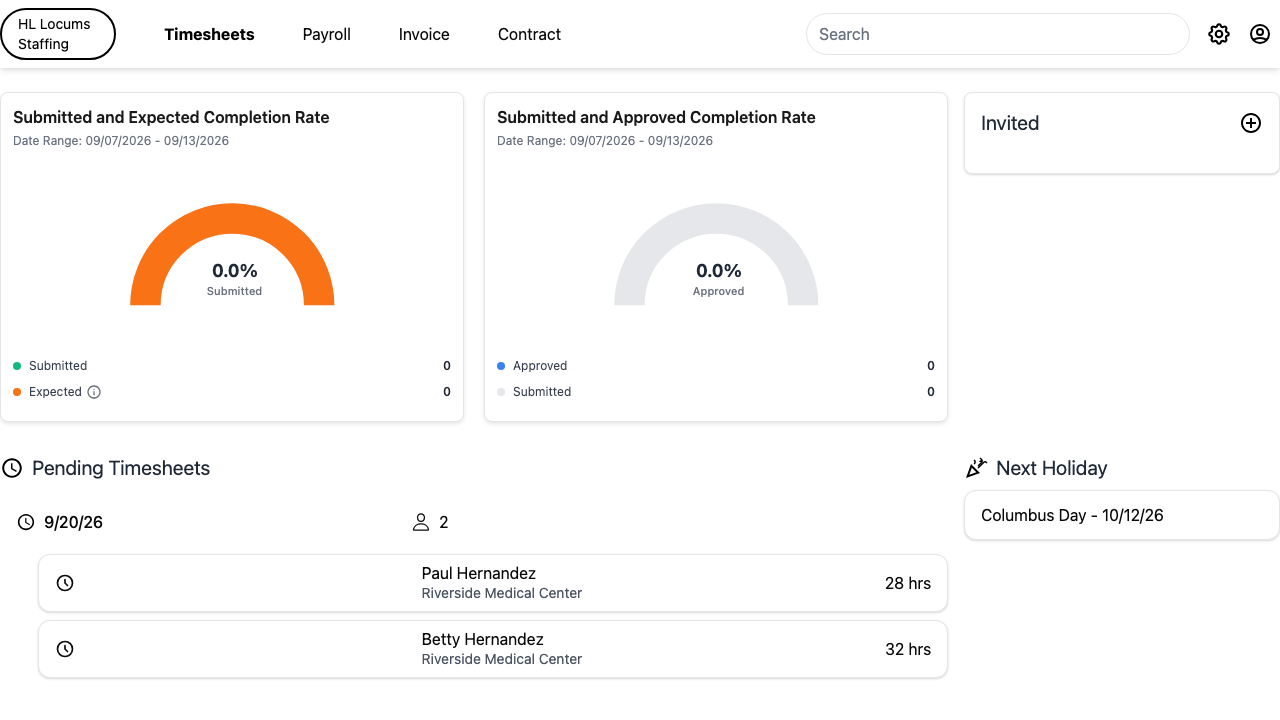
Sign in. The dashboard opens automatically as your landing page.
Use the client filter at the top to look at one client or all of your clients at once. You can switch the grouping between Client and Person.
Screenshot: the dashboard header with the client/all-clients filter and the Client / Person toggle highlighted.
Read the status groups. Timesheets are sorted into Not Submitted, Pending Timesheets, Submitted Timesheets, and Approved Timesheets, the ones needing your attention are under Submitted / Pending.
Screenshot: the dashboard showing the Submitted Timesheets and Pending Timesheets sections with their counts highlighted.
Use Hide Future / See Future to include or exclude upcoming weeks so you focus on what is due now.
Click any row to open that week's timesheet and start reviewing. If nothing matches, you'll see "No timesheets match the selected filter."
Tip: the same dashboard also shows submission and approval completion rates and an upcoming-holiday panel, so you can see at a glance how many people still owe you a submission.
How to approve a submitted timesheet
Supervisor (their assigned clients), Agent, AdminTimesheet app → Dashboard → open a submitted timesheet
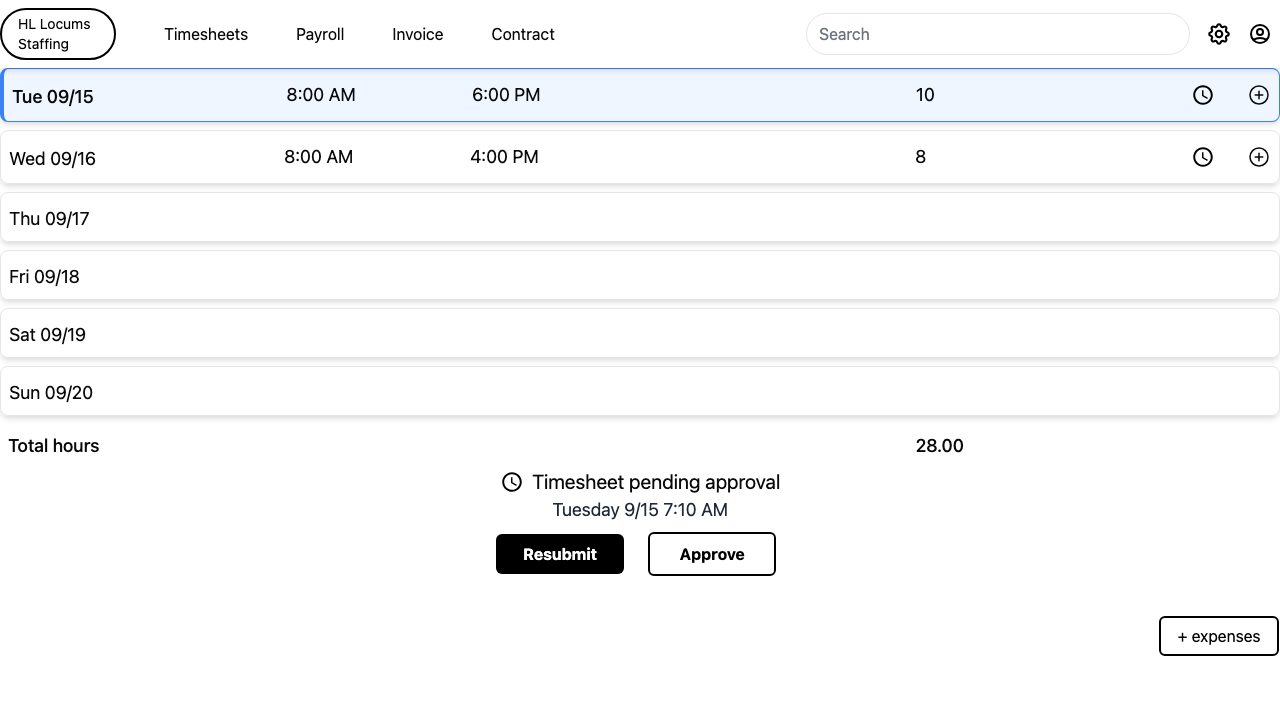
From the dashboard, open a timesheet listed under Submitted or Pending. It opens on the full week with a day-by-day breakdown and the header showing Timesheet pending approval.
Review the hours, pay, and any expenses for each day. Check the assisted-review panel above the week for any warnings (see the last how-to in this section).
Screenshot: an open weekly timesheet with the day rows and the Approve button highlighted at the bottom.
When everything looks right, click Approve. A week is fully approved once every day on it is approved. If your company uses client terms, you'll be asked to accept them first.
A confirmation appears showing Approved with the total hours, expenses, and the note that a PDF copy has been emailed to you. Click Close. The header then shows the timesheet was approved and who approved it.
Tip: if the Approve button is greyed out, there are unresolved warnings or the assisted review is still running, you'll see a short note telling you to resolve or dismiss the warnings first.
How to reject or send a day back with a reason
Supervisor, Agent, AdminTimesheet app → open timesheet → a single day
Open the timesheet and click into the specific day you want to send back.
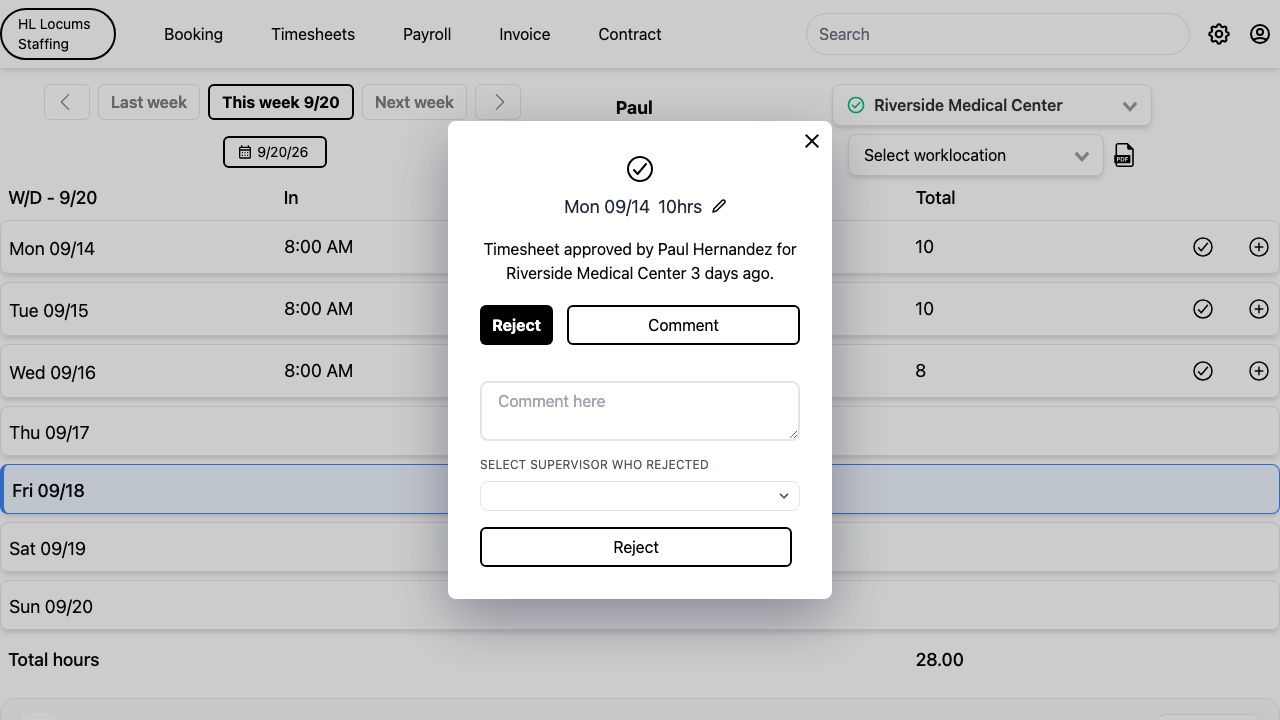
Click Reject. A comment box opens so you can explain what needs fixing.
Screenshot: the day's approval dialog with the Reject button clicked and the comment text area highlighted.
Type your reason, then click Reject again to confirm.
The provider is notified automatically and sees "Please edit and resubmit" on that day, so they know to correct it and resubmit.
Tip: you reject one day at a time, not the whole week, this lets a provider fix just the problem day rather than resubmitting everything.
How to approve a timesheet on a client's behalf
Admin, AgentTimesheet app → open a submitted timesheet
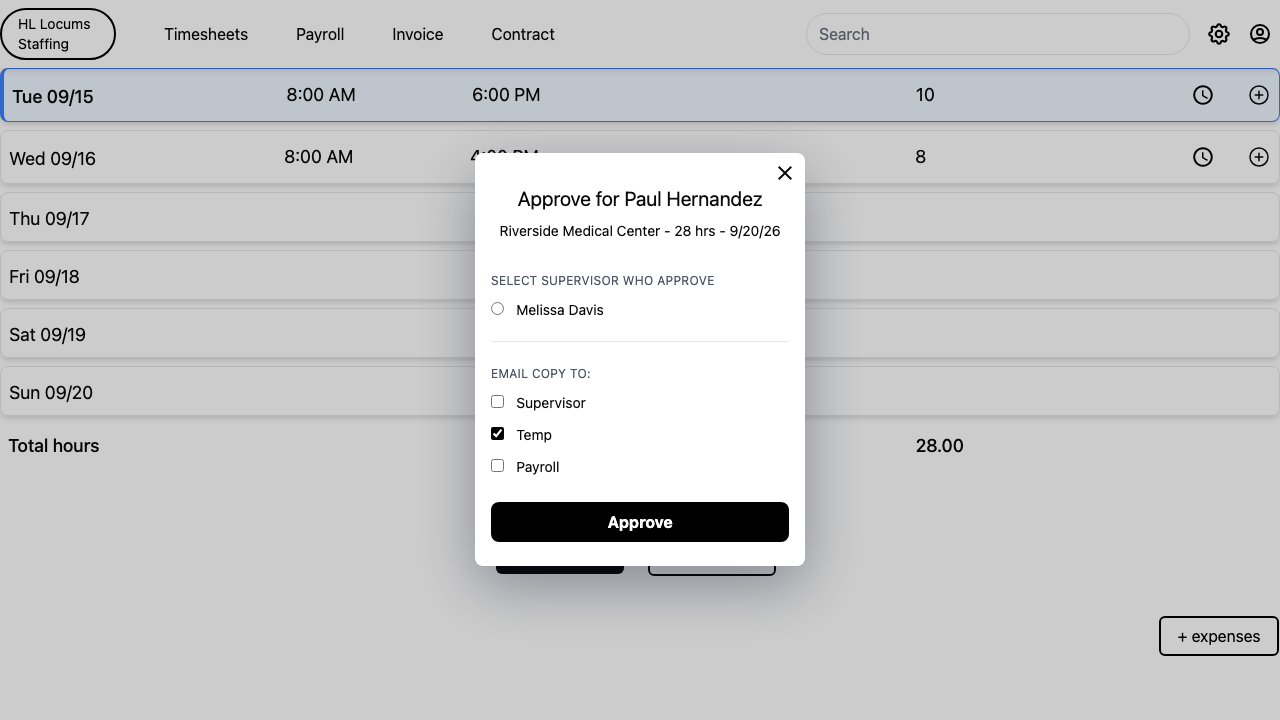
Open the submitted timesheet you're approving for the client. A dialog titled Approve for [provider name] shows the client, total hours, and dates.
Under Select supervisor who approve, choose which supervisor should be credited as the approver.
Screenshot: the "Approve for" dialog with the supervisor radio list and the "Email copy to" checkboxes highlighted.
Under Email copy to:, tick who should receive an email copy, Supervisor, Provider, and/or Payroll.
Click Approve. The timesheet is approved and shows the chosen supervisor as the approver.
Tip: depending on your company's settings, you may see a combined Approve & Mark Paid button that approves and marks the week paid in one step.
How to add or read comments on a day during review
Supervisor, Agent, Admin (providers can read them too)Timesheet app → open timesheet → a single day
Open the timesheet and click into the day you want to comment on.
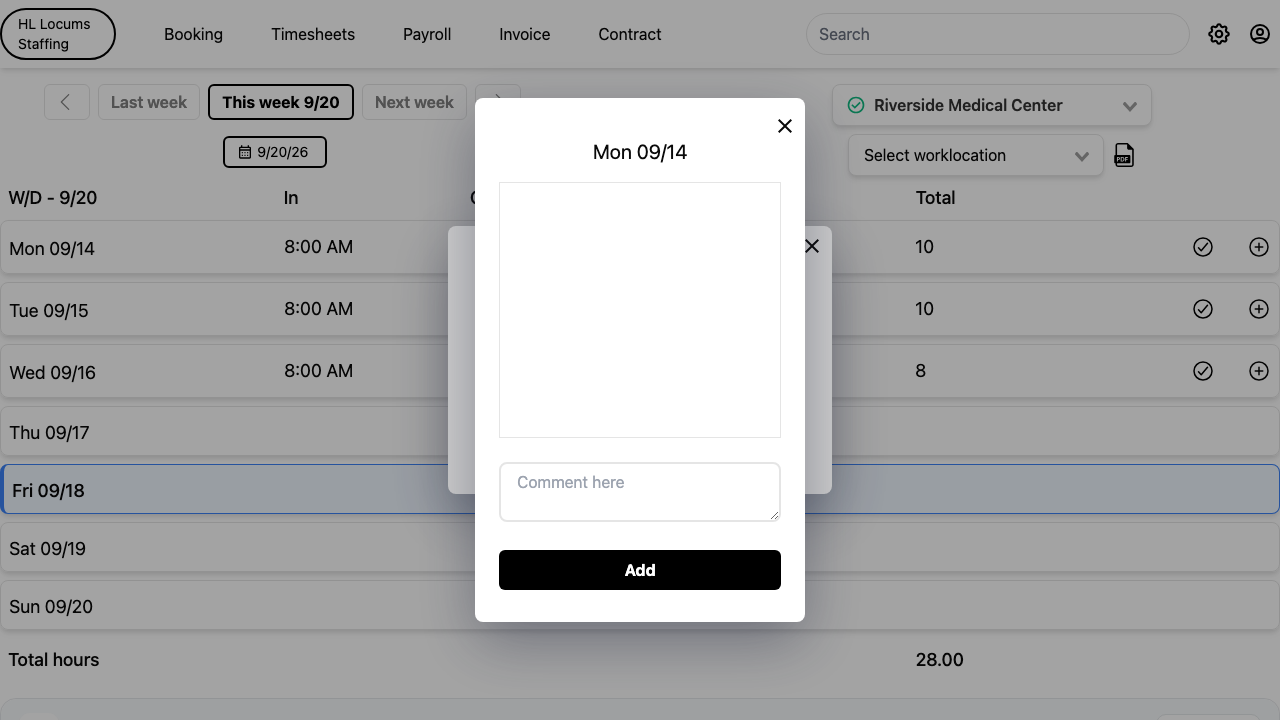
Click Add comment, type your note, and save it. The comment is visible to both the provider and the approving supervisor.
Screenshot: the day dialog with the Add comment button and the comment field highlighted.
To read existing comments, open the Comments panel, which lists each comment with the day, the author's name, and the date.
Use the weekly activity feed to see every submit, approve, reject, and comment event in order.
Tip: a comment doesn't change a day's status, use it to ask a question or note context, and reject if the day actually needs to be corrected.
How to send a reminder to a provider who hasn't submitted
Admin, AgentTimesheet app → Dashboard → Not Submitted
On the dashboard, look under the Not Submitted group for a week that's still missing.
Click the bell icon on that row (its tooltip reads Send Reminder).
In the Text & Email Reminder dialog, click Send. On success you'll see Reminder Sent, and the provider is reminded by both email and text to submit their time.
Tip: if the week has zero hours, the same dialog offers a Did not work button so you can mark the week as not worked instead of chasing a submission.
How to view and filter the approved-timesheets list
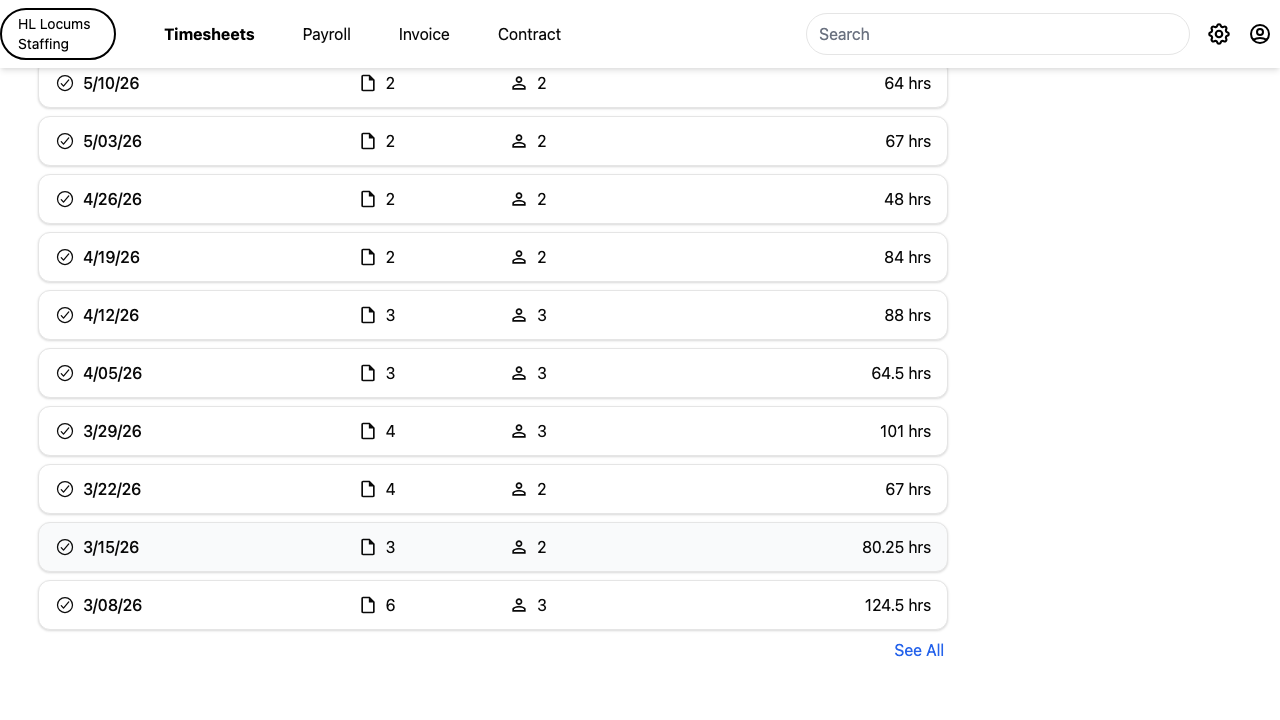
On the dashboard, open the Approved Timesheets section and click a week-ending row. This opens the Timesheets for Week ending list, grouped by provider and client.
Use the Search box to find a provider, approver, or client quickly.
Screenshot: the Approved Timesheets list with the Search box and the sort dropdown highlighted.
Sort the list by Last Approved Time, Employee Last Name, or Client Name. Each row shows the hours, expenses, and "By [approver name]" with the approved date.
Click a row to open the full day-by-day breakdown. Use Load More at the bottom to see more approved weeks.
Tip: this is the place to confirm a past week was approved and by whom before it moves on to payroll or billing.
How to open a timesheet PDF
Supervisor, Admin, Agent, ProviderTimesheet app → open a timesheet
Open the timesheet you want a PDF of.
In the header, click the Timesheet PDF icon to open the formatted timesheet in a new tab, ready to print or save.
Screenshot: the timesheet header with the Timesheet PDF and Invoice PDF icons highlighted.
Depending on your company's setup you may also see an Invoice PDF (provider bill) icon and a Client Invoice link next to it.
Tip: a PDF copy is also emailed automatically once a timesheet is fully approved, so approvers and the provider get a record without downloading it.
How to mark a timesheet as paid
Admin, AgentTimesheet app → open an approved timesheet
Open an approved timesheet once it has been processed for payment.
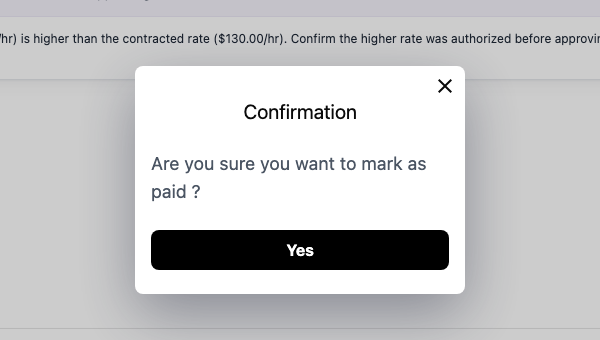
Click Mark Paid. A confirmation asks "Are you sure you want to mark as paid?", click Yes.
Screenshot: an approved timesheet with the Mark Paid button and its "mark as paid" confirmation highlighted.
The timesheet then shows Paid on with the date, and the provider's paystub becomes available to download.
Tip: if a timesheet is edited after it was paid, an admin or agent can re-approve it, some companies show a single Approve & Mark Paid button for this.
How to use the assisted review and its warnings before approving
Supervisor, Agent, Admin (if enabled for your company)Timesheet app → open a submitted timesheet
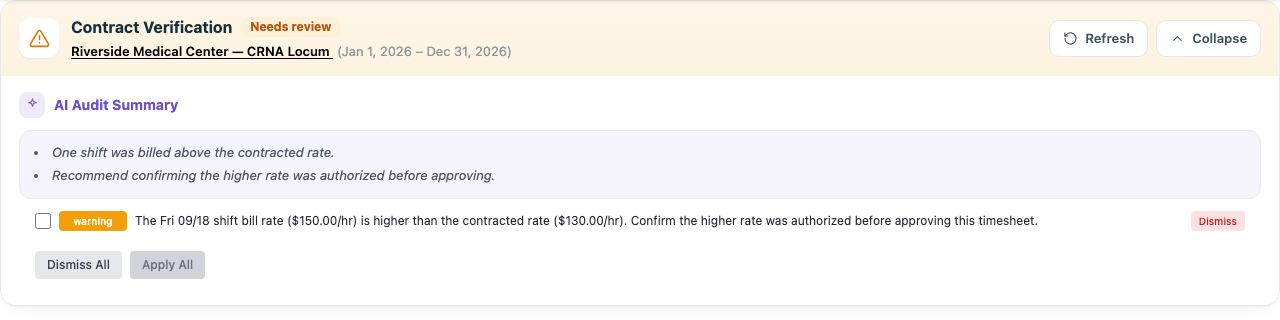
Open a submitted timesheet. If assisted review is enabled, a panel above the week shows findings that compare the submission against the provider's contract, things like a rate that doesn't match, hours outside the contracted window, unexpected overtime, a missing clock-out, or a duplicate entry.
Screenshot: the assisted-review panel with a warning finding, its plain-language reason, and the Dismiss / Apply buttons highlighted.
Read each finding and its plain-language reason. Each is tagged by severity, warning, info, or pass. A status pill at the top of the panel summarizes the week as Verified, Needs review, or Discrepancies.
For a finding with a suggested correction, click Apply to accept the suggested value or Dismiss to set it aside; use Apply All or Dismiss All to act on several at once. Nothing changes automatically, and when you dismiss you're asked for a short reason. You can also send the provider a pre-drafted message summarizing the issues.
Resolve or dismiss every warning. The Approve button unlocks once nothing is left blocking it, you'll see a note if the review is still running, and if warnings remain you'll be told to dismiss or apply them before proceeding.
Tip: the assistant only recommends, a person always decides. Both the recommendation and your actual decision are recorded, so there's a clear record of who approved what and why.
Contracts
Contracts (also called confirmation detail letters) hold everything a placement is built on: the facilities, the schedule, guaranteed hours, pay and bill rates, authorized expenses, and the terms & conditions. Agents and admins build and manage them; providers and clients review and sign them. This group walks through the whole lifecycle, from creating a contract to getting it signed, revised, or retired.
How to view and search the contract list
Agent, AdminTimesheet app → Contracts
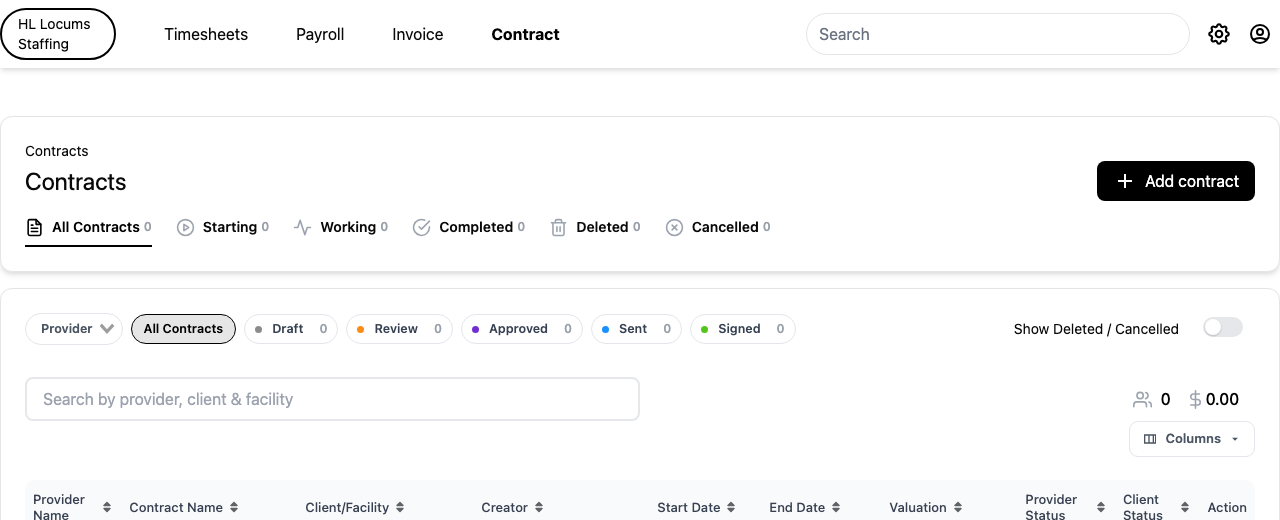
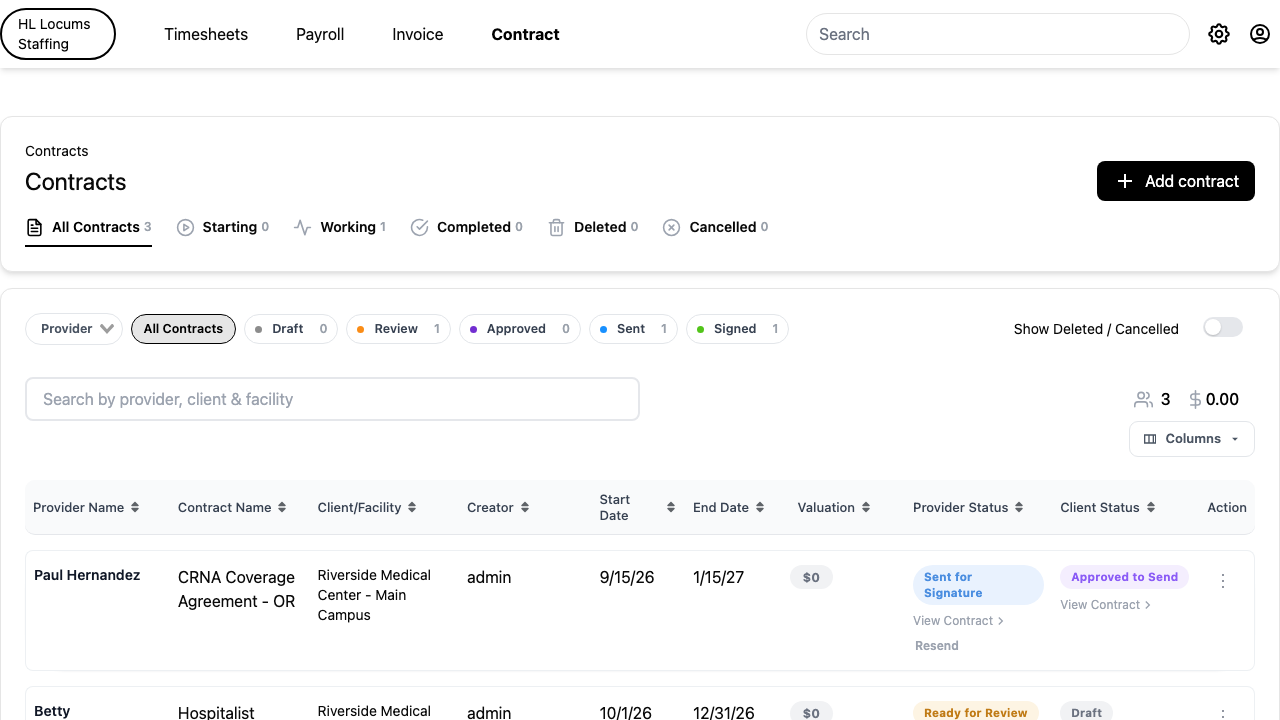
Open Contracts from the main menu. The page opens on the All Contracts tab, with a count beside each tab name.
Switch between the tabs across the top to narrow the list: All Contracts, Starting, Working, Completed, Deleted, and Cancelled.
Screenshot: the top of the Contracts page showing the All Contracts / Starting / Working / Completed / Deleted / Cancelled tabs, each with its count badge.
On the Starting tab, use the time-range chips to see contracts starting soon: 1-10 days, 11-30 days, 31-60 days, and 61 + days.
On the Working tab, use the chips to focus on contracts about to end: All, Expiring in 30 Days, Expiring in 60 Days, and Expiring in 90 Days.
On the All Contracts tab, filter by stage using the status pills, All Contracts, Draft, Review, Approved, Sent, and Signed, each with its own count. Turn on Show Deleted / Cancelled if you also want retired contracts mixed in.
Type into the Search by provider, client & facility box to jump straight to a contract by anyone's name. The Unique Providers count and Total Valuation on the right update to match what you're viewing.
Click a row to open that contract. Each row also shows a Provider Status and a Client Status tag (for example, Draft, Ready for Review, Approved to Send, Sent for Signature, Duly Signed).
Tip: Use the Columns button above the table to open Show / Hide Columns and tick exactly the columns you want, Provider Name, Contract Name, Client/Facility, Creator, Start Date, End Date, Valuation, Provider Status, and Client Status. Depending on your company's setup, admins may also see Recruiter, Recruiter Start Date, Account Manager, and Account Manager Start Date. Your choices are remembered for next time.
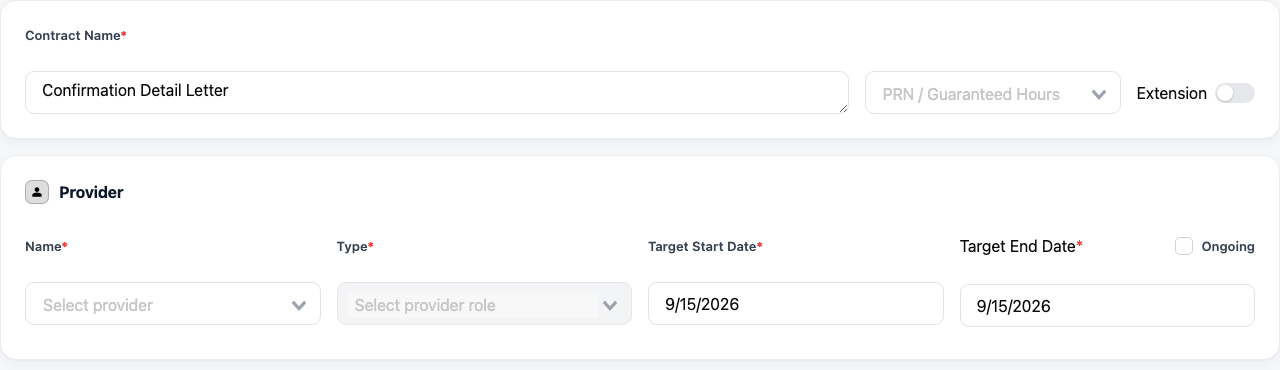
On the Contracts page, click Add contract (top right). A blank contract form opens.
Enter a Contract Name (required), this is how the contract is labeled everywhere in the app.
Set the Target Start Date and Target End Date (both required). If the placement has no fixed end, tick Ongoing and the end date is left open.
Screenshot: the Contract Name field with the Target Start Date and Target End Date pickers below it, and the Ongoing checkbox beside the end date.
Choose the provider and, if your company uses them, the estimate option and any internal-team fields (such as a recruiter or account manager with their start dates). These appear depending on your company's setup.
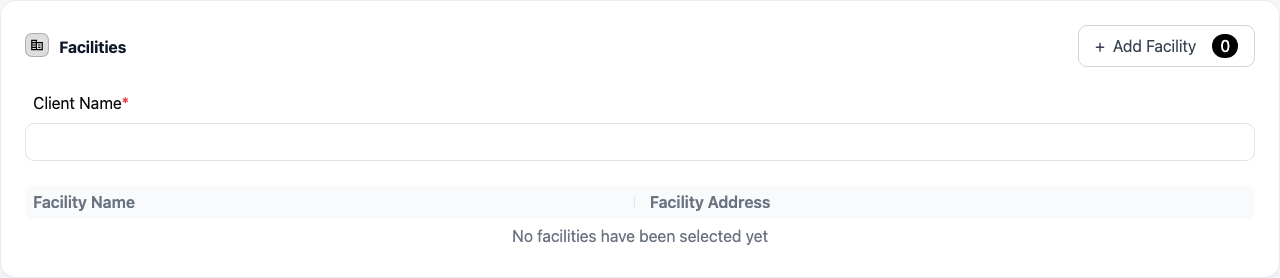
In the Facilities section, click + Add Facility to pick the client facilities this contract covers; the count next to the button shows how many are attached. Fill in the Client Name that should appear on the contract.
Screenshot: the Facilities section with the "+ Add Facility" button (and its count badge) highlighted, plus the Client Name field.
In Schedule/Shift, add a note describing the working schedule and list any Dates Not Available.
Under Guaranteed Hours, enter the provider's guaranteed hours Per Week and Per Day, and set the Overtime thresholds (services in excess of per week / per day) if they apply.
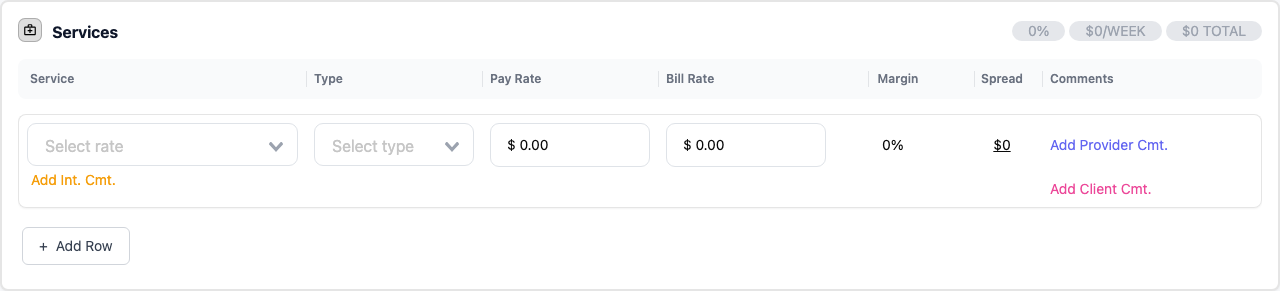
Build the pay in the Services table: for each row choose the Service and rate Type, then enter the Pay Rate and Bill Rate. The Margin and Spread calculate automatically. Click + Add Row for each additional rate line.
Screenshot: the Services table showing Service, Type, Pay Rate, Bill Rate, Margin and Spread columns, with the "+ Add Row" button highlighted.
Add any authorized costs in the Expenses table the same way (see the separate expenses how-to for the options).
Click Save (top right, or press ⌘S). The indicator under the button changes from Unsaved changes to a saved confirmation once it succeeds. Your new contract now appears in the list, usually as a Draft.
Tip: A running summary bar near the top shows the date range, overall margin, weekly amount, number of weeks, and total contract value as you fill things in, a quick sanity check before you save.
How to edit a contract's terms & conditions
Agent, AdminTimesheet app → Contracts → (open a contract)
Open the contract from the Contracts list and scroll down to the terms sections near the bottom of the form.
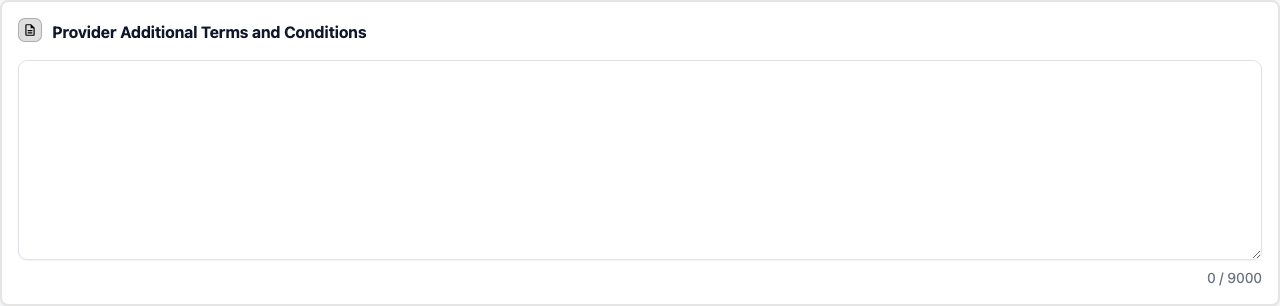
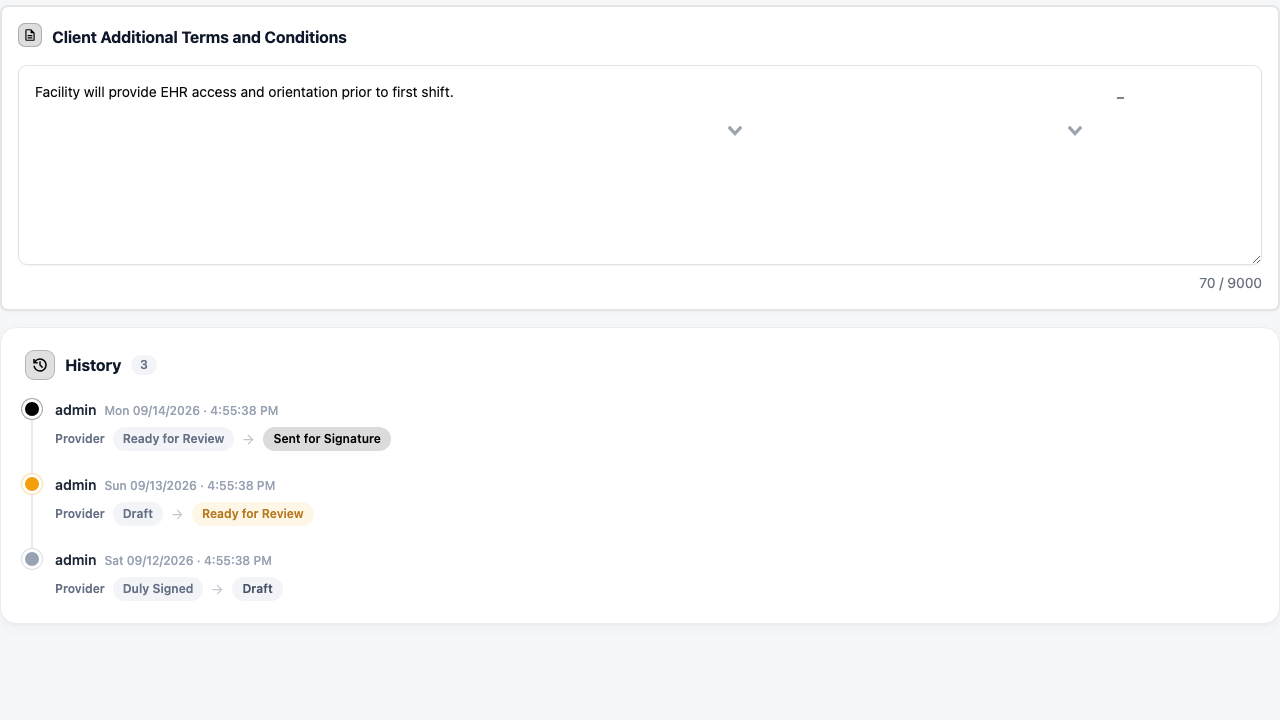
Edit the Provider Additional Terms and Conditions box, this is the free-text policy language that goes to the provider. You can enter up to 9000 characters; a counter shows how much you've used.
Screenshot: the "Provider Additional Terms and Conditions" text area with the character counter (x / 9000) below it.
Edit the Client Additional Terms and Conditions box just below it for the language that goes to the client.
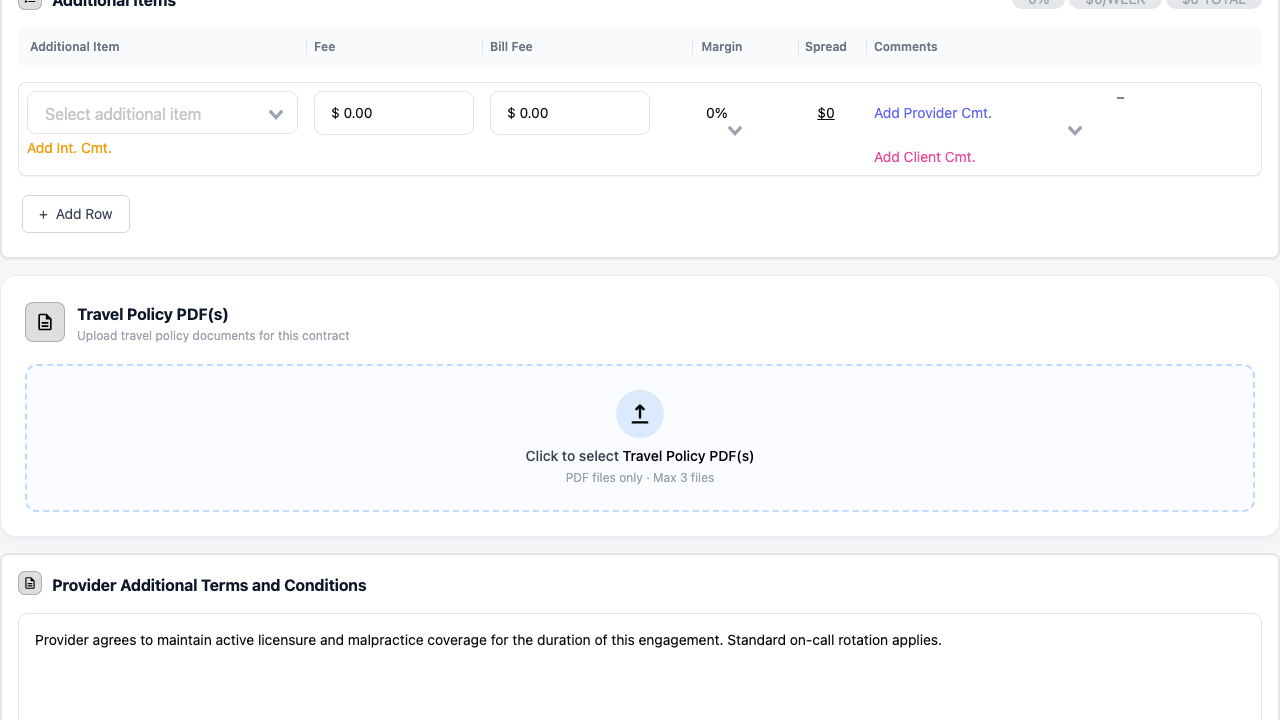
To attach travel or other policy documents, use the Travel Policy PDF(s) panel: click the upload area and choose your PDF files (up to 3). Each uploaded file appears in a list with its name; click a file to open it, or use the trash icon to remove one (you'll be asked to confirm before it's removed).
Screenshot: the "Travel Policy PDF(s)" panel with the dashed upload drop zone and its "PDF files only · Max 3 files" note highlighted.
Click Save (or press ⌘S). The saved indicator under the button confirms your changes were stored.
Tip: When you're creating a brand-new contract, admins see a Save as default for future contracts checkbox under each terms box. Tick it to reuse that wording automatically on the next contract you build. Once a side of a contract has been signed, its terms are locked and shown grayed out.
How to add or edit rates and expense options on a contract
Agent, AdminTimesheet app → Contracts → (open a contract)
Open the contract and find the Services table (pay/bill rates) and the Expenses table below it.
To add a rate line, click + Add Row under Services, then choose the Service and rate Type and enter the Pay Rate and Bill Rate. Watch the Margin and Spread columns update live.
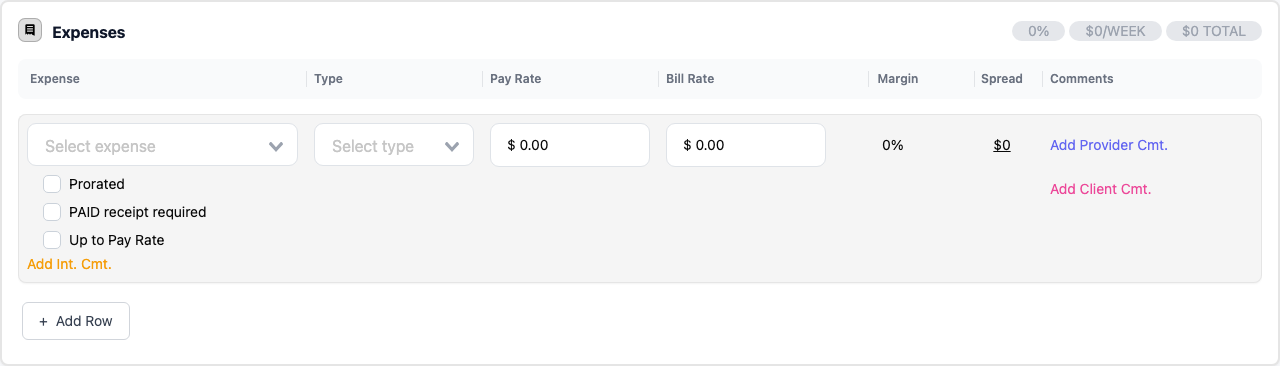
To add an authorized cost, click + Add Row under Expenses, pick the Expense and its Type, and enter the Pay Rate and Bill Rate.
Screenshot: the Expenses table with a row selected, showing the Prorated and receipt-required checkboxes and the "+ Add Row" button.
Use each expense row's checkboxes to set how it behaves, for example Prorated (split across the period) and whether a receipt is required.
To reorder lines, drag a row by its handle. To remove a line, use the delete control at the end of that row.
Click Save (or press ⌘S) to store the updated rates and expenses.
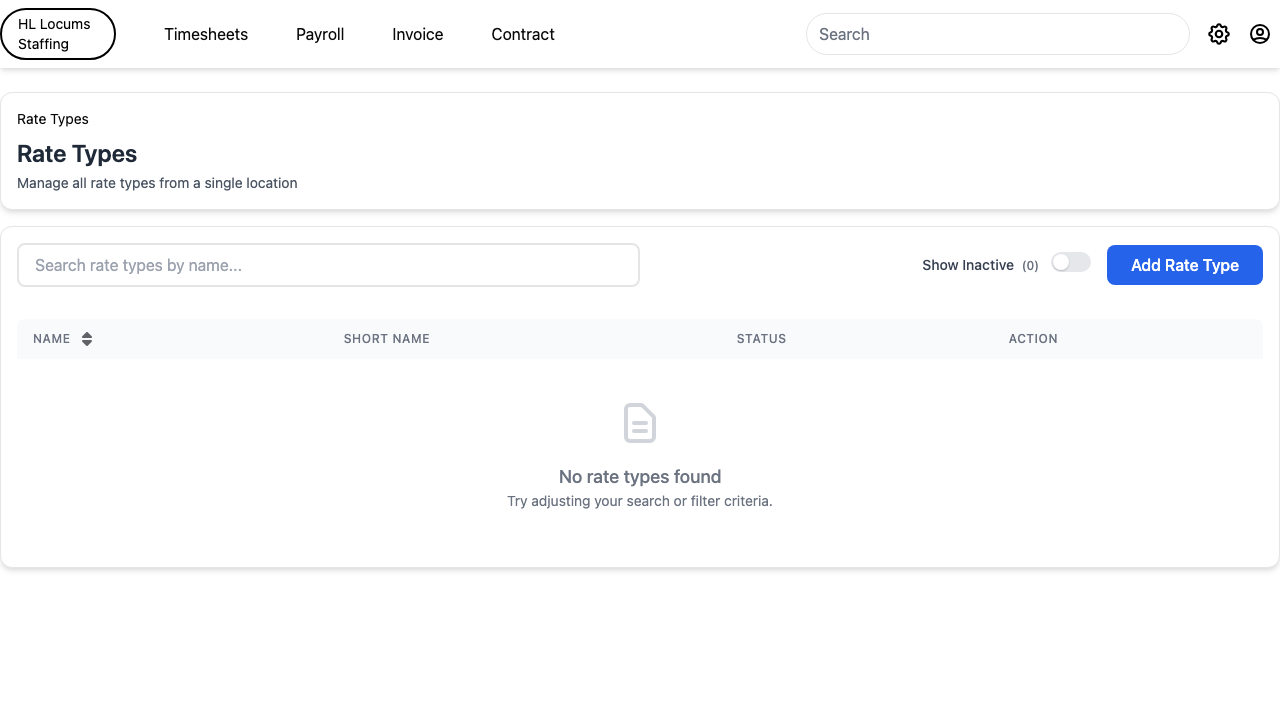
Tip: If the exact rate type or expense type you need isn't in the dropdown, you can add it from the picker without leaving the contract; it then becomes available for future contracts too. Company-wide rate and expense types are also maintained on the Rate Types / Expense Types settings pages.
How to send a contract for signature
Agent, AdminTimesheet app → Contracts → (open a contract)
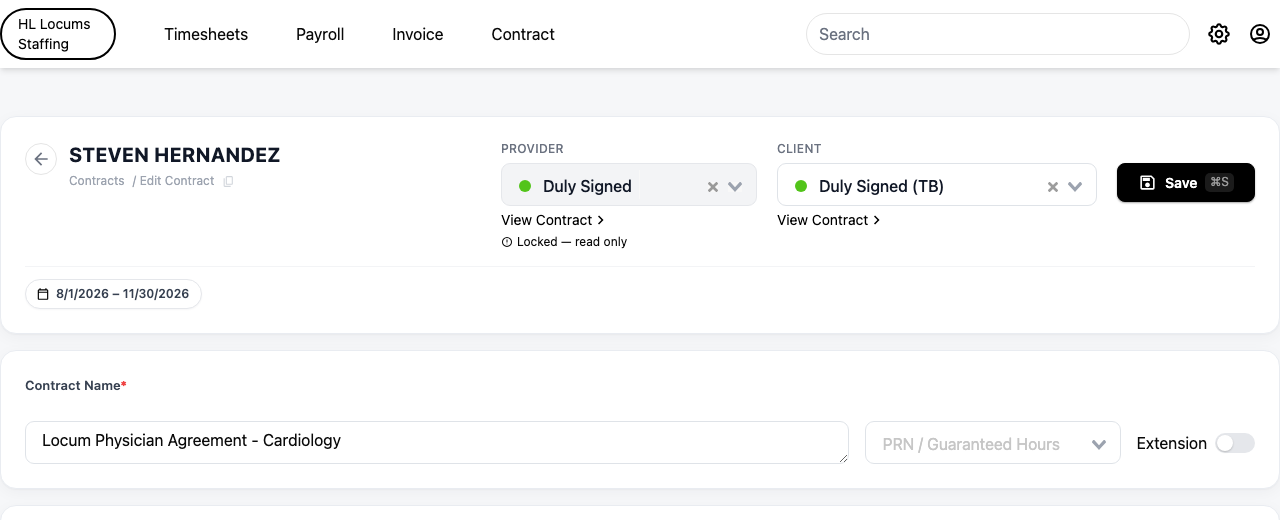
Open the finished contract. At the top you'll see two status dropdowns: Provider status and Client status.
Move the contract along its stages using the dropdown, Draft → Ready for Review → Approved to Send, until it's ready to go out.
Screenshot: the Provider and Client status dropdowns at the top of the contract, with the status options list open.
Set the status to Sent for Signature and click Save. A confirmation prompt appears so you can confirm you want to send it out for signing.
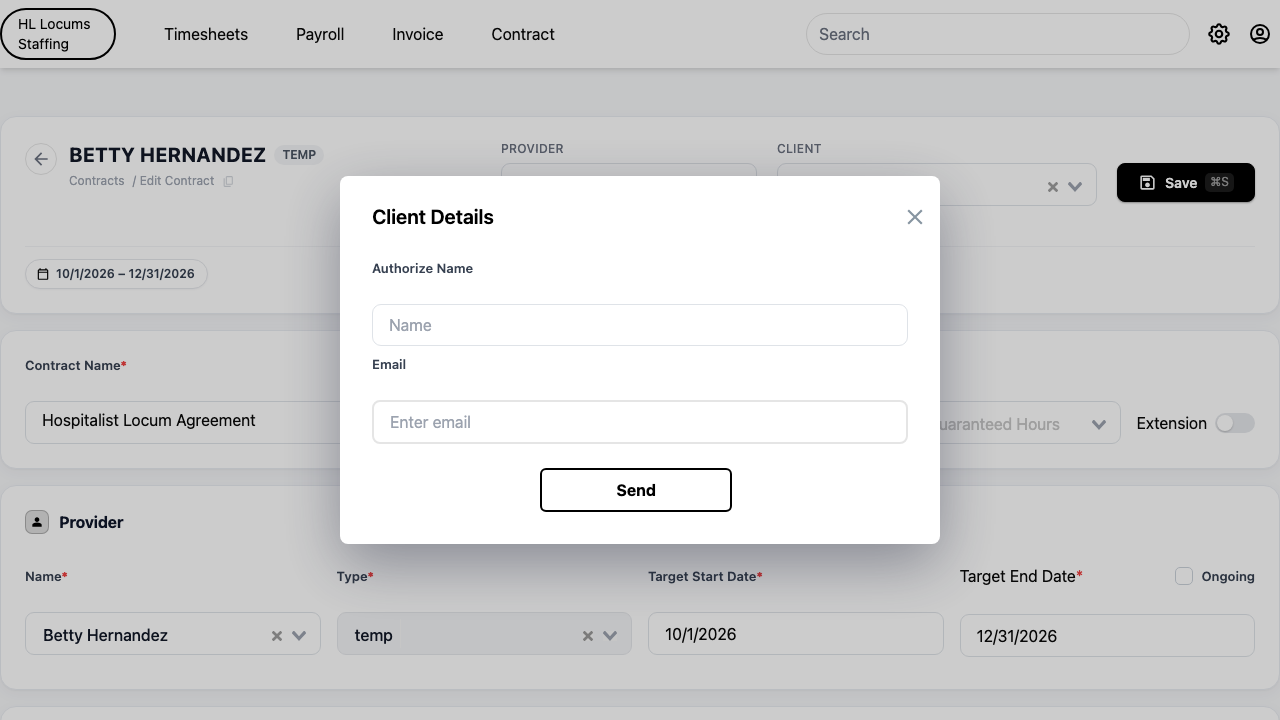
When sending the Client side, you'll be asked for the signer's details, enter the Authorize Name and Email. The client receives an emailed link to review and sign; no account is needed.
Screenshot: the client approval details dialog with the "Authorize Name" and "Email" fields highlighted.
After sending, the contract shows a Sent for Signature tag. If the signer needs the email again, open the contract (or the list row) and click Resend next to the relevant status.
Tip: The provider and client sides are sent independently, so you can request one signature without waiting on the other. A contract becomes fully Duly Signed once both required sides have signed.
How to sign a contract as a provider
Provider (Temp)Timesheet app → profile menu → Contracts
Open Contracts from your profile menu to see My Contracts, the contracts waiting for your signature.
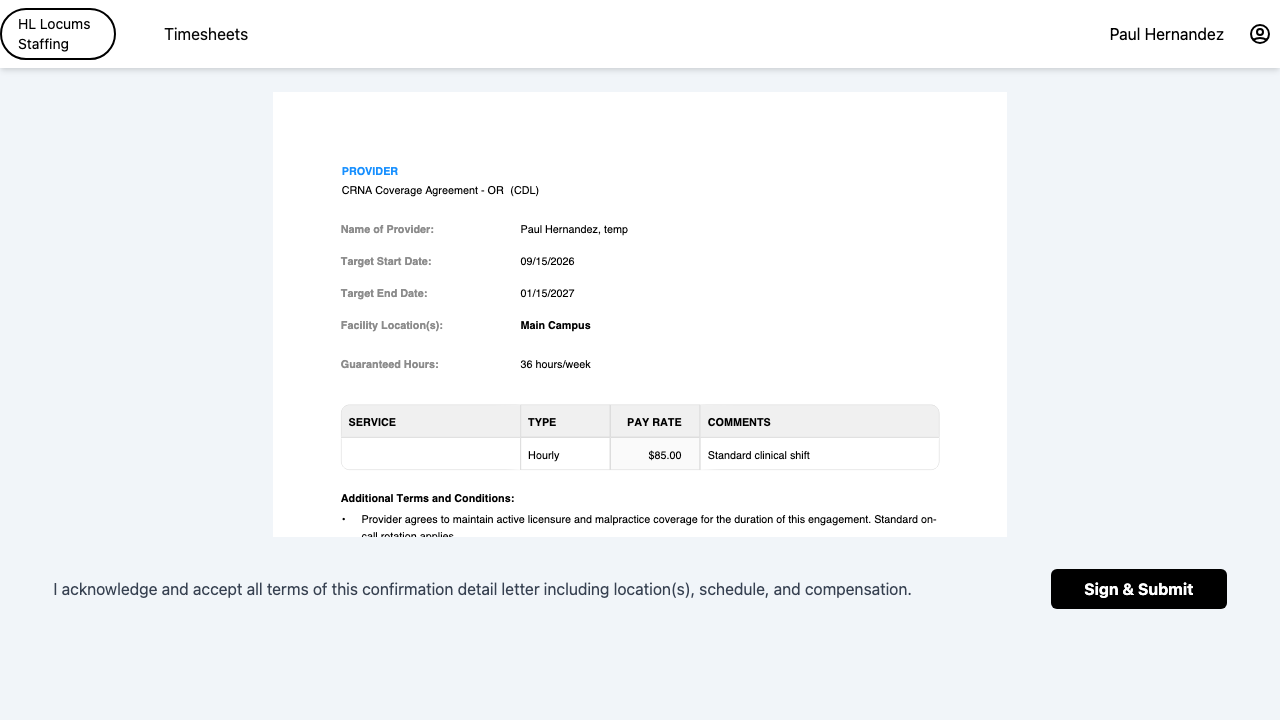
Click View to read a contract, or Sign to start signing. The contract opens as a full document you can scroll through.
Screenshot: the "My Contracts" list showing a contract row with the View and Sign buttons.
Read the acknowledgement line ("I acknowledge and accept all terms of this confirmation detail letter including location(s), schedule, and compensation") and click Sign & Submit.
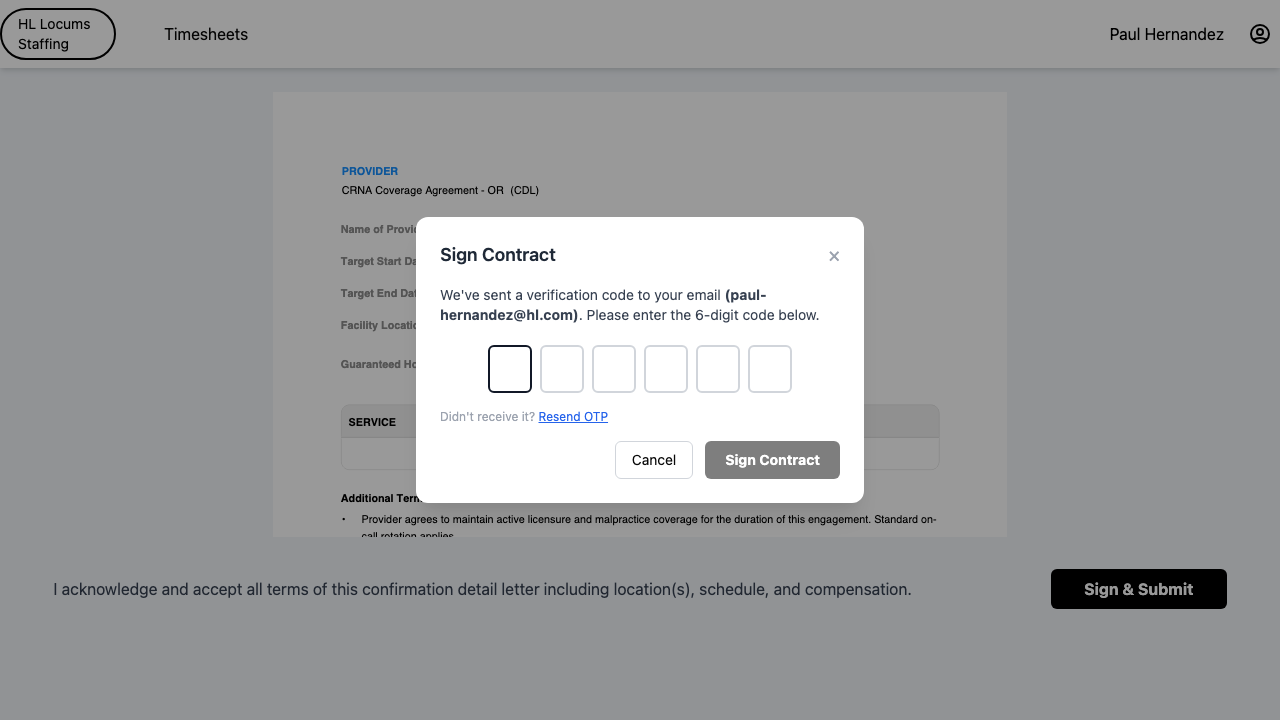
A verification code is sent to you, check your email (and your phone, if a number is on file). Enter the 6-digit code in the boxes shown.
Screenshot: the "Sign Contract" dialog with the six single-digit code boxes and the "Resend OTP" link.
Click Sign Contract. You'll see a success confirmation, and the contract moves to signed. If the code doesn't arrive, click Resend OTP and try again.
Tip: The verification code is valid for a limited time (about 10 minutes). If it expires, just request a new one with Resend.
How to approve and sign a contract as a client
ClientEmailed signing link (no account needed)
Open the signing link from the email your staffing contact sent you. It opens the contract directly, you don't need to log in or create an account.
Review the full contract in the viewer: the facilities, schedule, rates, expenses, and terms.
Screenshot: the client-facing contract viewer with the full document shown and the Approve / Sign button below it.
Confirm the acknowledgement that you accept the terms, then approve and sign the document.
Depending on how the contract was sent, you may be asked to enter a short verification code sent to your email to complete signing.
Once done, you'll see a confirmation that the contract has been signed, and the staffing team's copy updates automatically.
Tip: Signing links expire for security. If yours no longer works, ask your staffing contact to resend it, they can do that in one click.
How to cancel, delete, re-activate, duplicate, or revise a contract
Agent, AdminTimesheet app → Contracts → row menu (three dots)
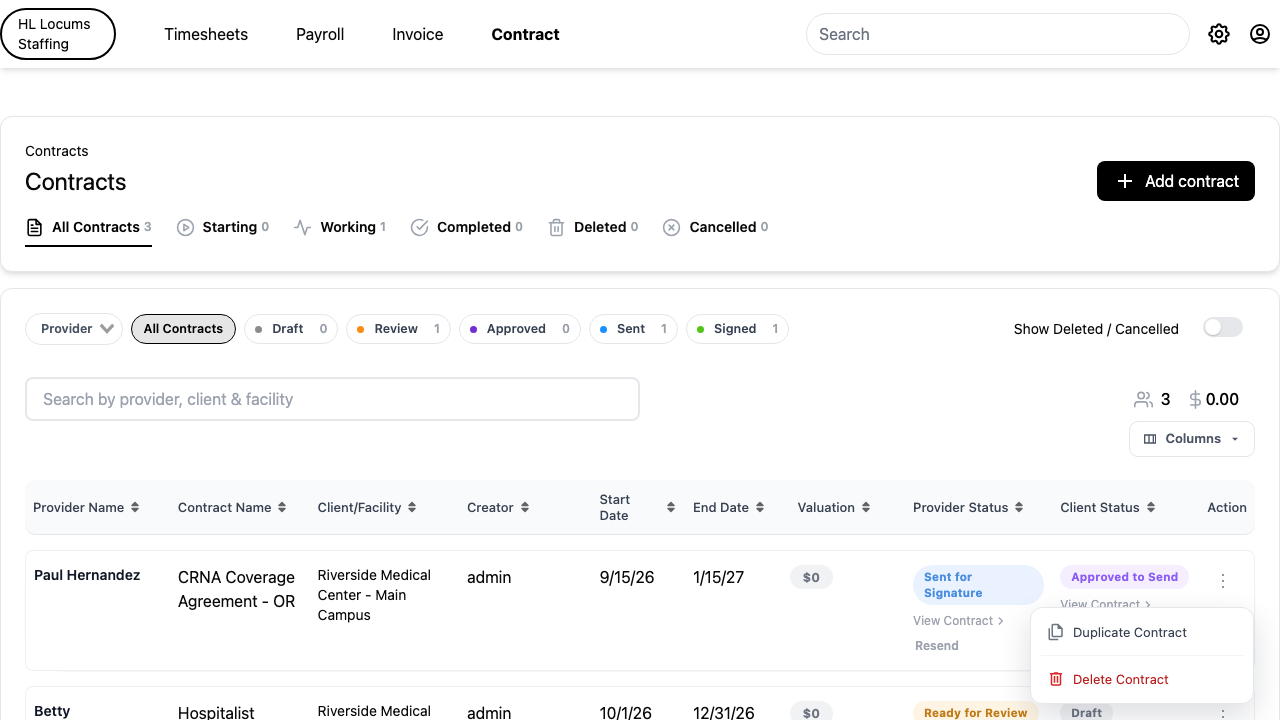
On the Contracts list, click the three-dot menu at the end of a contract's row to open its actions.
Screenshot: an open contract row menu showing Revise Contract, Duplicate Contract, Cancel Contract, and Delete Contract.
Duplicate Contract makes a fresh copy you can edit as a new contract. If any attached facility is no longer active, a warning lists them first so you can proceed or drop them. You'll see "Contract duplicate successfully" and land on the new copy.
Revise Contract creates a linked new version. Choose which side you're revising, Provider Side, Client Side, or Both. A signature that already exists on the unchanged side can carry over, and the older version stays active until the revised one is fully signed, at which point it's replaced automatically.
Cancel Contract is for contracts that have already started. Pick the Cancelled Date in the prompt and click Save.
Delete Contract is for contracts that have not started yet. Choosing it removes the contract from the active list; you'll see "Contract deleted successfully".
To reverse either action, find the contract on the Deleted or Cancelled tab (or turn on Show Deleted / Cancelled), open its row menu, and click Re-activate. You'll see "Contract Re-activated successfully".
Tip: The rule of thumb built into the menu: Delete contracts that never started, and Cancel ones that were already underway. Revise options only appear once a contract is fully signed, since that's when a new version makes sense.
How to read a contract's change log / history
Agent, AdminTimesheet app → Contracts → (open a contract)
Open the contract you want to audit.
Scroll to the History panel. It shows a timeline of everything that happened to the contract, with a count of events.
Screenshot: the "History" timeline panel showing dated events with who made each change and the status transitions.
Read each entry top to bottom: the person (or "System") who made the change, the exact date and time, and what changed, for example a Provider or Client status moving from one stage to the next, shown as two pills with an arrow between them.
Look for milestone entries too: Executed (fully signed), Revised (Provider Side / Client Side / Both Sides), and Duplicated from another contract (with a link back to the original).
Tip: The History panel only appears once a contract has events to show, so a brand-new draft won't have one until its first status change or edit.
How to set up contract change alerts
Agent, Admin, SupervisorTimesheet app → Settings → user preferences
Open your user preferences in Settings and find the alerts area.
Turn on Alert for contracts ("Expiring, revised and newly signed contracts"). This enables a live feed for contract activity across your company.
Screenshot: the "Alert for contracts" toggle with its description, and the sub-toggles that appear once it's on.
With the master toggle on, fine-tune which events you want using the sub-toggles: Signed contracts, Cancelled contracts, and Revised contracts.
Your choices save as you set them. From then on, the bell icon in the top bar shows a dropdown feed of matching contract events.
Tip: These alerts are aimed at the staffing team and appear depending on your company's setup; they aren't shown to provider (employee) accounts.
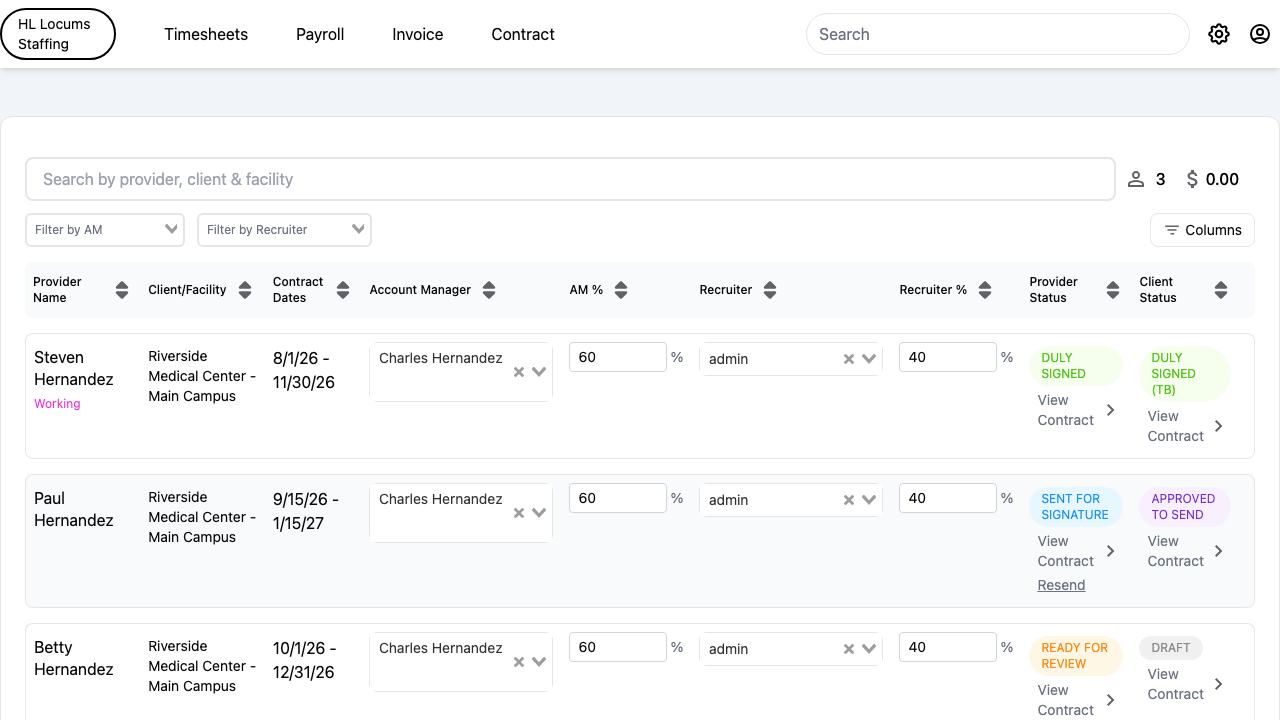
How to manage commissions on a contract
AdminTimesheet app → Contract Commissions
Open the Contract Commissions manager. It lists your contracts with commission columns alongside the usual details.
Assign the people who earn on a contract directly in its row: choose the Account Manager and enter the AM %, and choose the Recruiter and enter the Recruiter %.
Screenshot: the Contract Commissions table showing the Account Manager, AM %, Recruiter, and Recruiter % columns with a row being edited.
Narrow the list with Filter by AM and Filter by Recruiter, or search by provider, client, and facility. Use the Columns button to show or hide fields.
Changes save as you set each contract's assignments and percentages.
You can also set the internal team on the contract itself: open a contract and, depending on your company's setup, fill in the Recruiter / Account Manager (with their start dates) in the internal-team section, then Save.
Tip: The commission manager is an admin tool and appears depending on your company's setup. Assigning commissions here also feeds the commission and contract dashboards.
Managing People & Clients
For Admins and Agents who set up and maintain the people and organizations in your account, providers (shown as Employees), clients, facilities, supervisors, and the agents and admins on your own team. Everything here lives in the Timesheet app; most tasks require an Admin, and Agents can do them when they have the matching permission.
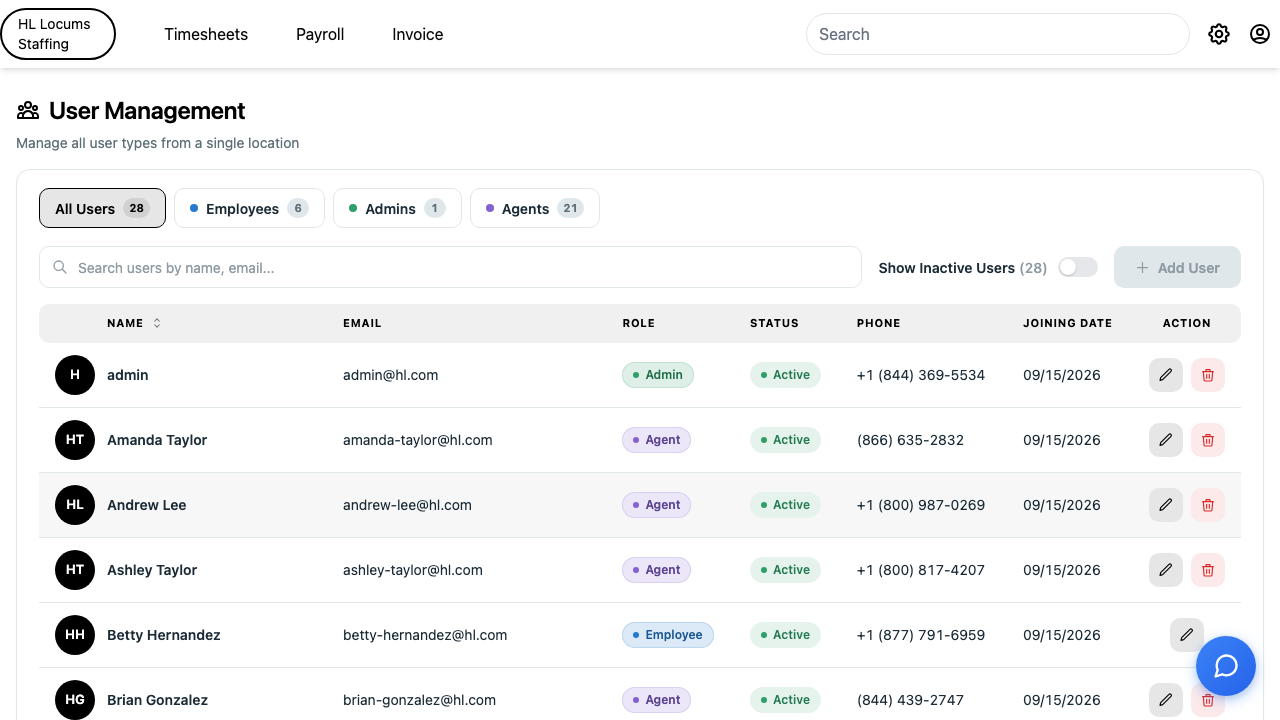
How to find anyone using the User Management directory
Admin, AgentTimesheet app → User Management
In the left navigation, open User Management. (If you are an Agent with provider access, the same directory opens from the Employees menu item.) The page is titled User Management with the subtitle “Manage all user types from a single location.”
Use the tabs across the top to narrow the list, All Users, Employees, Admins, Agents, and (if your company uses job postings) Candidates. Each tab shows a live count.
Screenshot: the User Management page with the role tabs (All Users, Employees, Admins, Agents) highlighted, each showing its count badge.
Type in the Search users by name, email... box to filter, and flip Show Inactive Users to include people who are currently deactivated.
To start creating someone, pick the tab for the role you want, then click the Add button, it reads Add Employee, Add Admin, or Add Agent depending on the tab. (On the All Users tab the button is disabled until you choose a role tab.)
Click any row’s Edit (pencil) icon to open that person, or the Delete (trash) icon to remove them. You’ll know the directory is working when the count badges and the “Showing X of Y users” footer update as you filter.
Tip: Clicking an Employee row opens a read-only snapshot of their activity, total timesheets, hours, revenue, margin, the clients they’ve worked with, and recent timesheets, without leaving the directory.
How to add or invite a provider and set their pay/bill rates
Admin, AgentTimesheet app → User Management → Employees, or Invites
To add a provider directly: open the Employees tab in User Management and click Add Employee.
Fill in the required fields, Name, Email, Phone, and Date of birth, plus any optional details such as business name and address. Leave Generate auto password checked to email the provider a secure temporary password, or turn it off to set one yourself.
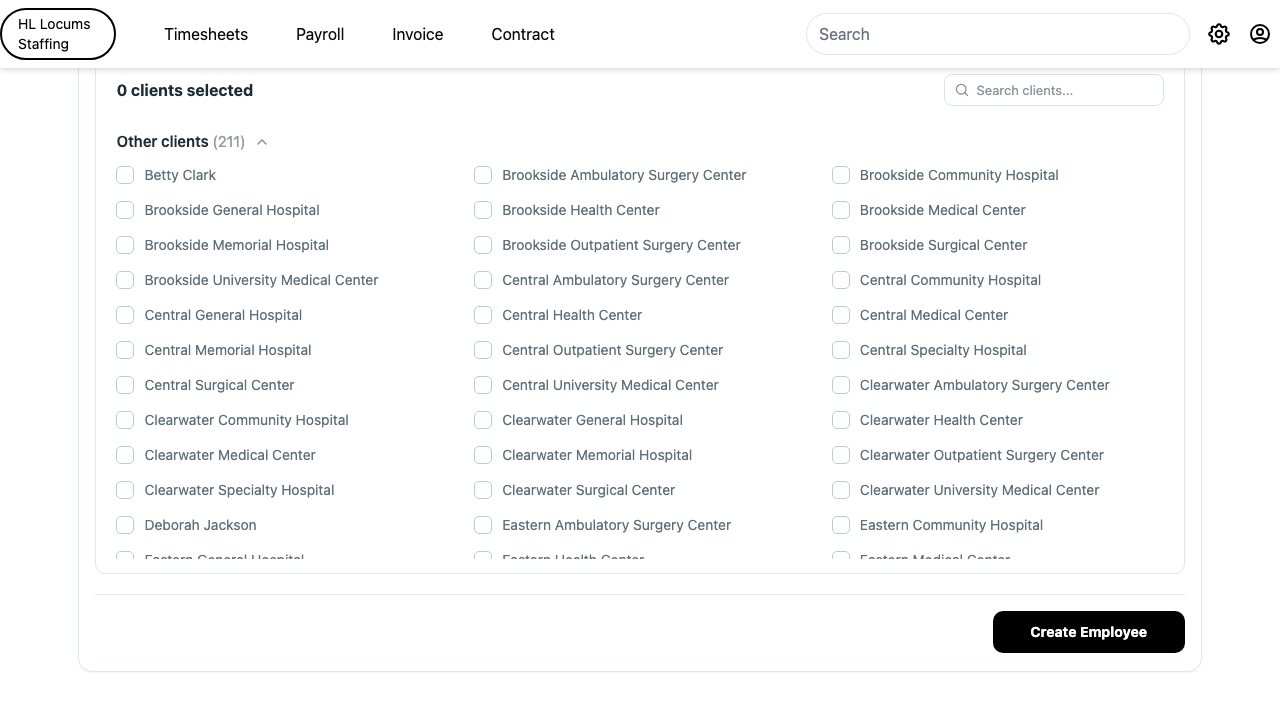
Under Assigned clients, search and check the clients this provider will work for. A running “{n} clients selected” count and a Selected clients band confirm your picks; use Clear all to start over.
Screenshot: the Add Employee form with the Assigned clients picker highlighted, showing the search box and the “clients selected” count.
Check Send Onboarding Link if you want onboarding to start automatically, then click Create Employee. A “Created successfully” message confirms the account exists.
To invite providers instead (they finish their own signup): open Invites from the navigation, then click New Invite.
In the Invite window, choose the role Employee, pick a client, and enter the person’s Email. Enter a starting Pay Rate and Bill Rate, a live margin percentage shows as you type. To invite several people at once, click Add user for each additional row.
Screenshot: the Invite window with role set to Employee and the Pay Rate / Bill Rate fields and the live margin readout highlighted.
Click Invite to send. The new rows appear on the Invited list with a status of Accepted once the person signs up.
Tip: To resend or cancel an invite, click its row on the Invited list to open Invitation Details, then use Resend or Revoke. A “Invitation resend successfully” message confirms a resend.
How to edit a provider’s profile, clients, rates, and active status
Admin, AgentTimesheet app → User Management → Employees → [provider]
Find the provider on the Employees tab and click the Edit icon to open their profile. The header shows their name, an Employee tag, and an Active / Inactive badge.
Update any profile field in the Employee card, Name, Email, Date of birth, Phone.
To change who they work for, use the Access for clients picker: check or uncheck clients, using Clear all or the search box as needed.
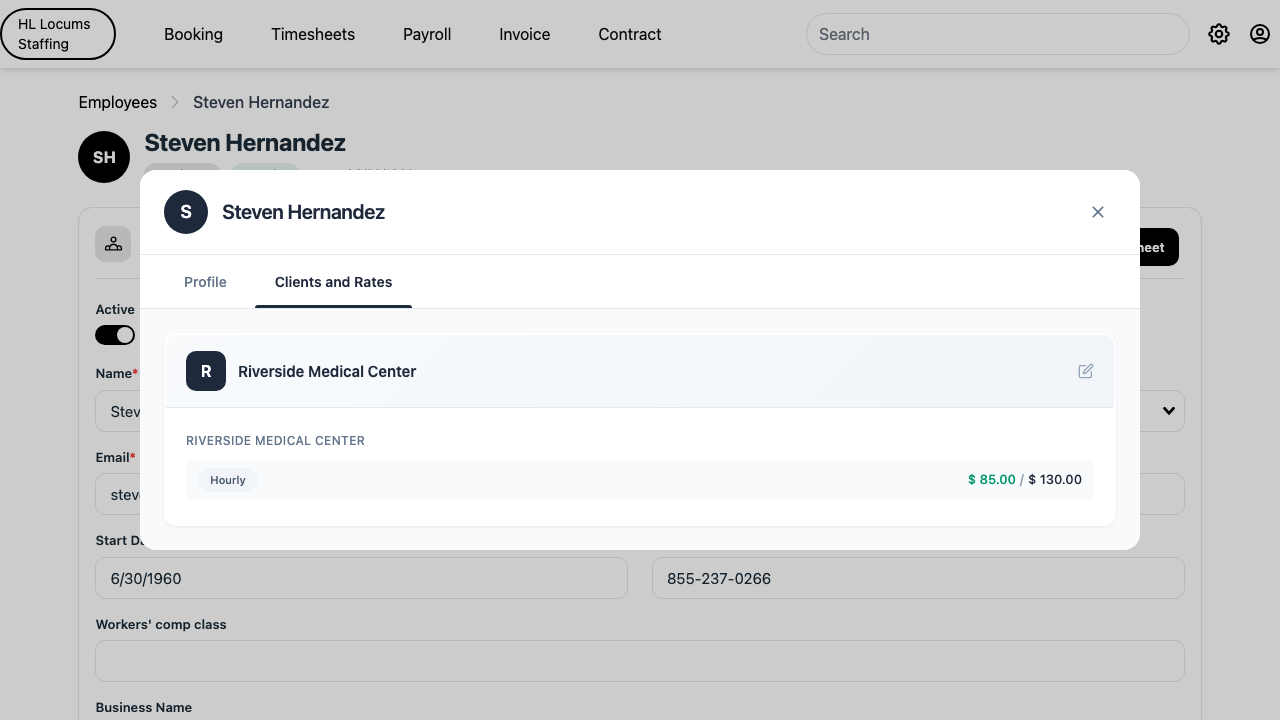
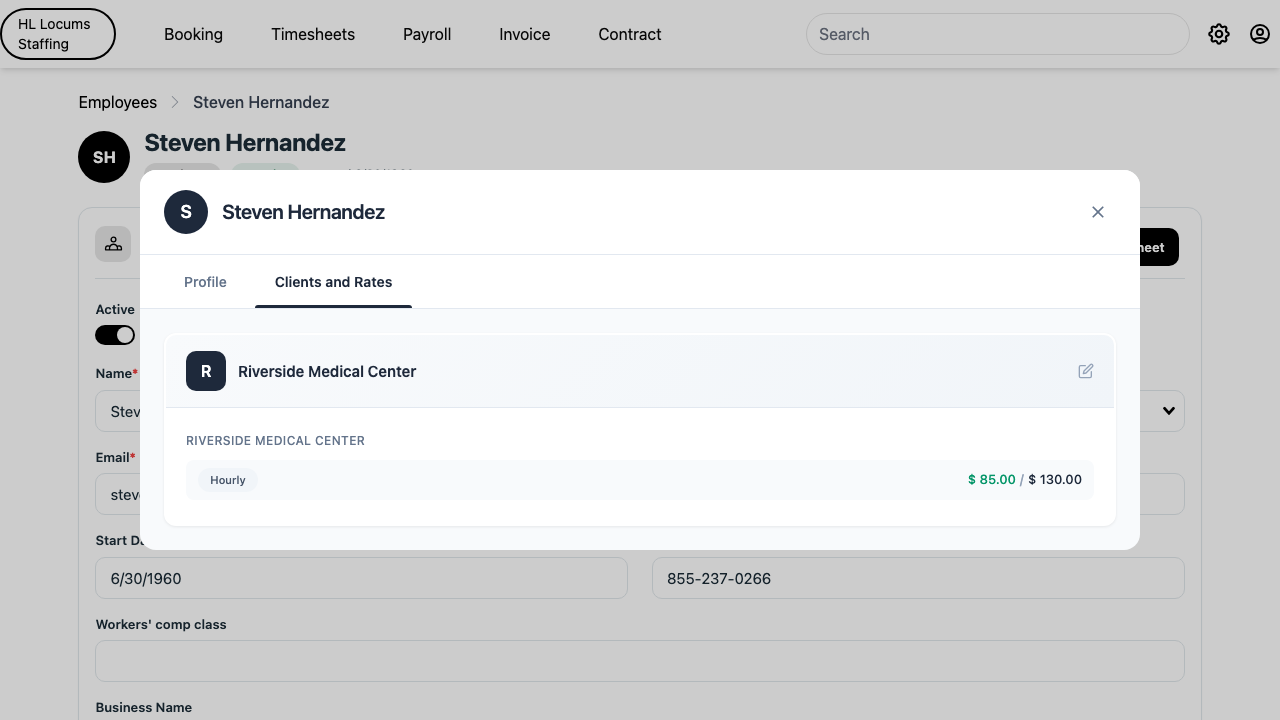
To change pay, click the Rates button. Each client shows its earning lines; edit the Pay and Bill columns and watch the Margin update. Use Add earning, Add Effective Date Rates, or Add new client as needed, then click Save.
Screenshot: the Rates window for a provider with the Pay, Bill, and Margin columns highlighted and the Save button visible.
To activate or deactivate the provider, flip the Active toggle in the Employee card.
Click Update to save profile changes. An “Updated successfully” message confirms it.
Tip: The same profile page has quick actions to Email Timesheet, send a Welcome Email, or Open Timesheet on the provider’s behalf.
How to adjust or look up a provider’s PTO / sick balance
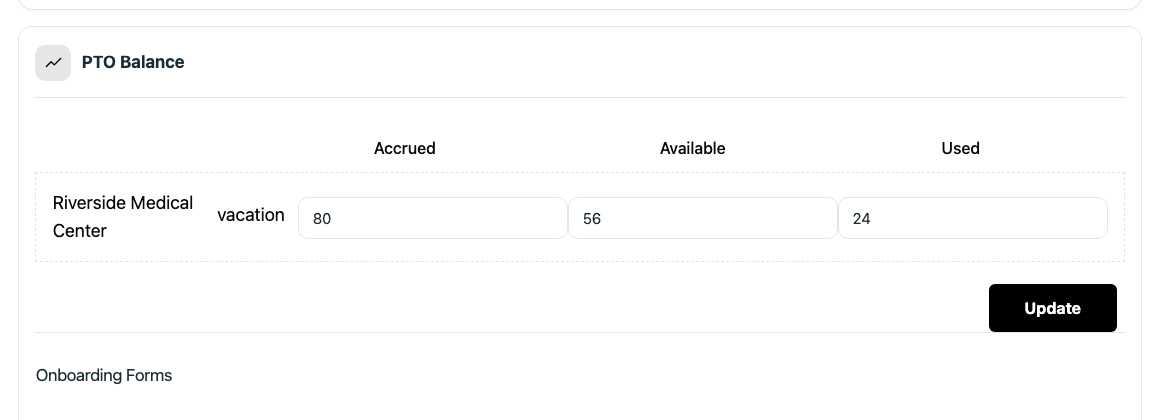
Open the provider’s profile and scroll to the PTO Balance card. This is also where you simply look up a balance, no editing required.
Each row lists a client and a balance type (such as Sick or Vacation) with three columns: Accrued, Available, and Used. Read these to check where the provider stands today.
Screenshot: the PTO Balance card with the Accrued, Available, and Used columns highlighted for one client.
To make a manual correction, type the new number directly into the relevant column.
Click Update to save. The card refreshes to show the corrected figures.
Tip: For account-wide views rather than one person, use the PTO Balance Report and PTO Used Report in the navigation.
How to start onboarding and manage a provider’s forms
Admin, Agent (providers complete their own)Timesheet app → User Management → Employees
When creating a provider, check Send Onboarding Link to start onboarding right away. For an existing provider, use the Send Onboarding Email action and confirm on the Confirmation prompt (“Are you sure you want to send onboarding email?”).
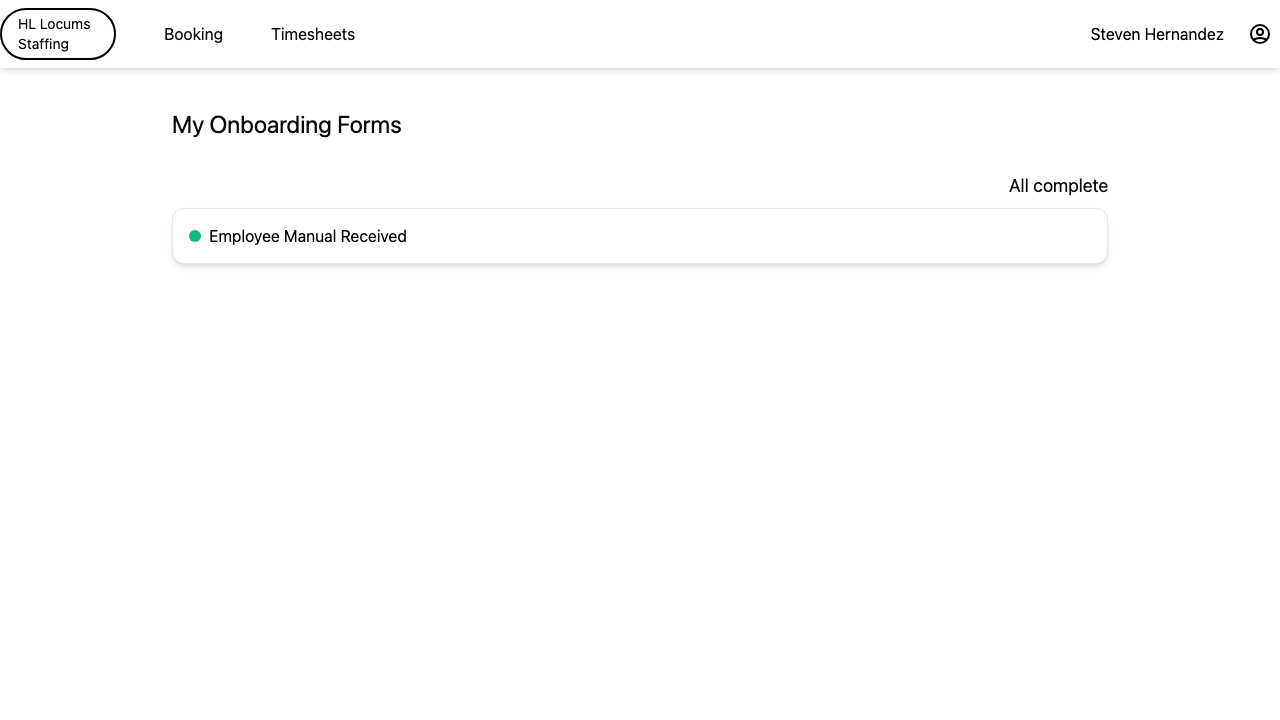
To review progress, open the provider’s Onboarding Forms page (titled “{name}’s Onboarding Forms”). Each form shows a colored status dot, green for complete, orange for pending, blue for needs-review, red for rejected, and a summary such as “{n}/{total} pending” or “All complete.”
Screenshot: a provider’s Onboarding Forms page with the per-form status dots and the “All complete” / pending summary highlighted.
Click a form to open it and review the details the provider submitted, including their pre-filled identification form and uploaded ID images.
Providers complete tax and direct-deposit setup through a secure external portal (CheckHQ); once they finish each step, the matching status dot turns green here.
Tip: A provider sees the same checklist under Onboarding forms in their own menu, titled “My Onboarding Forms”, a handy reference when you’re helping someone over the phone.
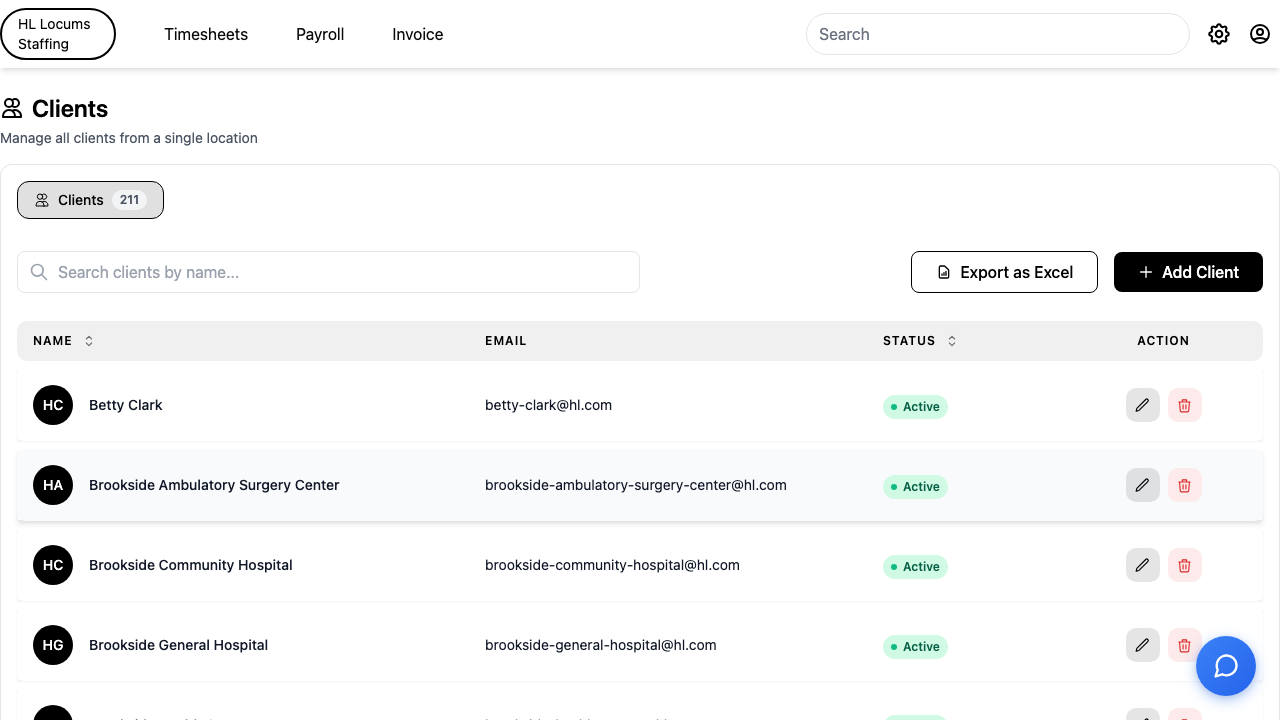
How to add and manage a client
Admin, AgentTimesheet app → Clients
Open Clients from the navigation. The page (“Manage all clients from a single location”) lists your clients with a Search clients by name... box and an Export as Excel option.
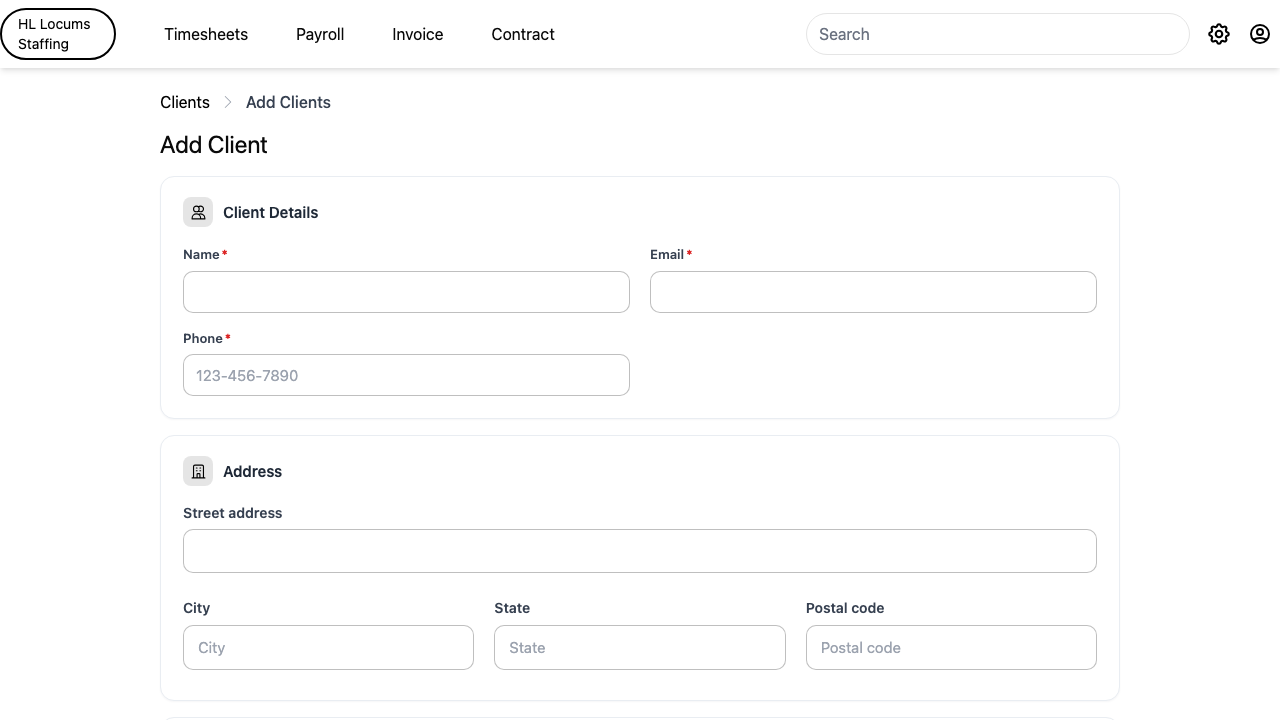
Click Add Client. Under Client Details, enter Name, Email, and Phone; under Address, start typing the street address to use autocomplete.
Screenshot: the Add Client form with the Client Details section (Name, Email, Phone) highlighted.
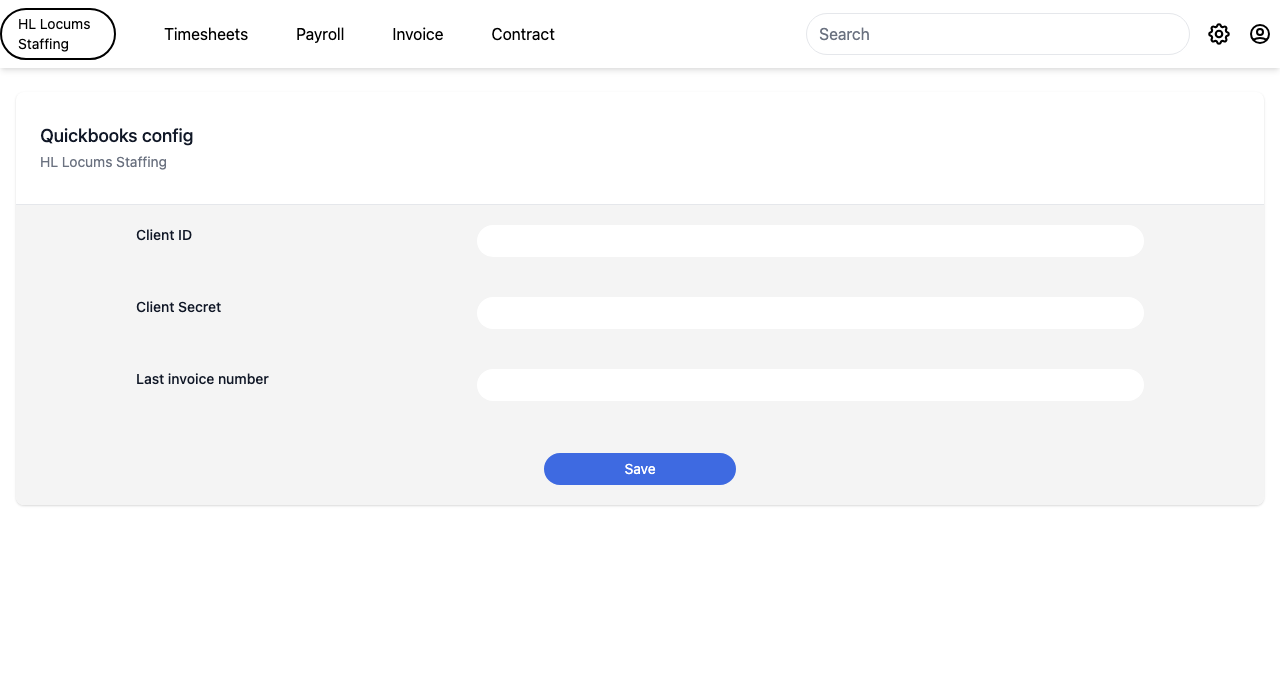
In the Settings section, turn on the options that apply, for example Expenses Billable, PTO, or Internal Client. If your account is connected to QuickBooks, you can also check Create in QuickBooks to create the customer there at the same time.
Click Add Client. A “Created successfully” message confirms it, and the client appears in the list.
To change a client later, click its name or the Edit icon to open its page, make your edits, and click Update. To remove one, use the Delete icon and confirm with Yes, Delete.
Tip: A client that already has timesheets can’t be deleted, you’ll see a message telling you it’s in use. Set the client to Inactive instead if you no longer work with them.
Open the client’s page and find the Facilities card, then click Add Facility.
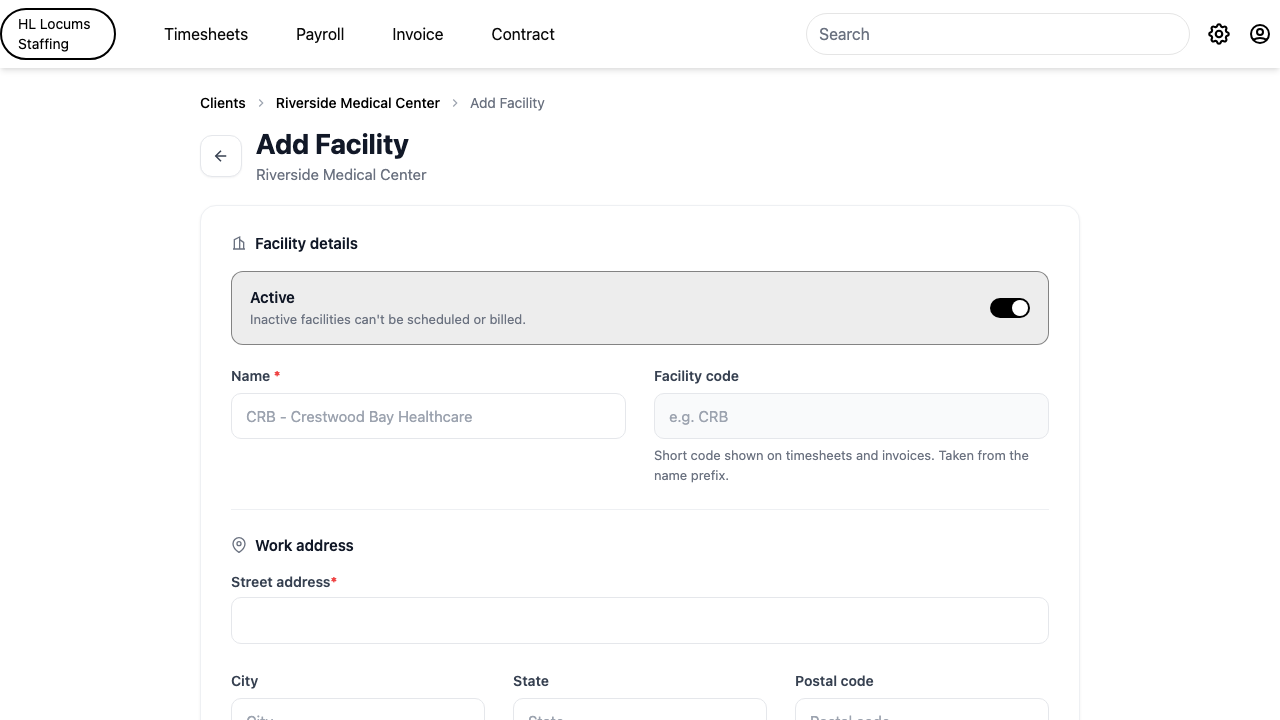
On the Facility details screen, enter the facility Name. A short Facility code is filled in for you from the name and appears on timesheets and invoices.
Under Work address, enter the street address (use the autocomplete as you type).
Screenshot: the Add Facility screen with the Name field, the auto-filled Facility code, and the Active toggle highlighted.
Leave Active on for a facility in use. Click Add Facility to save, a “Created successfully” message confirms it.
To retire a facility, open it, turn Active off (“Inactive facilities can’t be scheduled or billed”), and click Update Facility.
Tip: Search within a client’s facility list using the Search facilities... box; each row shows the code, name, and an Active/Inactive status pill.
Open the client’s page, expand the Supervisors section, and click Add supervisors.
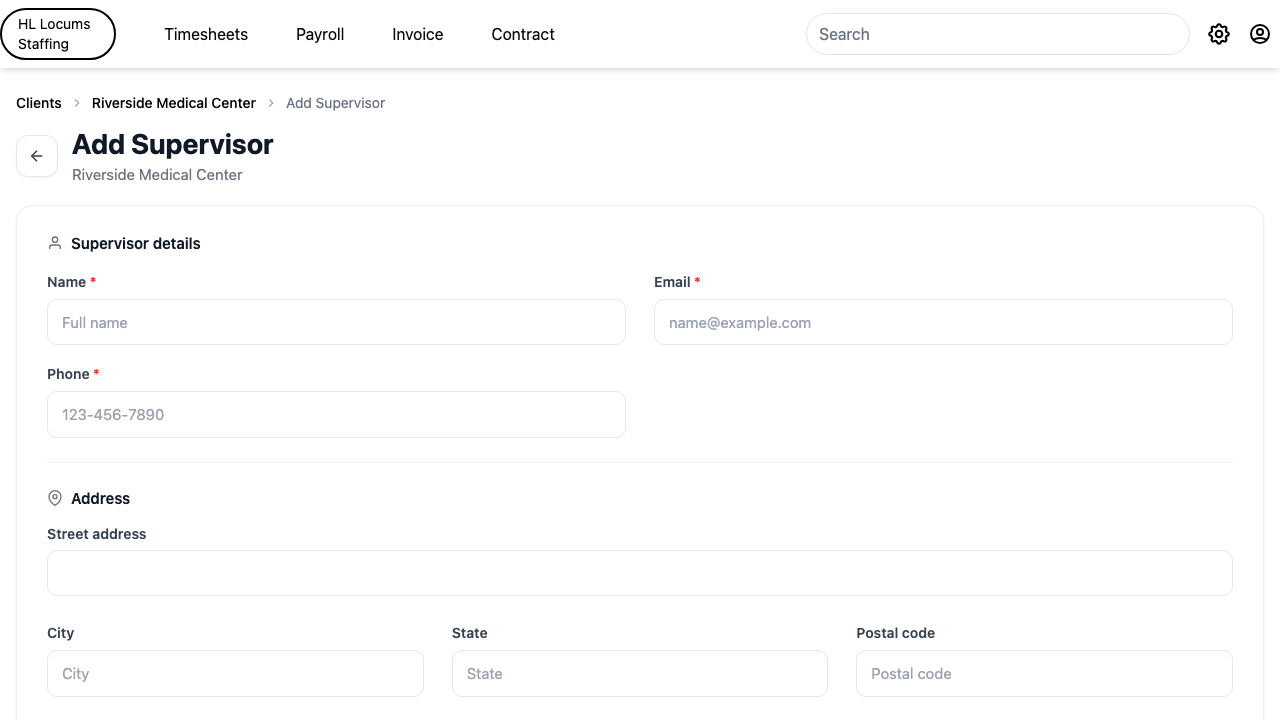
Under Supervisor details, enter Name, Email, and Phone, and optionally an address.
Under Account access, leave Generate auto password checked to email the supervisor a temporary password when the account is created (or turn it off and set a password yourself).
Screenshot: the Add Supervisor screen with Supervisor details and the “Generate auto password” checkbox highlighted.
Click Create Supervisor. A “Created successfully” message confirms it and the supervisor appears in the client’s list.
To assign one supervisor to more than one client, open the supervisor and use the Access for clients checklist to tick every client they should cover, then click Update. To stop a supervisor’s access, turn off the Active toggle and update.
Tip: Each supervisor has Notification Settings toggles, text alerts, automated voice reminders, and email, so they only get reminders in the way they prefer.
How to set a client’s holidays and leave policy
Admin, AgentTimesheet app → Clients → [client]
Holiday calendar: open the client’s page and click Manage Holidays to reach the Holidays page.
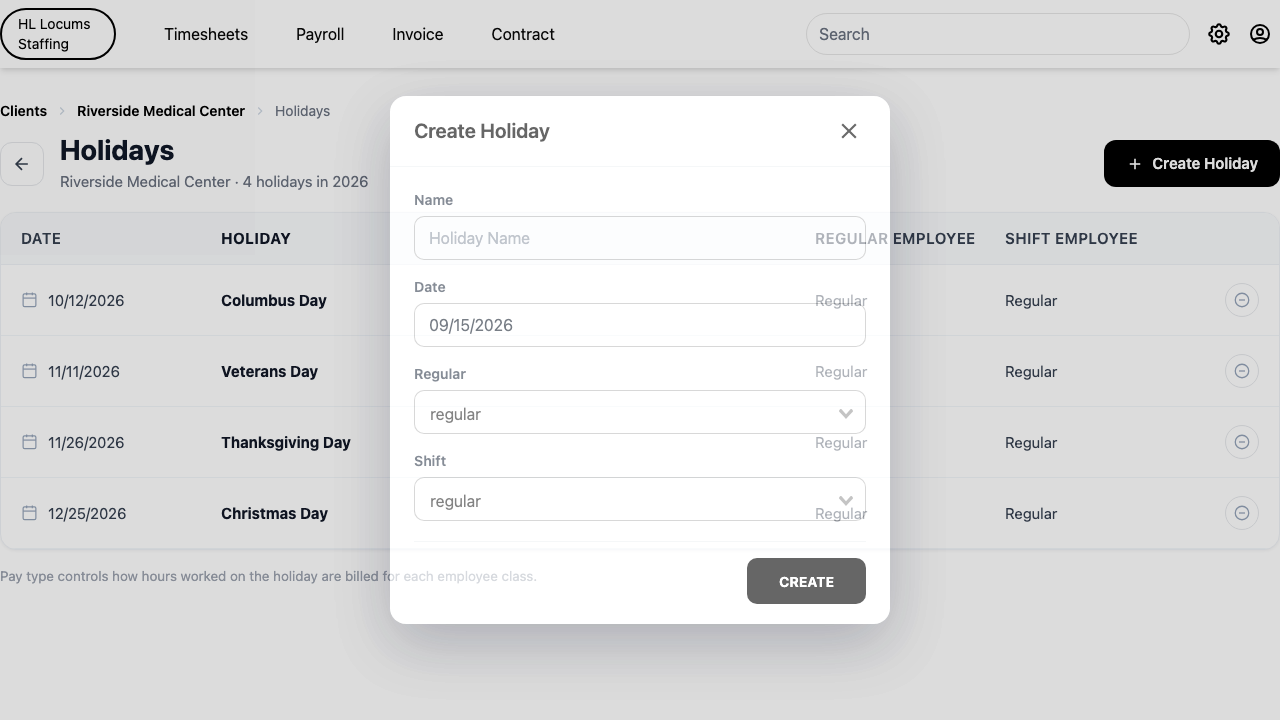
Click Create Holiday, then enter the holiday Name and Date. Choose how the day is paid using the Regular and Shift pay-type dropdowns, these set the pay handling separately for regular employees and shift employees. Click Create.
Screenshot: the Create Holiday window with the Name, Date, and the Regular / Shift pay-type dropdowns highlighted.
Existing holidays appear in a Date / Holiday / Regular Employee / Shift Employee list; click a row to edit it or use its remove button to delete one.
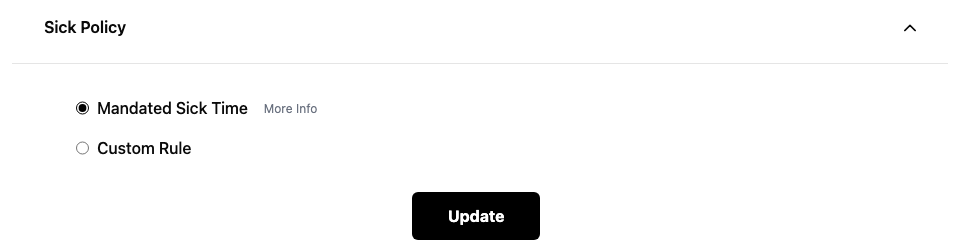
Sick & vacation accrual: back on the client’s page, expand the Sick Policy and Vacation Policy sections. Tick Sick Rule (or Vacation Rule) to turn the policy on.
Choose how leave builds up: check Grant full sick balance up front for a flat yearly grant, or set the Accrue row to earn hours perPay Period or per hours worked. Set the Up to ... per year cap, an optional Wait period before hours can be used, and choose Roll Over or Reset at year end.
Screenshot: the Sick Policy panel with the accrual row (per Pay Period / per hours worked), the yearly cap, and the Roll Over / Reset choice highlighted.
For vacation that changes with length of service, uncheck Same Every Year and use + Add year range to define a tier for each From–To range of years. Click Update to save each policy, a confirmation message appears.
Tip: Use the Show On Timesheet toggle on each policy to control whether that accrual appears on the provider’s timesheet.
How to manage agents and admins and set agent permissions
AdminTimesheet app → User Management
In User Management, pick the Agents or Admins tab and click Add Agent or Add Admin. Enter Name, Email, and Phone, choose whether to auto-generate a password, then click Create Agent / Create Admin.
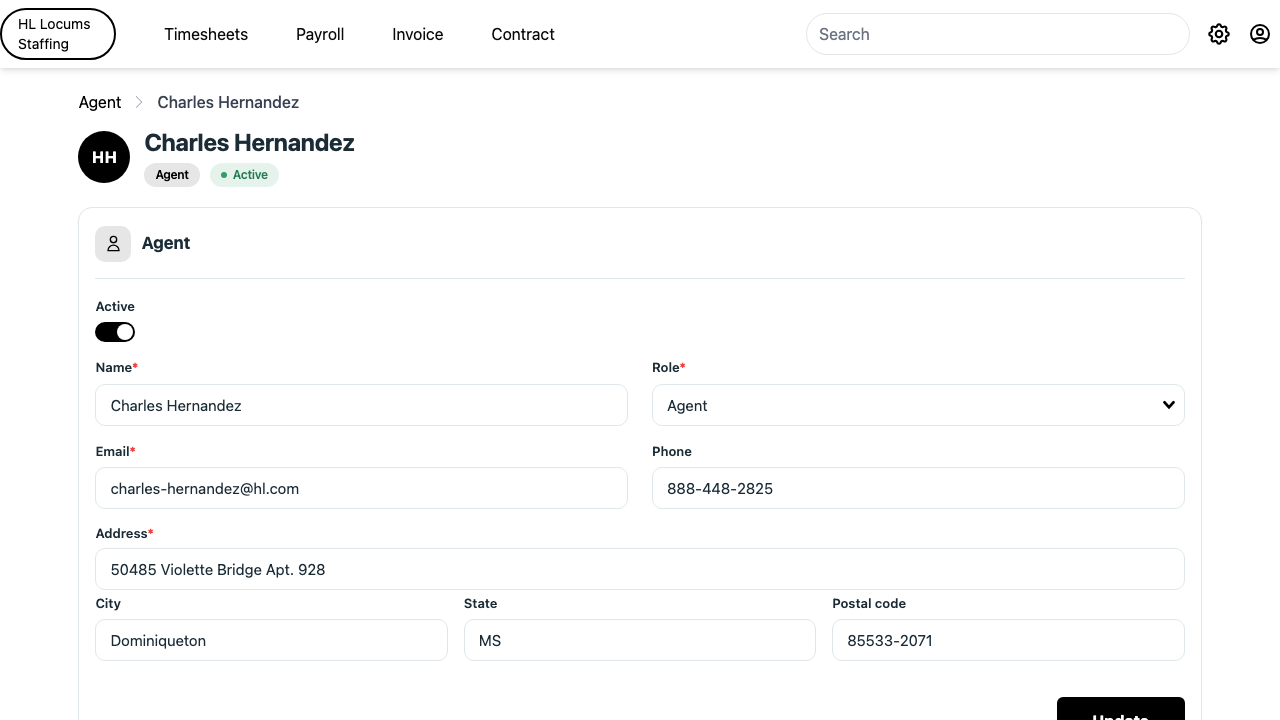
To edit someone, open their row and change details in the top card, then click Update. Use the Active toggle to activate or deactivate the account.
To promote or demote, use the Role dropdown on the edit page (for example, switch between Admin and Agent) and click Update. You’ll be taken to the page for the new role.
Screenshot: an agent’s edit page with the Active toggle and the Role dropdown highlighted.
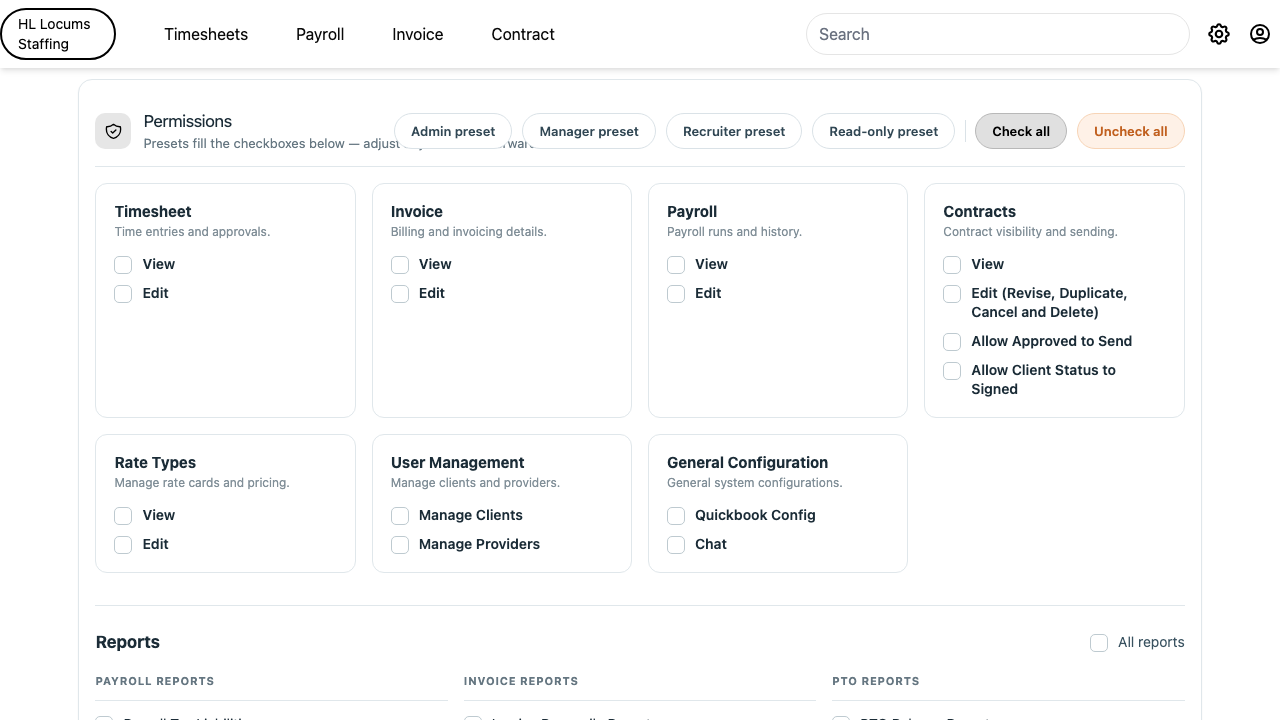
To control what an agent can access, scroll to the Permissions card on their edit page (“Presets fill the checkboxes below, adjust any of them afterwards”).
Click a preset to get started fast, Admin preset, Manager preset, Recruiter preset, or Read-only preset, or use Check all / Uncheck all. Then fine-tune the individual checkboxes for modules, the Reports section (with an All reports master toggle), and the Dashboards section (with an All dashboards master toggle).
Screenshot: the Permissions card with the four preset buttons and the module/report/dashboard checkboxes highlighted.
Permissions save automatically as you change them, a “Permissions updated successfully” message confirms each change.
Tip: Presets are just a starting point, after applying one, you can check or uncheck any single item, so an agent can get, say, the Recruiter preset plus one extra report.
Payroll & Invoicing
These tasks live in the Spreadsheet app, a separate part of TempButton that you reach from the "Billing" / Spreadsheet link. Because it shares your sign-in with the Timesheet app, switching over never asks you to log in again. Everything here is for Admins and Agents; Providers can see their own rates and the shift-type list. It covers running payroll end to end, managing rates and shift types, creating and sending invoices, and connecting QuickBooks and your payroll processor.
How to run a payroll (draft → preview → pay)
Admin, AgentSpreadsheet app → Payroll → Run payroll
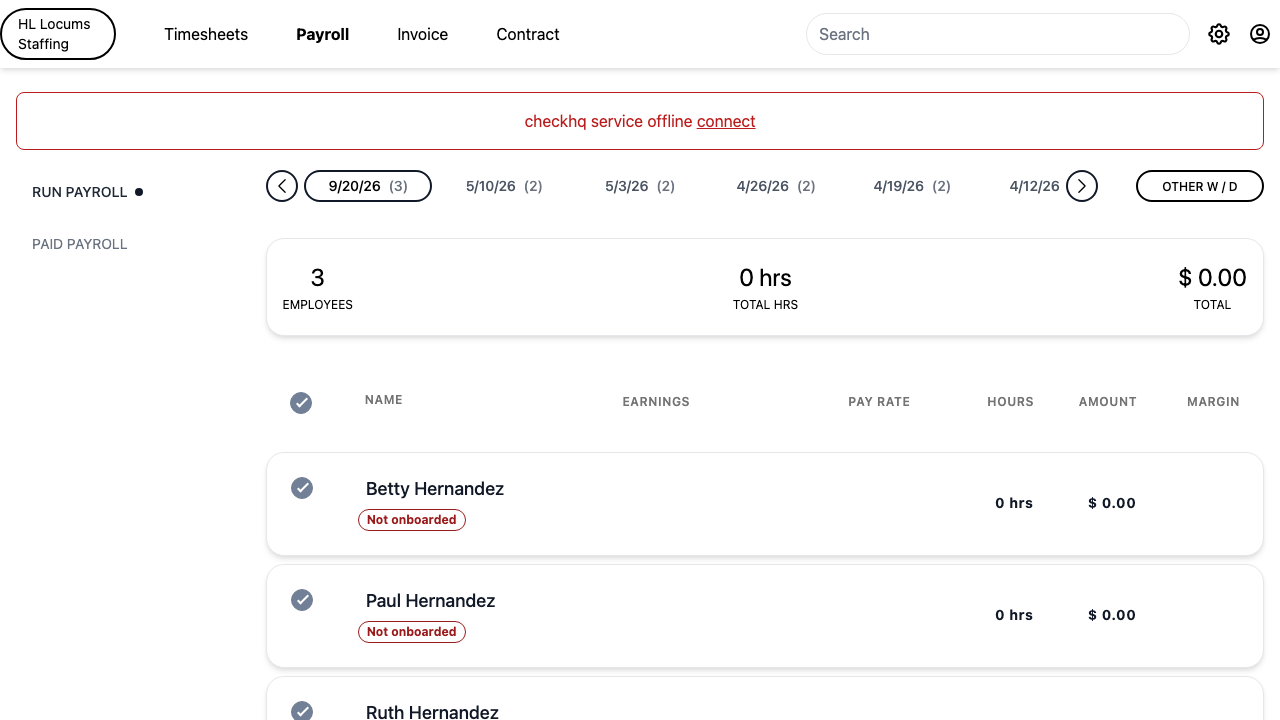
Open the Spreadsheet app and go to Run payroll. A small dot next to the tab means there are unpaid timesheets waiting to be run.
Choose the pay period. Pick the week-ending you want, or use the Other w / d date picker to jump to a different week. Until you pick one you'll see "Select weekending date for create payroll".
Review the provider list. Each provider shows one line with Name, Earnings, Pay Rate, Hours, Amount and Margin, and the summary strip at the top totals Employees, Regular, OT, Total hrs and Total.
Screenshot: the Run payroll provider list with the top totals strip (Employees / Regular / OT / Total hrs / Total) and the per-provider columns (Name, Earnings, Pay Rate, Hours, Amount, Margin) visible.
Watch for the visual flags: a red Not onboarded or No workplace pill means the provider isn't fully set up for payroll yet; a small green up-arrow or red down-arrow shows the rate changed since last payroll (hover to see the old rate); a yellow card flags a pending timesheet; and a blue Comments: box shows notes left on a workday.
Adjust amounts if needed. Click a provider to open their editor (titled with their name), where you enter the rate, hours and amount in their own fields. Use Add earning or Add reimbursement to add a line, then Save. To bring in someone who isn't listed, use Add employee at the bottom and pick them from Select employee.
Set Pay day (a payment date) and confirm the Pay period range, then click Preview payroll.
In the confirmation window ("Confirm paid date … Employees (N)") review everyone one last time. You can click Export Payroll to download a spreadsheet copy, then click Pay payroll to create the run.
You'll see a "Payroll paid" confirmation, and the run moves to Paid payroll.
Tip: Every run moves through draft, then pay, then paid, these steps aren't skippable. If you changed a rate while editing, you'll be asked whether to keep that rate for future weeks too.
How to finalize pay and review the cash-requirements report
Admin, AgentSpreadsheet app → Payroll → Run payroll (payment report)
After previewing a run, open the payment report. Click Show details to expand the full breakdown.
Review the cash you'll need. The report lists, per employee, an Earnings section, Taxes Company and Taxes Employee sections, and a Net Pay figure, under a Total Employees – N header.
Confirm the Pay day and Pay period shown at the bottom of the report.
Click Pay to submit the run for final payment processing.
You'll see "Payroll paid successfully" and the run appears under Paid payroll. Opening a paid run later shows its Company Taxes and Liability totals.
Tip: If the report says it can't be found, go back and rebuild the draft with Create draft pay, then reopen the report.
How to view paid payrolls and reopen / re-approve a run
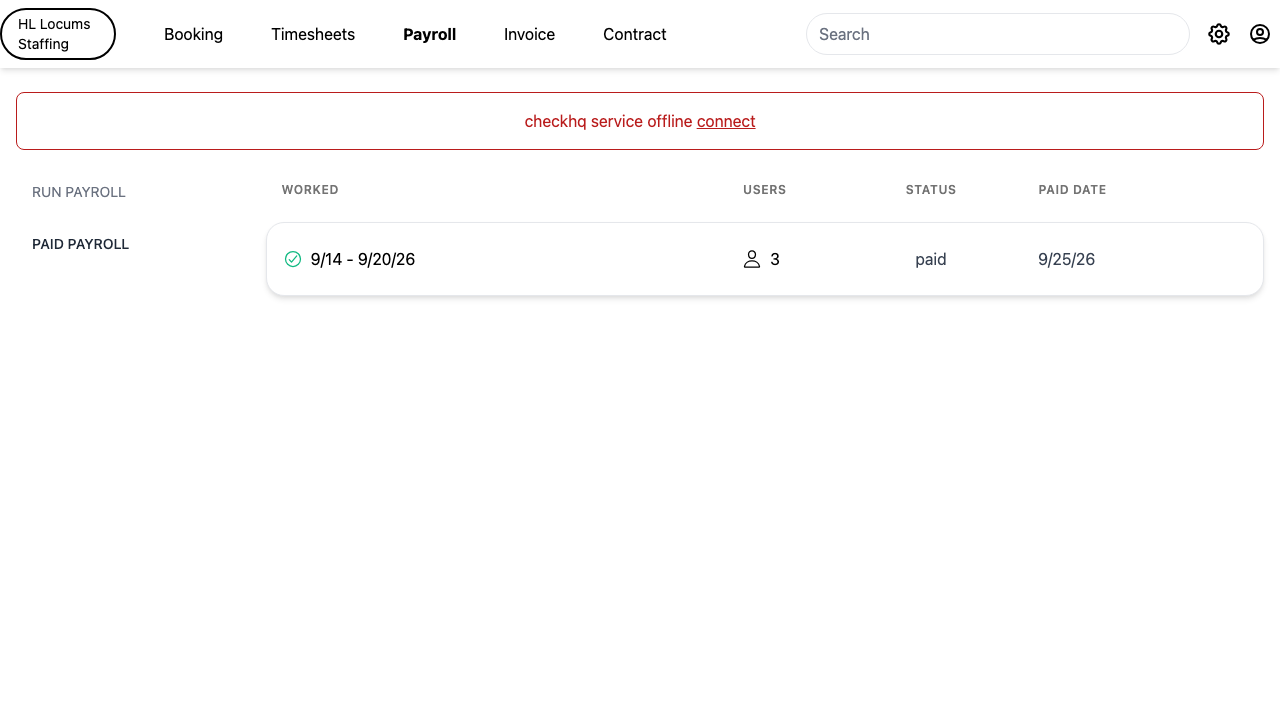
Go to Paid payroll. The list shows Worked (the worked date range), Users, Status and Paid Date. A run still finishing shows a spinner and "creating pending payroll".
Click any row to open its details ("Paid Payroll …"), where you can see the full provider breakdown plus the Company Taxes and Liability totals.
Screenshot: a paid-payroll details window with the provider breakdown and the Company Taxes / Liability totals in the lower right, plus the Re-open and Generate paystubs buttons.
To reopen a run that's stuck mid-processing, click Re-open (available while the status is pending). This opens a page headed "Payroll …" with the status shown on the right.
Click Re-Approve. When asked "Are you sure you want to re-approve payroll …?", choose Re-Approve to confirm (or Cancel to back out).
You'll see a "Success" window reading "Payroll re-approved successfully."
Tip: Only a run whose status is still pending can be reopened. If it isn't pending, the page tells you so instead of offering the button.
How to manage a provider's pay & bill rates
Admin, Agent (bill rate hidden from Providers)Spreadsheet app → Employees
Open the Employees page. Each provider is listed with their current Pay and Bill rates; use the Search box to find someone.
Click a provider to open their rate editor (titled with their name). Rates are grouped by client, with Pay and Bill columns and one line per earning type / shift.
Screenshot: the rate editor grouped by client, showing the Pay Rate and Bill Rate fields on an earning line and the "+ Add Effective Date Rates" link on the client row.
Enter the amounts in the Pay Rate and Bill Rate fields. Use Add earning to add another line, or Add new client to add a client the provider works for.
To schedule a future rate change, click + Add Effective Date Rates on the client row. Pick the effective date and enter the New Pay Rate and New Bill Rate, add more lines with Add New Rates if needed, then Save.
Click Save. You'll see a confirmation that the provider's rates were saved.
Tip: Changing a rate automatically recalculates the provider's already-entered, unpaid shifts, you don't have to re-enter them. If a future effective date lands before the provider's last pay, you'll get a heads-up that earlier pay may need adjusting.
How to view your company's shift types
Admin, Agent (Providers can see the list)Spreadsheet app → Shifts
Open the Shifts page.
Review your catalog. Each shift type shows its Name, Category, Default Pay Rate and Default Bill Rate.
Screenshot: the Shifts table with the Name, Category, Default Pay Rate and Default Bill Rate columns.
Use these shift types as the reference for rate cards and for the shifts your providers enter on their timesheets.
Tip: The default rates here are the starting point; a provider's actual pay and bill rates for a specific client are set on their rate card (see "Manage a provider's pay & bill rates").
How to view, filter and send draft & sent invoices
Admin, AgentSpreadsheet app → Invoices
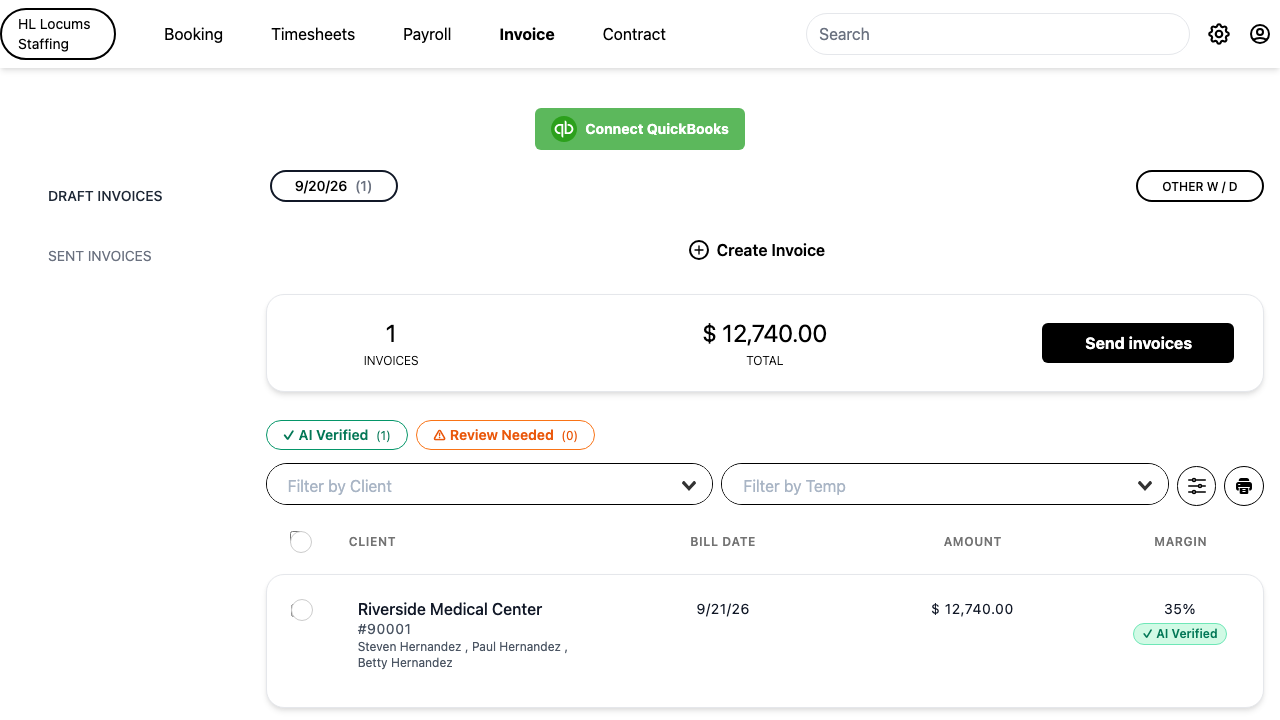
Open Invoices and choose Draft Invoices or Sent Invoices. Pick a week-ending from the strip along the top.
Narrow the list with the filter icon: Filter by Client or Filter by Temp. Each invoice shows Client, Bill Date, Amount and Margin.
Read the row colors: a blue border means the invoice has comments (a Comments: block expands underneath), an orange border means it has pending timesheets, and a red border flags a problem such as a zero amount or a missing rate.
Screenshot: the invoice list with the Client / Bill Date / Amount / Margin columns and a color-flagged row (e.g. a blue-bordered card with the Comments block expanded).
Select the invoices you want with the row checkboxes (or the select-all box).
Click Send invoices (on the Draft tab) or Resend invoices (on the Sent tab). When a client is filtered, a Download PDF button also appears so you can save copies instead.
Confirm in the send window, which summarizes how many invoices and clients you're sending. When it finishes you'll see "Invoices sent".
Tip: If your company uses an invoice-factoring lender, a "Fund with" button appears so you can send the selected invoices straight to the lender instead of the client.
How to create invoices (manually or from payroll / timesheets)
Admin, AgentSpreadsheet app → Invoices
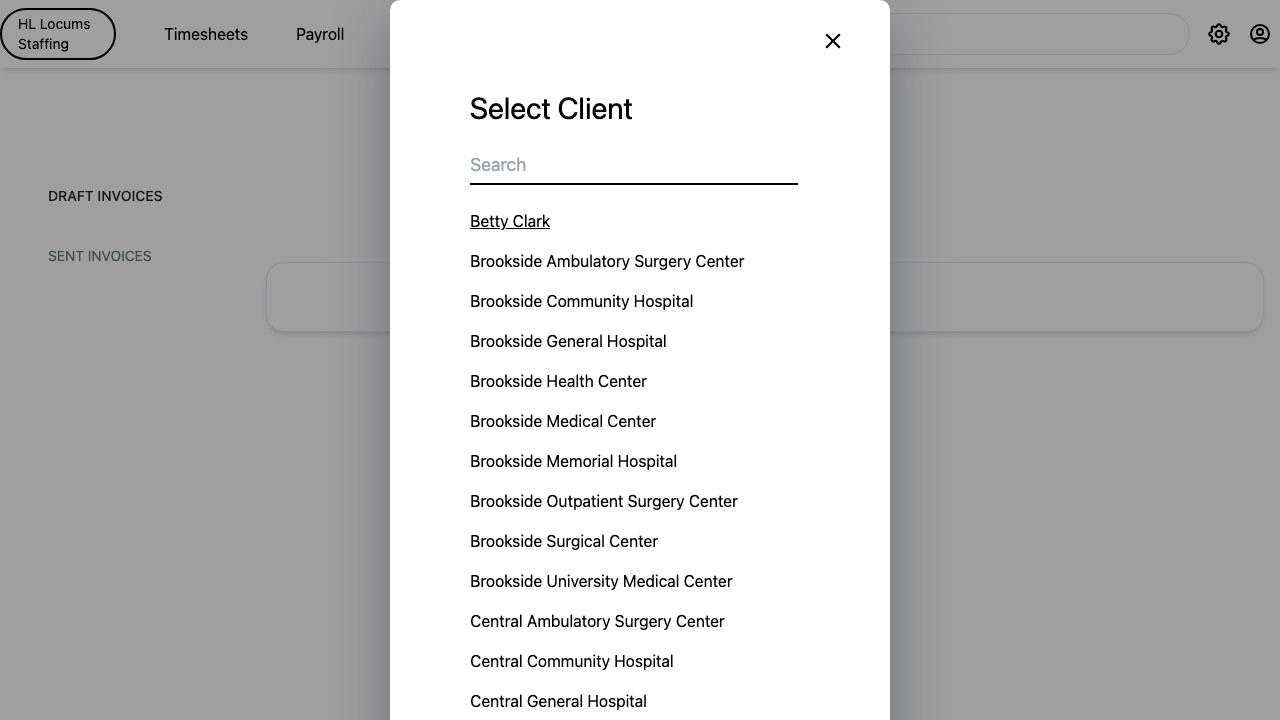
One-off manual invoice: on the Invoices list, click Create Invoice, choose a client from Select Client, and confirm with Yes. You'll see "Invoice created successfully" and the new invoice opens for editing.
Screenshot: the "+ Create Invoice" control and the Select Client picker with the search box.
From a paid payroll batch: open the "List payroll" window. Check the Next invoice number, then click Create invoices next to the week-ending you want to bill. If invoice numbers collide, fix the flagged numbers first, as the window instructs.
From uninvoiced timesheets: choose the "Not invoiced timesheets" screen, pick a week-ending, and click Preview invoice. In the confirmation window ("Confirm create invoices for clients (N)") click Create.
When invoices are generated you'll see an "Invoices created" confirmation and land on Draft Invoices.
Tip: Depending on your company's settings, an invoice may be created automatically as soon as a timesheet is approved, so you may find some already waiting in Draft Invoices.
How to edit an invoice's details and line items
Admin, AgentSpreadsheet app → Invoices → (open an invoice)
Open an invoice from the list to reach its edit screen.
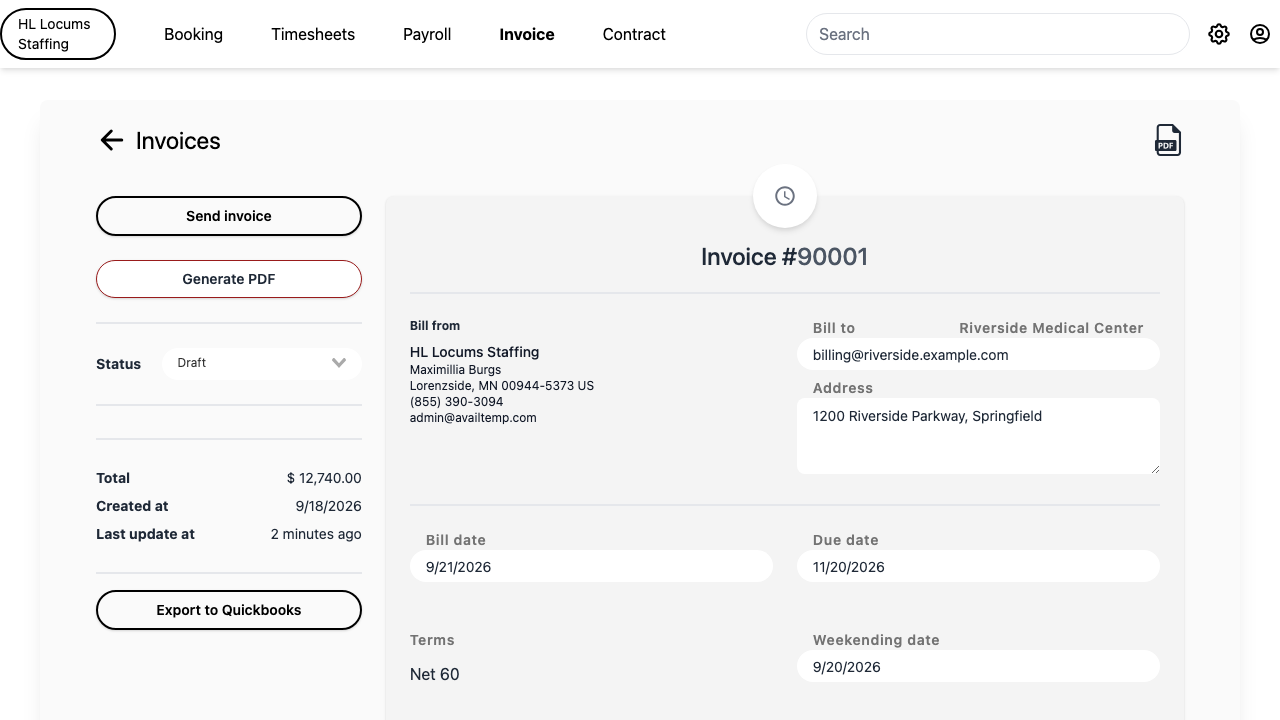
Edit the header: the Bill to client email and address, and the Bill date, Due date and Weekending date. The Bill from block shows who the invoice is billed from.
Screenshot: the invoice edit screen showing the Bill from / Bill to blocks and the Bill date / Due date / Weekending date fields.
Edit the line items in the table (Employee, QTY, Rate, Total). To change a line, open its editor, where you can adjust the amounts and use Add item or Add reimbursement (with Attach for a receipt), then Save.
Expense and reimbursement lines appear under Expenses (per provider) and Other Expenses.
Click Generate PDF to produce the invoice PDF (you'll see "Invoice generated"), or Save invoice to keep your changes.
If QuickBooks is connected, click Export to Quickbooks to push the invoice across.
Tip: Enter every amount, rate and hours figure in its own field, the invoice adds them up for you. Save before sending; the screen reminds you if you try to send with unsaved changes.
How to read an invoice's change log and status history
Admin, AgentSpreadsheet app → Invoices → (open an invoice)
On the invoice edit screen, scroll to the Change Log panel. The heading shows how many entries there are.
Filter with All, Manual Edit, or the assisted-review filter. The table columns are Action, Changes, User and When.
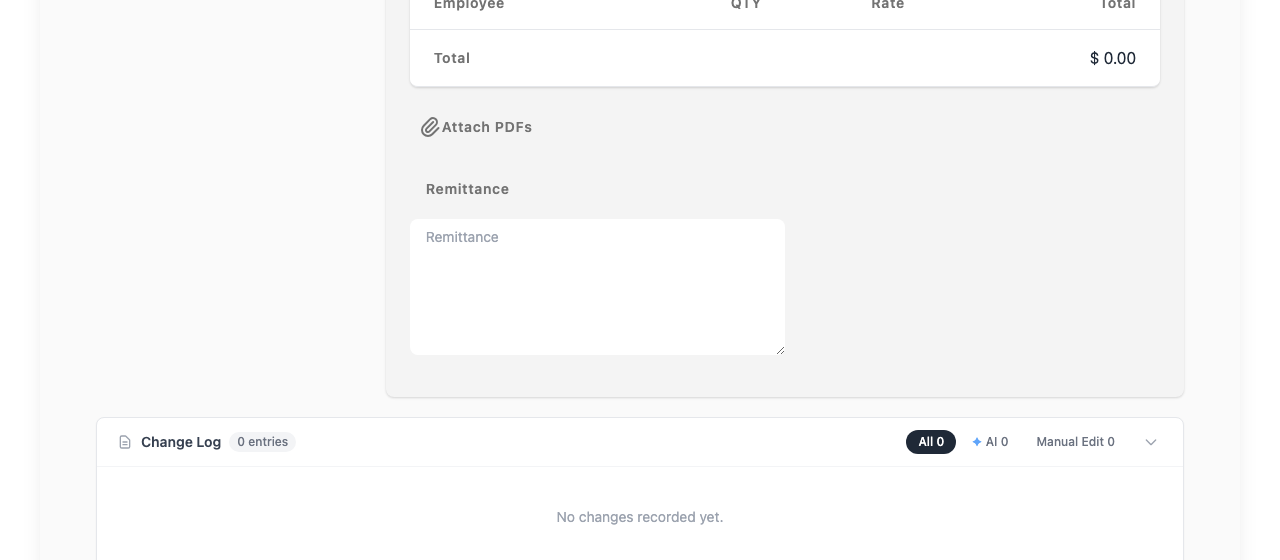
Screenshot: the Change Log panel with the All / Manual Edit filter buttons and the Action / Changes / User / When columns, showing a before→after change line.
Read each entry in plain English, an action label such as Add Expense, Update Rate or Remove Rate, with the before-and-after values (for example, a rate shown as an old amount changing to a new amount) and who made the change.
For the run of statuses, open the separate History card, which lists each status change and when it happened.
Tip: The change log is a complete audit trail, every edit is recorded with the person's name and time, so you can always see what changed and why.
How to use the assisted invoice review
Admin, Agent (if enabled for your company)Spreadsheet app → Invoices → (open an invoice)
On the Invoices list, filter by review status: AI Verified shows invoices that look clean, and Review Needed shows ones with something to check. You can narrow further by issue, such as a rate mismatch, an hours shortfall, or a fee mismatch.
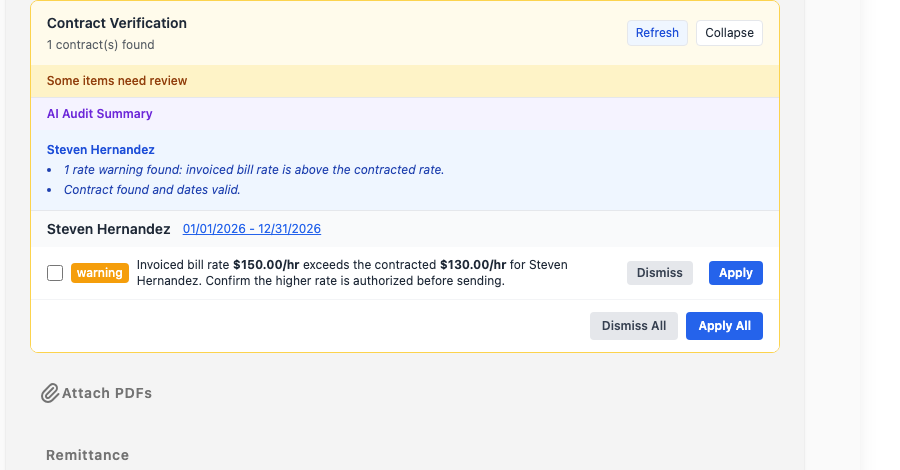
Open a flagged invoice and find the Contract Verification card. A banner summarizes the result, for example "All items match the contract" or "Some items need review", over per-provider findings.
Screenshot: the Contract Verification card on the invoice edit screen, showing per-provider findings with their Apply and Dismiss buttons.
Act on each finding. Use Apply to accept a suggested correction, or Dismiss to set it aside, when you dismiss, you're asked for a short reason so it's on the record. You can also use Apply All or Dismiss All.
Once every finding is applied or dismissed, send the invoice as usual.
Tip: The assisted review only recommends, a person always decides. Nothing is sent on its own, and if your company hasn't turned the feature on, your invoicing works exactly the same without it.
How to connect QuickBooks and export invoices and bills
Admin (Agent with permission)Spreadsheet app → QuickBooks / Invoices
Click Connect QuickBooks and sign in to QuickBooks to authorize the connection. Once connected you'll see a green confirmation.
Screenshot: the green "Connect QuickBooks" button.
Map your products and services. Each rate line needs a matching QuickBooks product/service attached on the rate screen; if one is missing, the invoice shows a note asking you to attach it there first.
To export an invoice, open it and click Export to Quickbooks. When it finishes, the invoice shows an "Integrated quickbooks" confirmation.
If a possible duplicate is detected, a warning appears, confirm the invoices are not duplicates and click Export to continue.
Tip: If an export is blocked because a product/service isn't set up, the message points you to the rate screen, attach it there and try the export again. Any mismatch between TempButton and QuickBooks is flagged for you to review.
How to onboard your company and providers with the payroll processor and view paystubs
Admin, AgentSpreadsheet app → CheckHQ integration
Open the CheckHQ integration screen. It lists your Company and its Status, then your providers with their onboarding status.
Connect your company if prompted. When told your company isn't set up yet, click Create to register it with the processor.
Onboard a provider by clicking onboard in the provider's row. This opens CheckHQ's own secure onboarding page in a new tab, where the provider enters their tax and banking details, that sensitive information is handled on the processor's secure page, not inside TempButton.
To get paystubs, open a paid payroll's details and click Generate paystubs. You'll see "Paystub generated successfully".
Click a provider's line in the paid-payroll details to open their paystub PDF.
Tip: Paystubs are a premium feature, if it isn't part of your plan, the button opens a short "Book A Meeting" prompt instead of generating a stub.
Dashboards, Reports & Analytics
These tasks are for Admins, Agents, and Recruiters who track how the business is doing, revenue, margin, contracts, commissions, and provider trends. Which dashboards and reports you see depends on your role and the permissions your administrator has granted you: an Admin typically sees everything, while an Agent or Recruiter sees only the dashboards and reports they've been given access to. If a dashboard mentioned here isn't on your hub, ask your administrator to grant you access.
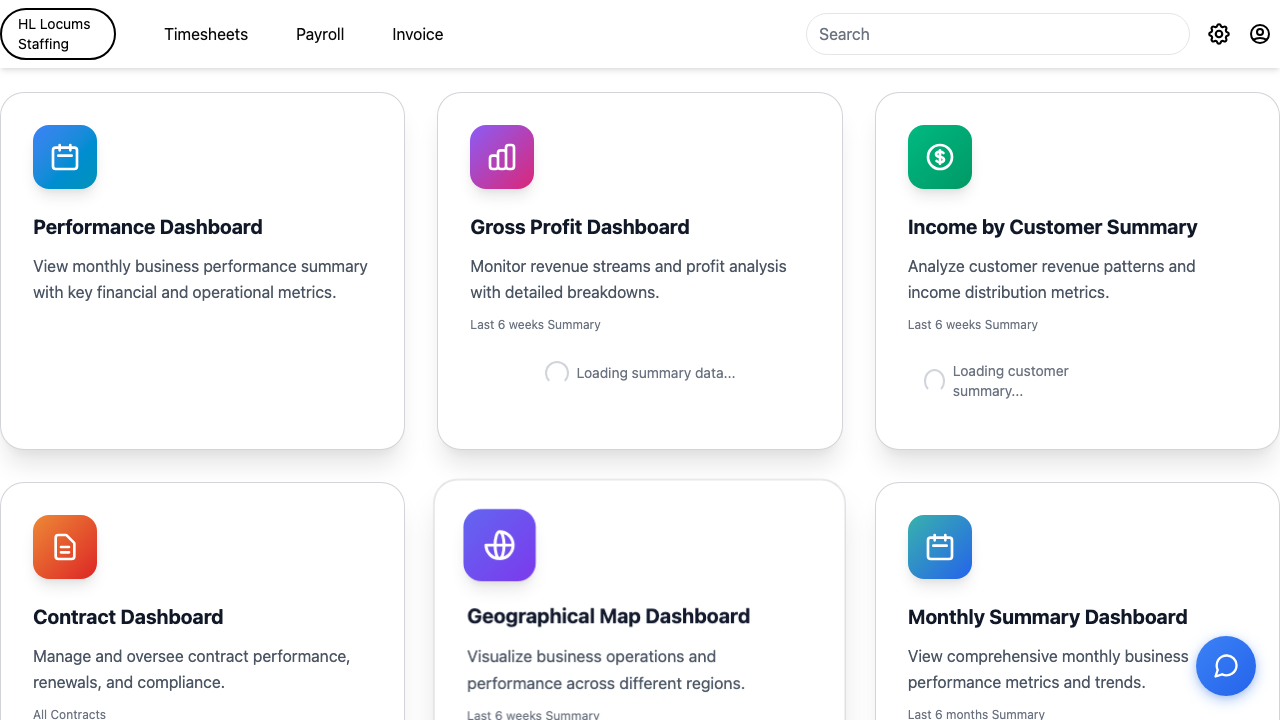
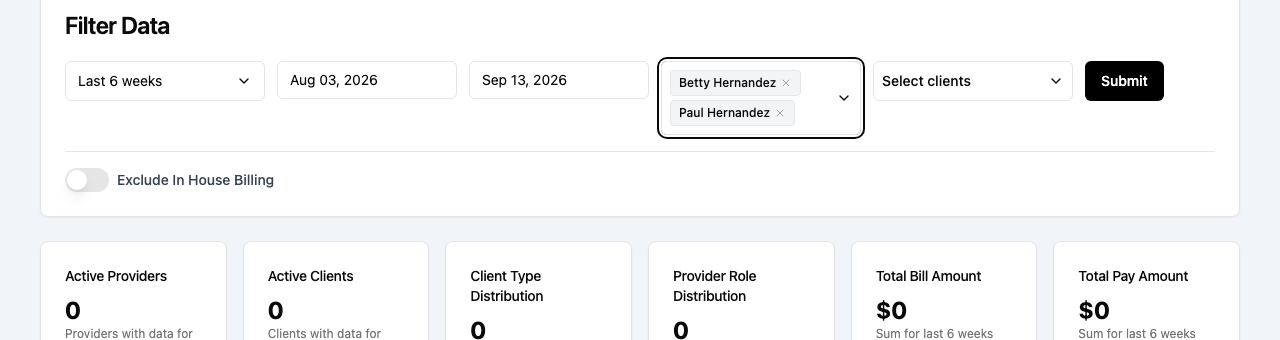
The hub opens as a grid of cards, one per analytics dashboard you're allowed to view, such as Performance Dashboard, Gross Profit Dashboard, Income by Customer Summary, Contract Dashboard, Geographical Map Dashboard, Monthly Summary Dashboard, Contract Forecasting, YoY Performance Dashboard, and Audit Trail Dashboard.
Screenshot: the Dashboards hub showing the grid of dashboard cards, each with an icon, title, and short description; highlight two or three cards.
Some cards show a quick preview right on the tile (for example a few headline totals or a date range like "Last 6 weeks").
Click any card to open that dashboard.
Tip: The set of cards is tailored to you. If a colleague sees a card you don't, it's because their account has that dashboard's permission enabled, an administrator can turn it on for you.
How to use the Company Dashboard
Admin, or Agent with permissionTimesheet app → Dashboards → Company Dashboard
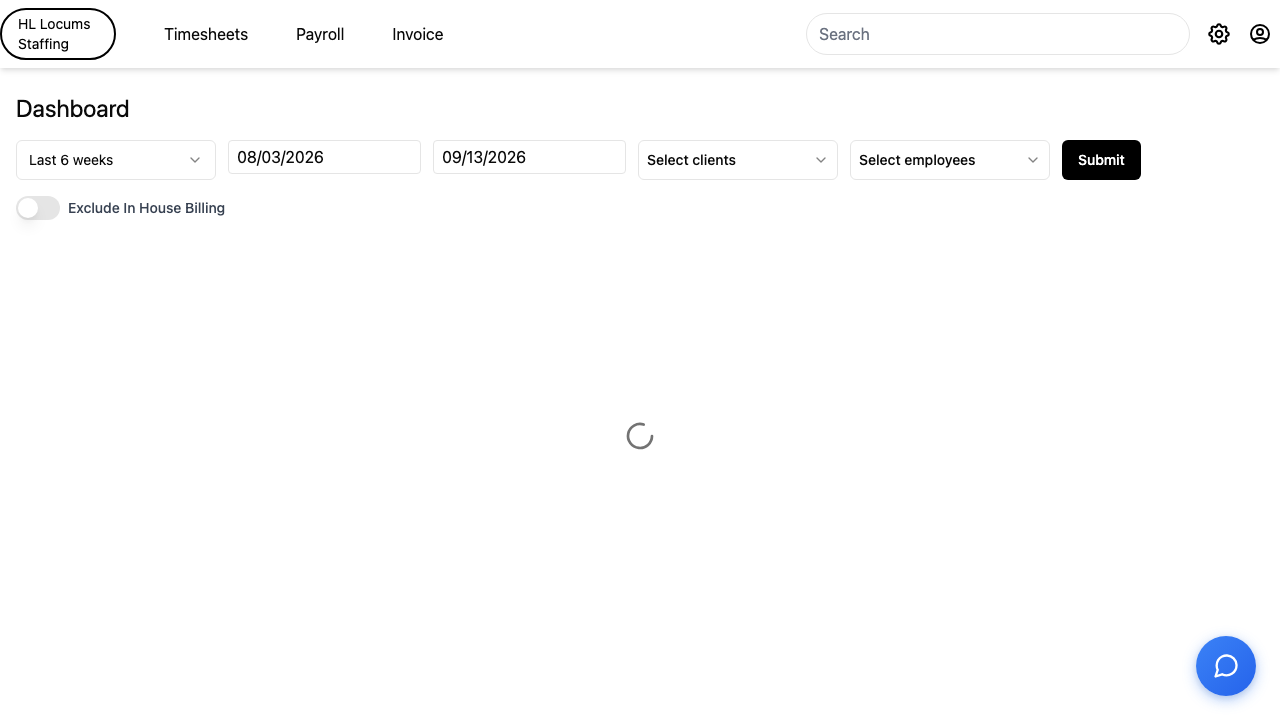
Open the Company Dashboard. At the top you'll see a filter bar and a Submit button.
Choose your time period: pick a date filter, then set the date range you want to analyze.
Optionally narrow the view by Client, Employee (provider), or Client Type.
Screenshot: the Company Dashboard filter bar with the date range and Client / Employee pickers, and the Submit button highlighted.
Click Submit. The dashboard fills in the summary cards (such as number of workers, gross profit, and margin percentage) and the charts below.
Review the charts: sales, gross margin, gross profit, and payroll for the period you selected.
Tip: A chart only appears when there's data for your filters. If a chart is missing, widen the date range or clear a filter and Submit again.
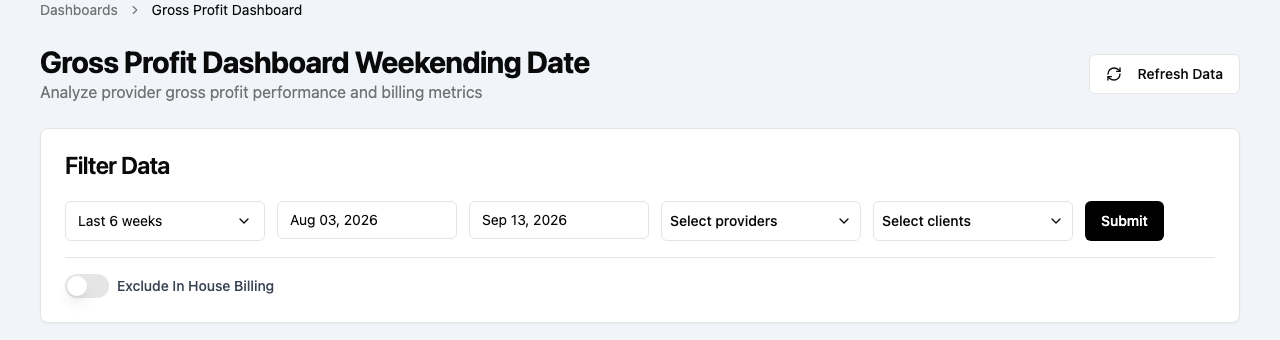
How to filter an analytics dashboard and export the data
Admin, or Agent with permissionTimesheet app → Dashboards
On a dashboard's filter bar, open a filter such as Client, Employee, or Client Type and search for what you want.
For each item, choose include to keep only matching records, or exclude to leave them out.
Screenshot: a filter picker with the search box and the include / exclude toggle on a listed item highlighted.
Your choices appear as removable chips on the ACTIVE strip, included items and excluded items are shown separately. Remove any chip with its ×, or choose Clear all to start over. When nothing is selected you'll see "No filters applied, showing all results."
Screenshot: the ACTIVE filter strip with a couple of include chips and an exclude chip, and the "Clear all" button highlighted.
Apply the filters (click Submit or Apply) to refresh the charts and tables.
To take the data with you, use the export controls, typically CSV, Excel, or PDF (some views also offer a chart image download). The file downloads to your device.
Tip: Include and exclude can be combined, for example, include one client type while excluding a single client within it.
How to use Contract Forecasting
Admin, or Agent with permissionTimesheet app → Dashboards → Contract Forecasting
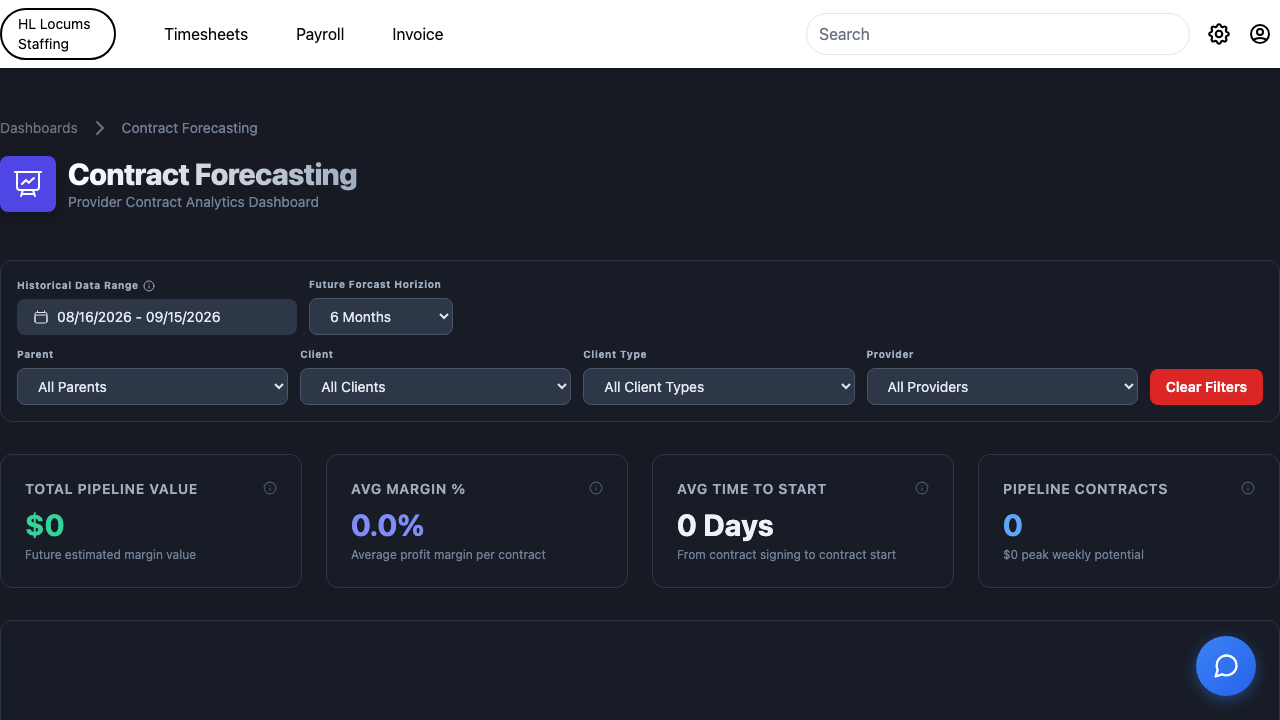
Open Contract Forecasting from the hub. It shows your signed contracts projected forward into the future.
Set the date range for the signed contracts you want to include, and set a forecast range (the future horizon to project across).
Screenshot: the Contract Forecasting header with the date range and forecast horizon controls highlighted.
Review the summary cards, total signed contracts, average margin, and projected trajectory, and the weekly margin chart, which shows your projected portfolio margin week by week.
Screenshot: the weekly portfolio margin chart with the projected trajectory line highlighted.
Use the provider search and status filters to focus on specific people or contracts, and open the data table to see per-provider weekly and total dollars, hours, and margin percentage.
Export with Export Current View (just what's filtered) or Export All Data.
Tip: Back-dated contracts are excluded from the forward projection, so the future numbers reflect only contracts that project cleanly ahead.
How to use the Year-over-Year Performance dashboard
Admin, or Agent with permissionTimesheet app → Dashboards → YoY Performance Dashboard
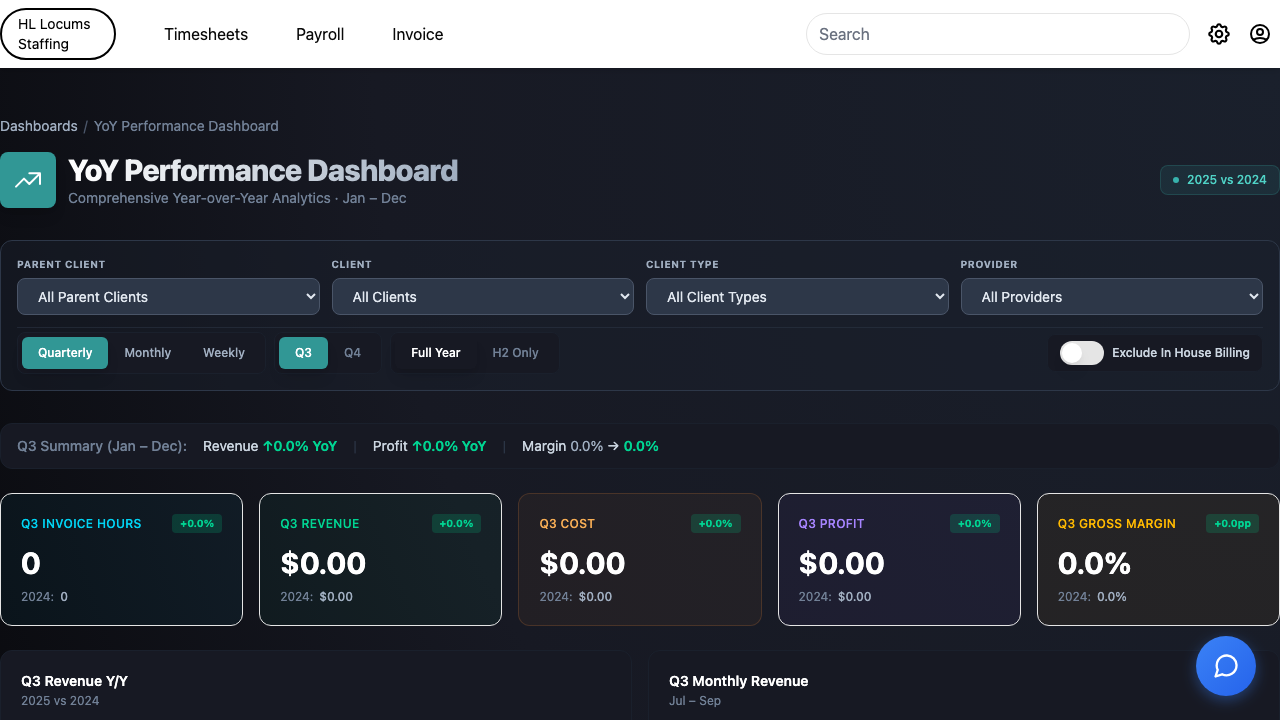
Open the YoY Performance Dashboard. It compares this year against last year across Revenue, Cost, Profit, Hours, and Margin.
Screenshot: the year-over-year comparison view with the current-vs-prior-year metric cards highlighted.
Narrow the comparison with the Parent Client, Client, Client Type, and Provider filters. Use Clear to reset them.
Turn on Exclude In House Billing if you want internal billing left out of the totals.
Choose a period to focus on, a full year or an individual quarter.
Scroll to the Raw Data table to see the underlying rows; search and page through them for the detail behind any figure.
Tip: Compare the same quarter across years rather than a partial current quarter against a full prior one, it keeps the year-over-year change honest.
How to use the Commissions dashboard and read Actual Margins
Admin, or Agent with permissionTimesheet app → Dashboards → Commissions
Open the Commissions dashboard to see contracts with their assigned recruiter and account manager and the commission percentages.
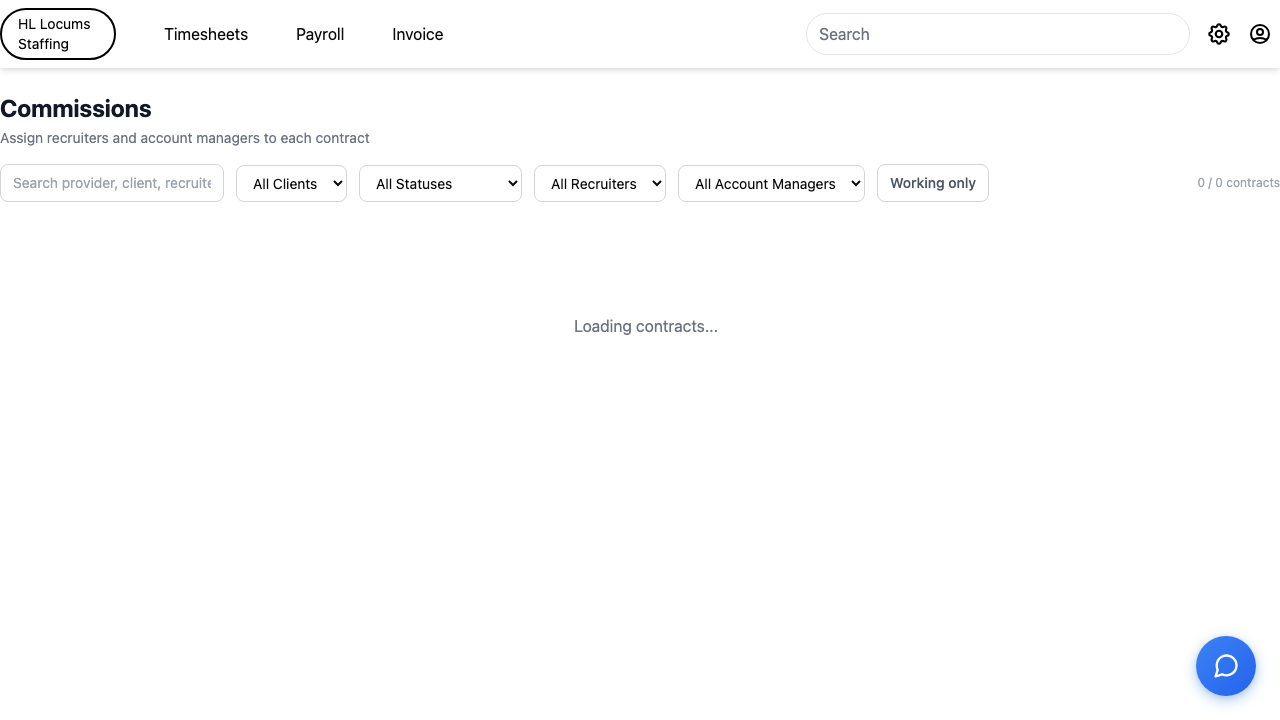
To record who earns commission on a contract, assign a Recruiter and/or Account Manager and set the percentage, then save.
Screenshot: the Commissions table with a contract row's recruiter / account manager assignment and percentage field highlighted.
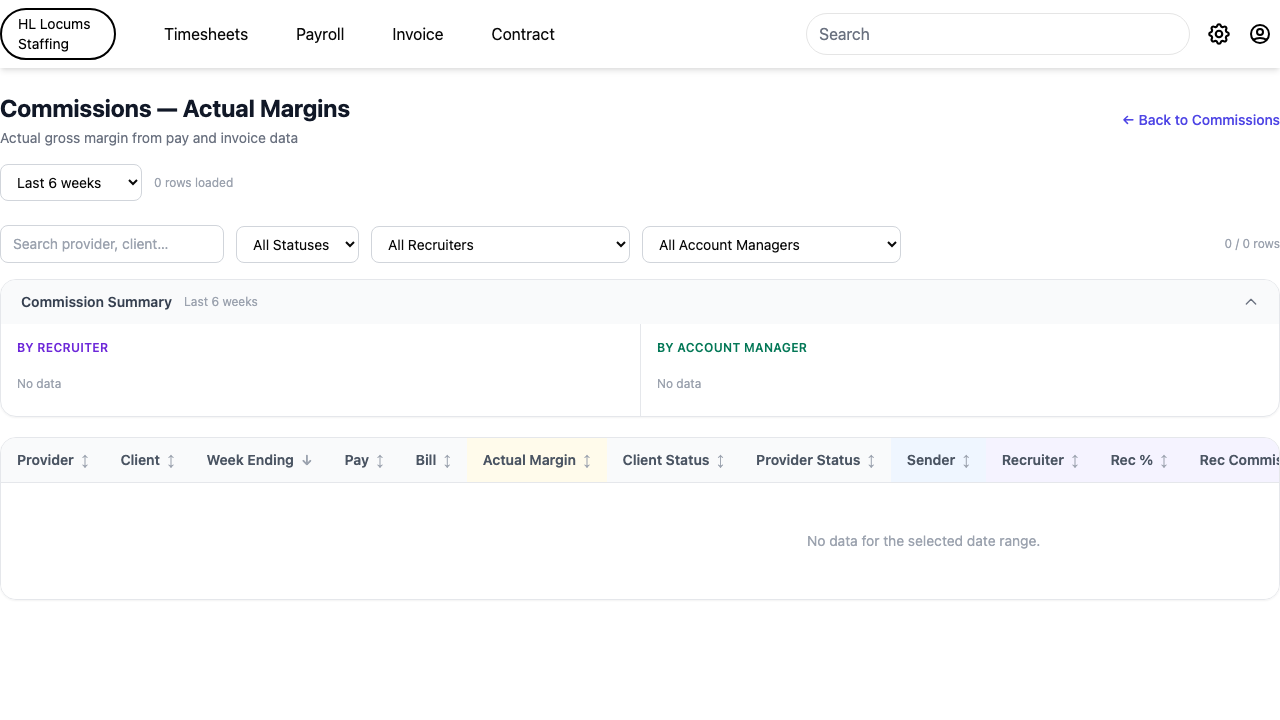
Switch to the Actual Margins view to see actual gross margin calculated from real pay and invoice data, rather than projections.
Pick a period using the presets (This week, Last week, Last 4 weeks, This month, This quarter, This year, and so on) or choose Custom period and set a date range.
Screenshot: the Actual Margins period preset dropdown open, with This quarter highlighted.
Filter by provider or client search, contract status, recruiter, or account manager. The Commission Summary and the By Recruiter breakdown show weeks, actual margin, and commission side by side, with a Total row.
Tip: Actual Margins reflect approved pay and issued invoices, so numbers firm up as more of a period's timesheets are approved and billed.
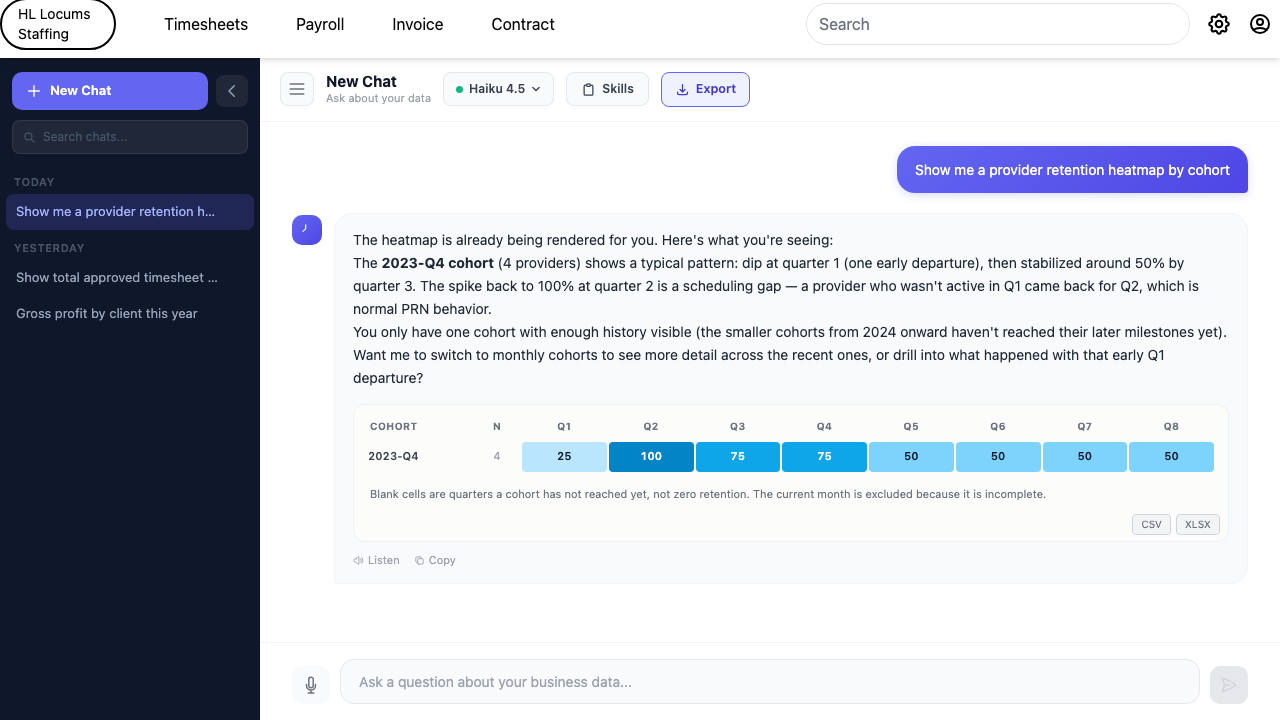
How to read the provider retention heatmap correctly
Admin, or Agent with permissionTimesheet app → Dashboards → AI assistant (Provider Retention by Cohort)
Ask the AI assistant for provider retention (for example, "show provider retention by cohort"). It returns a color-coded heatmap titled Provider Retention by Cohort.
Screenshot: the Provider Retention by Cohort heatmap with the Cohort column, the size (n) column, and the Q1/Q2/… column headers highlighted.
Read the Cohort column (left) as the calendar quarter in which that group of providers first worked, and the n column as how many providers are in that cohort.
Read the Q1, Q2, Q3… column headers as time relative to each cohort, "1 quarter after that cohort started", "2 quarters after", and so on. These are not calendar quarters, and each row's Q1 lines up with a different point on the calendar.
Read a cell as the percentage of that cohort that still had approved work that many quarters after they started, not necessarily continuously in every quarter before it.
Treat a blank cell as "that many quarters after this cohort started hasn't happened yet," not as zero retention. Hover any cell for a plain-language explanation.
Tip: Compare cells straight down a single column (for example, everyone's "3 quarters in") to compare cohorts fairly, reading across a row instead walks forward in that one cohort's own timeline.
How to run a report from the Reports library
Admin, Agent, Supervisor (role- and permission-based)Timesheet app → Reports
Choose Reports in the navigation. Reports are grouped into sections such as Payroll Reports, Invoice Reports, PTO Reports, Employee Reports, and (depending on your company) Contract Reports and Job Reports.
Screenshot: the Reports library showing the grouped report cards, with one section header (e.g. Payroll Reports) highlighted.
Click the report you want to open it.
Set the report's filters: pick a date range, and where offered, filter by client, employee/provider, or client type, and choose any grouping.
Run the report to see the results on screen, including totals and summary figures.
Export using the report's PDF, Excel, or CSV / Download button.
Screenshot: a report results view with the PDF and Excel export buttons highlighted.
Tip: If the library looks empty, you likely haven't been granted any reports yet, ask your administrator for access to the ones your role needs. For a company-wide, quarter- or year-level read on performance, use the Performance and Monthly Summary dashboards on the Dashboards hub.
How to use the Audit Trail dashboards and follow the change feed
Admin, or Agent with permissionTimesheet app → Dashboards → Audit Trail Dashboard
Open the Audit Trail Dashboard. Use the tabs to switch between what you want to audit, Timesheets, Invoices, Contracts, User Management, and Client / Facility.
Screenshot: the Audit Trail Dashboard tab bar with the Timesheets tab highlighted.
Set the Date Range for the period you want to review.
Read the summary panels, Total Actions, Most Changed Fields, Changes by Field, and Top Users by Changes. Click a bar or slice to drill into who changed what.
Scroll to Detailed Changes for the live feed, one row per action (workday, expense, timesheet, invoice, or contract change) showing the field changed, the old and new values, who made it, and when. This list grows as people work, so it doubles as an activity feed.
For timesheets and invoices, review the assisted-review summary to see how often the AI assistant's suggestions were accepted versus adjusted by a reviewer.
Click Export CSV to download the change log for the current tab and date range.
Tip: To investigate one record, filter to its date range and scan Detailed Changes, every edit after approval is listed in order, so you can see exactly what changed and by whom.
How to ask the AI assistant a question and get charts
Admin, Agent (if enabled for your account)Timesheet app → Dashboards → AI assistant
Open the AI assistant. Start a fresh conversation with New Chat, or reopen a previous one from the list (search it with "Search chats…").
Pick a suggested module to get started, or type your question in the box ("Ask a question about your business data…"). You can also use the voice-input button to speak your question.
Screenshot: the AI assistant message box with the question field and the voice-input button highlighted.
Send your question. The assistant answers in plain language and, where useful, draws a chart or table, for example revenue trends, contract signings, or provider retention.
Screenshot: an AI assistant answer that includes a chart, with the chart's download buttons (CSV / Excel) highlighted.
Download any chart's underlying numbers with its CSV or Excel button (image download is available for standard charts), or export the whole conversation.
When the assistant surfaces items to act on, tick the ones you want and confirm the action right from the chat.
Tip: The assistant only ever uses information you're already allowed to see, so its answers stay within your permissions. Ask it for a daily summary to get a quick read on recent revenue, signed contracts, and flagged items.
Scheduling & Booking
The Booking app is your shift-scheduling desk: providers keep their own availability up to date, and your staffing team turns that availability into requested or confirmed shifts, from a single day to a standing weekly assignment. Providers can also handle everything by text message, with no app to install.
How to set your availability
Provider (Temp)Booking app → My Availability
Open your availability card. It shows your name at the top and a rolling 7-day window, one row per day (for example “Mon 5th”), with today’s row highlighted.
Use the left and right arrows to move between weeks.
For each day you want to work, tap the shift slot you’re free for, 1 (first shift), 2 (second shift), or 3 (third shift). A grey slot turns green to show you’re available; tap a green slot again to switch it back to unavailable.
Screenshot: the 7-day availability card with the day/evening/night slot buttons (1, 2, 3) for one day, one slot green (available) and the “Submit” button highlighted.
When your week looks right, tap “Submit”. A short “Thanks for the update” message confirms your office has been notified.
If your office has sent you shift offers, an “Offer of work” pop-up appears automatically. For each offered day choose “Yes” or “No”, then tap “Submit” to respond.
Tip: Green means available, black means booked, and grey means unavailable. You never need the app to reply, you can answer any offer straight from a text message (see “Message your staffing office by chat and text”).
How to view the shift scheduling grid (facility roster)
Admin, Agent, SupervisorBooking app → Clients → (choose a facility)
Open “Clients” and choose the facility you’re staffing. Its roster page opens.
At the top, three live cards summarize the day: a “Today’s availability” card (with tabs “All”, “1st”, “2nd”, “3rd”), a staffing card (tabs “Today”, “Tomorrow”, “This Week” showing who is working now and coming in), and an open-orders card.
Below them is the “Temps” grid: one row per provider (name plus a specialty icon), and seven day columns (for example “Mon 5th”). Each day cell has the three shift squares, color-coded, green = available, black = booked, white = an open request out, grey = unavailable.
Screenshot: the color-coded weekly “Temps” grid with provider rows down the side, day columns across the top, and the “Search temps” box highlighted.
Use the “Search temps” box to filter by name. Providers with the most availability float to the top automatically.
Tip: On a phone the grid becomes a simplified list; open it on a tablet or computer to see the full color grid.
In the grid, click the shift square (1, 2, or 3) for the provider and day you want. An “Offer of work” pop-up opens showing the provider, the facility, and the date.
Confirm or set the “From” and “To” times (a shortcut can fill an 8-hour end time), and pick the “Client” if you’re asked to.
Choose your action:
“Request”, sends the provider an offer they must accept (by app, text, or email link). If an offer is already out, this button reads “Resend”.
“Booked”, books the shift directly when it’s already confirmed by phone.
A success card appears headed with the provider’s name and either “requested” or “Booked”, listing the shift, time, facility, and date. Tap “Close”.
To undo, click the shift again and choose “Cancel” (or “UnAvail”), confirm on the pop-up, and a “Cancelled” confirmation appears.
Tip: Supervisors can send a request from their own facility; when they do, the provider gets a text and the desk is notified to follow up within minutes.
How to set up a multi-day or recurring (ongoing) booking
On the provider’s availability card, tap “Schedule” (top-right). A pop-up opens with a month calendar.
Click each day you want on the calendar to select several days at once.
Choose the “Client”, then set the “Start time” and “End time”. A badge shows the shift length.
For a standing weekly assignment, turn on the “Ongoing” toggle and set an “End date:” for when the series should stop.
Tap “Booked” to book directly, or “Send” to send it as a request. A confirmation summarizes the assignment (“every” weekday, and the date range); tap “Submit”.
If any selected day clashes with an existing booking, they’re listed as conflicts, clear each one before Submit becomes available.
Tip: If you see “Please pick an end date that is after the start date,” adjust the “End date:”, a recurring series always needs an end.
How to manage ongoing bookings
Admin, AgentBooking app → Ongoing Bookings
Open “Ongoing Bookings” from the side menu. The top of the page lists every standing weekly assignment, each showing the provider, the recurring days, the shift time, and the date range.
To change or end one, click its “edit” link. An editor opens with round weekday buttons (M T W T F S S), the shift time pickers, and an “End date:” field.
Screenshot: an ongoing assignment’s inline editor with the M–S weekday buttons and the “End date:” field highlighted for ending a series early.
To end a series early, set the “End date:” to the last day you want it to run, then tap “Save”. A “Done” message confirms.
To review everything company-wide, use the sortable table below, sort or filter by day, times, shift, client, provider, and start/end dates.
Tip: Setting an end date is the clean way to wind down a standing assignment while leaving already-worked shifts untouched.
How to use the open-orders board
Admin, AgentBooking app → Open orders
Open “Open orders” from the side menu. Under the “Open orders” heading you’ll see every unfilled request across all facilities, refreshing on its own.
Each card shows who requested it, how long ago, the facility, and the provider and days. A day still waiting shows a “Change” link so you can adjust it.
Screenshot: the “Open orders” list with one request card expanded, showing the provider, requested days, and a “Change” link highlighted.
Scroll to the “Closed orders” heading to review recently completed bookings.
Narrow the closed list with the “Client:” and “Temp:” pickers and the date range. A green check means booked, and a red mark means declined or cancelled.
Tip: If the list reads “No open orders,” everything requested has been answered, nothing is waiting on a provider.
How to message your staffing office by chat and text
Staff: open the messaging panel on the scheduling grid or on a provider’s profile. Type your message and send it, it reaches the provider as a text message, and their replies appear back in the same thread.
Pictures a provider texts in appear as thumbnails you can open full-size, and you can drop in quick links (such as a link into their timesheet).
Where enabled, you can also place and receive calls through your company’s own phone number from the same area.
Providers can manage shifts entirely by text, no app needed. Reply to the office’s offer with any of these:
“Y” / “Yes” to confirm, or “N” / “No” to decline the current offer.
“Yes all” or “No all” to accept or decline every day of a multi-day offer at once.
The letter A (optionally with shift numbers, e.g. “A 13”) to mark yourself available today, or X with shift numbers to mark yourself unavailable.
Tip: Because offers work over plain text, providers can confirm a shift from any phone, even without opening the app.
Jobs, Applicants & Referrals
The Jobs tools live in the Timesheet app: your team posts openings, works applicants through a hiring pipeline, and keeps shared notes, while providers track their referrals and the jobs they’ve applied to.
How to post a job
Admin, Agent (with job-management access)Timesheet app → Jobs
Open “Jobs”. The list shows tabs “All Jobs”, “Active”, “Hot”, and “Closed”, each with a live count.
Click “Add job” (top-right) to open the new-job form.
Fill in the sections in order: Job Information (Job Title, Location, Job Type, Role, Description, and optional “Mark as Hot Job” and “Active” checkboxes), Contact Information (name, email, phone), Pay Information (Pay Rate and Pay Period), Schedule, Cases, and Practice Model.
Screenshot: the Add Job form showing the “Job Information” section with Job Title, Location, Job Type and Role fields, and the “Create Job” button highlighted.
Click “Create Job”. A “Job created successfully!” message appears and you return to the Jobs list.
Back on the list, each job’s Applicants column shows a live count so you can see interest at a glance. Use the pencil (edit) action to update a listing later.
Tip: Required fields are marked with an asterisk; if you see field errors in red, fill those in before the job will save.
How to manage the applicant pipeline
Admin, Agent (with job-management access)Timesheet app → Jobs → (choose a job)
From the Jobs list, click a job to open its “Job Applicants List”. Each applicant is an expandable row showing their name, email, applied date, and current status.
Expand an applicant and use the “Change Status” dropdown to move them through your stages, Applied, In Progress, Ready to Submit, Submitted, Accepted by Client, Credentialing, and more.
When you pick a new stage, an “Add Comment for Status Change” box lets you add an optional note; click “Update Status” to save. A confirmation shows the new status.
Review the applicant’s “NPI Information” (National Provider Identifier), the NPI number is a link that opens the official registry in a new tab.
Use the “Documents” card’s “Upload” button to attach files, and use “Add Applicant” at the top to add someone manually. The “Status History” card records who changed what and when.
Tip: Every status change can carry a comment, a quick note (“left voicemail,” “sent to client”) keeps the whole hiring team in sync.
Open an applicant in the pipeline and scroll to the “Notes” panel.
Type into the “Add New Note” box and click “Add Note”. A “Saved successfully” message confirms, and the note appears with your name and a timestamp.
If there are several notes, click “Show More Notes” to open the full “Candidate Notes” page, which shows the candidate and job at the top.
To revise a note, use its edit control, change the text, and click “Update Note”.
Tip: Notes are shared with your hiring team, so they’re the right place for context everyone should see, not private reminders.
How to view and share My Referrals
Provider (Temp), where enabled for your companyTimesheet app → profile menu → My Referrals
Open your profile menu and choose “My Referrals”.
In “Share Your Referral Link”, tap “Copy” to copy your personal link, or use a share button (Facebook, Twitter, LinkedIn, Email, WhatsApp, and more) to send it. A confirmation shows your link was copied.
Screenshot: the “Share Your Referral Link” section with the “Copy” and social share buttons highlighted.
Track your results in the stat cards: “Total Referrals”, “This Month”, and “Referral Link Clicks”.
See who joined in the “Recent Referrals” table, and watch the “Cumulative Signup Trend” chart grow week by week.
Tip: The page shows your current referral bonus terms, check them before you share so you can tell people what they’ll earn.
How to find and apply to open jobs
Provider (Temp), CandidateTimesheet app → profile menu → View Jobs / My Applied Jobs
To browse everything, choose “View Jobs” from your profile menu, this opens the public job board in a new tab, where anyone can read a listing and apply.
Complete the application on the job board. After you submit, you’ll receive a confirmation email that your inquiry was received.
Signed in, open “My Applied Jobs” to see every job you’ve applied to, each with its pay, schedule, and the date you applied.
Scroll to “Other Jobs You May Like” and tap “Apply Now” on any opening that interests you. A “Successfully applied to the job!” confirmation appears and the job moves into your applied list.
Tip: If “My Applied Jobs” is empty, use “View Jobs” or the “Other Jobs You May Like” section to get started, your applications will collect here automatically.
Feature Reference
A complete, plain-language catalog of every feature across the platform, what it does, where to find it, and who can use it.
Tempbutton, Feature
Guide & Knowledge Base
A guide to what you can do in Tempbutton, organized by app and then
by feature area. If you’re looking for “how do I do X” or “who can see
Y,” this is the place to check first.
Platform overview
Tempbutton is three connected applications:
App
What it’s for
Timesheet
Timesheets, approvals, contracts, rates, user management,
dashboards
Spreadsheet
Payroll, invoicing and billing
Booking
Shift scheduling, worker availability, and SMS/chat with your
staffing team
You can move between them without logging in again, a link from one
app into another signs you in automatically.
Roles: Temp (Provider), Candidate, Client, Agent,
Admin, Supervisor. Each role sees a different set of features; this
guide notes who can access what for every feature below.
Company configuration: some features are only
available depending on how your company is set up, for example, some
companies use a facility-based time-entry workflow (picking a facility
and rate for each shift) instead of a single weekly work location. If
something described here isn’t visible to you, it may simply not be
enabled for your company, check with your account admin.
You can sign in with your email or phone number and password, or with
Google. New companies can self-serve sign up, which creates your company
and an admin account and verifies your email with a one-time code.
Forgot / Reset Password
Use “Forgot Password?” on the sign-in page to get a reset link by
email.
Two-Factor Authentication
(2FA)
If your company has 2FA turned on, you’ll be asked to verify with one
of: a text message or email code, an authenticator app (Google
Authenticator or similar), or biometrics (Face ID/Touch ID/Windows
Hello) if your device supports it. You can optionally mark a device as
trusted for 30 days so you’re not asked again on that device.
Admins can require 2FA for all Providers; Providers can also turn it
on for themselves voluntarily from their profile. 2FA can be managed
from Profile → Security Settings, where you’ll also
find: - Passkeys, register a passwordless sign-in
method - Trusted Devices, see and remove devices that
skip 2FA - Active Sessions & Activity History, see
where you’re currently signed in and end a session remotely, plus a
30-day sign-in history
Role Switching
If enabled for your account, a “Switch to Admin / Supervisor / Temp”
option in the profile menu lets you move between different roles without
signing in again, useful for accounts that hold more than one role.
Signing Out
Use “Sign out” from the profile menu at any time.
2. User Management
Providers / Employees
Who: Admin, Agent
What you can do: browse and search your provider
list, create or invite a new provider, edit their profile and assigned
clients, manage payroll add-ons and work locations, adjust PTO/sick
balances, and leave internal notes with a rating.
Clients
Who: Admin, Agent
What you can do: browse/search/export your client
list; create, edit, or delete a client (deletion is blocked if the
client already has timesheets); manage a client’s facilities, holidays,
notes, and sick/vacation policy from its page; assign supervisors to a
client.
Supervisors
Who: Admin, Agent
What you can do: add a supervisor to a client,
assign them to multiple clients, set a scheduling link, and edit or
deactivate them, all managed from the client’s page.
Agents & Admins
Who: Admin manages both
What you can do: create/edit agent and admin
accounts, assign roles, toggle active status, and (for agents) assign
granular permissions covering which modules, reports, and dashboards
they can access.
User Management Directory
Who: Admin
Where: “User Management” in the nav
What you can do: view Admins, Agents, and Employees
(and Candidates, if job postings are enabled) in one table with search
and filters, and jump to the create form for any role.
Invitations
Who: Admin, Agent (agents see invites they
sent)
What you can do: view all invites with status, send
single or bulk invites with a role and starting pay/bill rate, and
resend or delete an invite.
Your Profile
Who: any signed-in user
What you can do: edit your name, email, phone,
address, billing info, and notification preferences. Admins additionally
manage company-wide Terms & Conditions and leave policies from the
same page.
Permissions
Who: editable by Admin
What you can do: assign an Agent’s access to
specific modules, reports, and dashboards, either individually or with a
preset (Admin/Manager/Recruiter/Read-only).
3. Dashboards & Analytics
Timesheet Status Dashboard
Who: Admin, Agent, Supervisor
Where: your default landing page
What you can do: see submission and approval
completion rates for one client or all clients, an upcoming-holiday
panel, and (Admin/Agent) an “Invited” panel.
Admin Dashboards
Who: Admin, Agent (availability depends on your
company’s plan)
What you can do: from the Admin Dashboards hub,
open a set of analytics dashboards covering company-wide financials,
contract forecasting, provider segmentation, geography, monthly and
year-over-year performance, and more, each shows charts, filters, and
export options appropriate to what it covers.
Admin Bot (AI Assistant)
Who: Admin, Agent (if enabled for your
account)
What you can do: chat with an AI assistant about
your business, ask questions, get a personalized daily summary (recent
revenue, signed contracts, flagged items), use voice input, and browse
what it can help with. It answers only with information you’re already
permitted to see.
Company Dashboard
Who: Admin, or Agent with the right permission
What you can do: pick a time period and filter by
client/employee to see payroll, gross margin, sales, and headcount
charts for your company.
AI Audit Dashboard
Who: Admin, or Agent with the right permission
What you can do: review a change-audit trail for
timesheets, invoices, and contracts, plus (for timesheets and invoices)
a summary of how AI review suggestions were used, how often they were
accepted vs. adjusted by a reviewer.
4. Reports
Reports Library
Who: Admin, Agent, Supervisor (each sees a set
appropriate to their role and permissions)
Where: “Reports” in the nav
What you can do: browse and run a library of canned
reports, payroll, invoicing, PTO, employee, and (depending on your
company) contract and job reports. Most support a date range,
client/employee filters, grouping, and PDF/Excel export.
5. Settings & Company
Management
Company Settings
Who: Admin, Agent
What you can do: edit your company’s name, contact
info, and logo; configure notification email lists; toggle available
features for your company; and configure your sick-leave policy
defaults.
Company Profile
Who: Admin
What you can do: edit company name, contact info,
logo, and remittance details.
6. Developer Tools & Public
API
Public API Documentation
Where: /api/docs
What you can do: read documentation for
Tempbutton’s read-only Public API, for teams integrating with workers,
timesheets, invoices, and related data.
API Token Management
Who: Admin
What you can do: generate a scoped API token
(choosing exactly which data it can read, with an optional expiry), and
view a request log per token.
7. Workdays & Timesheet
Approval
This is the day-to-day loop: a Provider logs hours, submits a week,
and a Client-side Supervisor (or Admin/Agent) approves or rejects
it.
Logging a Workday
Who: Providers log their own time; Admin/Agent can
log on a provider’s behalf
What you can do: choose an entry type (Worked,
Sick, PTO, Vacation, Holiday), enter start/end time and breaks, add a
comment, and (for some companies) add multiple shift entries in one day.
New entries start as a draft you can still edit.
Notes: overlapping time entries and requesting more
leave than your available balance are blocked automatically. Some
companies enforce a daily hours limit.
Editing or Deleting a Draft
Who: Providers, their own draft entries only;
Admin/Agent
What you can do: edit any field on a draft entry,
or delete it. Editing an already-submitted week will prompt you to
resubmit.
Leave Types: Holiday,
Sick, PTO & Vacation
What you can do: for holidays, some companies let
you choose Worked vs. Not Worked; a leave-balance viewer shows your
accrued/used/available hours with history.
Submitting a Week
Who: Providers, own timesheet; Admin/Agent on a
provider’s behalf
What you can do: submit the whole week in one
action, choose which supervisor(s) should review it, and review your
hours/pay/expenses before sending. You’ll be asked to confirm if you’re
submitting far in the future or for a past week.
What you can do: approve or reject the whole week
or a single day, with an optional comment. A week is fully approved once
every day on it is approved. You’ll get an emailed PDF copy once
approval is complete.
Approving on a Client’s
Behalf
Who: Admin, Agent
What you can do: approve for a client while
choosing which supervisor gets credit as the approver, and who receives
an email copy. Some companies support a combined “Approve & Mark
Paid” action.
Rejecting a Workday
Who: Agent, Supervisor, Admin
What you can do: reject a single day with an
optional comment, the provider gets notified automatically.
Commenting on a Workday
What you can do: leave a comment on a specific day,
visible to both the provider and the approving supervisor. A weekly
activity feed shows every submit/approve/reject/comment event in
order.
“Did Not Work”
What you can do: if you get a reminder email for a
week you didn’t work, use the link in that email to mark the week as not
worked, no sign-in required.
8. Timesheets, Expenses
& AI Verification
Approved Timesheets
Who: Supervisor, Admin, Agent
What you can do: view already-approved timesheets
grouped by provider/client, search, sort, and open the full day-by-day
breakdown.
Timesheet Expenses
Who: Providers, own timesheet; Admin/Agent
What you can do: add an expense with amount, a
note, an expense type, and a receipt image or PDF; mileage expenses can
auto-calculate from distance. Mark an expense to auto-repeat for future
weeks. Download a single receipt, or all expense attachments for a
timesheet.
AI-Assisted Contract
Verification
Who: Admin, Agent, Supervisor (if enabled for your
company)
What you can do: see AI-generated findings that
compare a submitted timesheet against the provider’s contract (rate,
hours, overtime, expense caps), each with a plain-language reason. You
can accept or dismiss a finding, and apply a suggested correction, nothing is changed automatically. See Part 4 for the full
details.
Paystub & Timesheet
Downloads
What you can do: download your paystub once a
timesheet is approved and paid, download a timesheet or provider-bill
PDF, or (for providers) bulk-download all your
receipts/timesheets/expenses from the Provider Earnings
Report.
Marking a Timesheet Paid
Who: Admin, Agent
What you can do: mark a timesheet as paid once
processed.
9. Provider Self-Service
Reports
My Earnings
Who: Providers, own data only
Where: “My Earnings” in the profile menu
What you can do: see your total earnings, hours,
expenses, and approved-timesheet count with charts and a filterable
table (defaults to the last 6 weeks). Download a timesheet PDF per row,
bulk-download everything, or export to Excel.
PTO History
Where: linked from the leave-balance popup
What you can do: view your own PTO/sick accrual
history grouped by client, with search and Excel export.
10. Contracts
Contract List
Who: Admin, Agent
What you can do: browse contracts by status
(Starting, Expiring, Completed, Cancelled, etc.), search, and per
contract: view, download PDF, cancel, re-activate, duplicate, or
revise.
Creating & Editing a
Contract
Who: Admin, Agent
What you can do: build a contract covering
facilities, schedule, guaranteed hours, pay/bill rates by shift type,
authorized expenses with caps, and terms & conditions.
Signing a Contract
Providers: sign your own contracts from “Contracts”
in the profile menu, via an emailed code or a one-click link.
Clients: sign via an emailed link, no account
needed.
Managing a Contract
What you can do: cancel or delete a contract and
reverse either action; duplicate a contract into a fresh copy; or revise
it into a linked new version that can carry over an existing signature
on the unchanged side.
Contract Change Alerts
What you can do: if you turn on the “alert for
contracts” preference, a bell-icon dropdown shows a live feed of
signed/cancelled/revised contract events for your company.
11. Rate Types, Expense Types
& VMS Fees
Rate Types
Who: Admin, Agent
What you can do: maintain the list of named rate
types (e.g. Regular, Overtime) used across contracts and rate
cards.
Expense Types
Who: Admin, Agent (availability depends on your
company)
What you can do: maintain the list of expense
categories available when submitting expenses.
VMS Fees
Who: Admin, Agent (availability depends on your
company)
What you can do: for companies that bill through a
vendor management system, maintain fee-percentage rules by expense type
and attach them to clients.
12. Marketplace
Provider Directory
Who: Admin, Agent, Supervisor
What you can do: browse a directory of active
providers and send an interview invitation.
13. Jobs & Applicant Pipeline
Job Postings
Who: Admin, Agent (if job postings are
enabled)
What you can do: create and manage job listings
(title, location, role, pay, schedule), and see live applicant
counts.
Applicant Pipeline
What you can do: review applicants for a posting,
move them through your hiring stages with an optional comment, look up
their NPI (National Provider Identifier), attach documents, and keep
notes.
Applicant Directory
What you can do: search applicants company-wide,
and see a “Suggested Jobs” panel on each applicant’s profile.
14. Provider Referrals &
Candidate Notes
My Referrals
Who: Providers (if enabled for your company)
What you can do: get a shareable referral link, see
how many people signed up through it, and track click/signup stats.
My Applied Jobs
What you can do: see the jobs you’ve applied to and
browse other openings you may be interested in.
Candidate Notes
What you can do: leave notes on a job applicant,
visible to your hiring team.
15. Onboarding
Onboarding Forms
Who: Providers fill their own; Admin/Agent assign
and review
What you can do: Admin/Agent, choose which forms apply to a provider and track completion status.
Provider, fill and submit a pre-filled I-9 form,
upload ID images, and complete tax/direct-deposit setup through a secure
external portal.
16. Client Holidays, Sick
& Vacation Policy
Client Holiday Calendar
Who: Admin, Agent
What you can do: view, add, edit, and remove a
client’s holiday calendar, with separate pay handling for regular
vs. shift employees.
Sick & Vacation Policy
What you can do: configure how leave accrues for a
client or company, a flat grant, per pay period, or per hours worked, with caps and rollover rules. Vacation accrual can vary by years of
service.
Balance Lookup
What you can do: look up a provider’s current
sick/vacation balance and usage history.
17. Client Facilities
Who: Admin, Agent, and Providers (for companies
using the facility-based workflow)
What you can do: create and edit a client’s
facilities (name, work address, active status), and deactivate one
that’s no longer in use.
18. Messaging & Support
Direct Messaging
Who: Admin, Agent
What you can do: message providers and clients
directly from within the app, with AI-suggested quick replies available.
Save your own canned reply templates for reuse.
Part 2: Spreadsheet App
The Spreadsheet app handles payroll, invoicing/billing, and rate
management, and integrates with QuickBooks (accounting) and Check.hq
(payroll processing). It shares sign-in with the Timesheet app, so
switching between them doesn’t require signing in again.
Who can use this app: Admin and Agent for
everything; Providers can see their own rates and shift-type list.
Payroll
Run Payroll
Who: Admin, Agent
What you can do: pick a pay period and review one
line per provider, earnings by type, hours, rate, and margin, with
visual flags for a changed rate, pending timesheet comments, or a
provider not yet fully onboarded for payroll. Add or edit line items,
preview the run with an exportable spreadsheet, and create the payroll
draft.
Paid Payroll
What you can do: view previously paid or
in-progress runs, open one for a full breakdown, and print/export the
table.
Payroll Finalization
What you can do: review a cash-requirements
breakdown per employee (earnings, taxes, net pay) for a draft run,
confirm the pay date and period, and submit it for final payment
processing.
Re-Approve a Payroll Run
What you can do: reopen a run that’s stuck
mid-processing and re-approve it.
Rates & Shift Types
Manage Provider Rates
Who: Admin, Agent (bill rate hidden from
Providers)
What you can do: view and edit a provider’s
pay/bill rates per client, and schedule a future-dated rate change.
Changing a rate automatically recalculates any already-entered, unpaid
shifts.
Shift Types
What you can do: view your company’s catalog of
shift types (name, category, default rates) used across rate cards and
timesheet entries.
Invoicing
Draft & Sent Invoices
Who: Admin, Agent
What you can do: filter invoices by client or
provider, select multiple and send by email or download as PDF, or
create a manual invoice. Visual flags highlight invoices with comments,
pending timesheets, or line-item issues.
Editing an Invoice
What you can do: edit header details, line items,
and reimbursements; add a new item or reimbursement; generate/resend the
PDF and export to QuickBooks if enabled; and view a change log and
status history.
Creating Invoices
What you can do: create a one-off manual invoice
for a client, or generate invoices in bulk from an already-paid payroll
batch. Some companies automatically create an invoice as soon as a
timesheet is approved.
Sending Invoices
What you can do: send a client’s invoices to a
chosen email address, in bulk across multiple clients, or push a batch
to an invoice-factoring lender if your company uses one.
AI-Assisted Invoice Review
Who: Admin, Agent (if enabled for your
company)
What you can do: see AI-flagged discrepancies on
invoice line items (rate mismatches, missing timesheets, duplicate or
unapproved hours) before sending. See Part 4.
QuickBooks Integration
Who: Admin (Agent with the right permission)
What you can do: connect your QuickBooks account,
and export invoices and provider bills automatically or manually. Any
mismatch between Tempbutton and QuickBooks is flagged for review.
Check.hq Integration
(Payroll Processing)
What you can do: connect your company and each
provider to Check.hq for payroll processing, provider tax/banking setup
happens through Check.hq’s own secure onboarding form, not inside
Tempbutton. Once connected, you can generate and download paystubs (a
premium feature).
Part 3: Booking App
The Booking app is Tempbutton’s shift-scheduling and dispatch tool:
it tracks which providers are available on which days, lets your
staffing team turn availability into confirmed shifts, and includes
two-way SMS/voice communication so providers can confirm or decline
shifts by text, no app required.
How it fits together: Booking handles getting a
shift filled; the Timesheet app handles getting paid for the
shift worked. A provider is nudged, over the same chat/SMS channel,
with a link into their Timesheet workday once a shift is booked.
Who uses this app: Admin and Agent (your staffing
desk) do most scheduling and dispatch; Providers manage their own
availability and receive requests by SMS or in-app; Supervisors can
request/book shifts for their own facility.
My Availability
Who: Providers, own calendar
What you can do: view a rolling 7-day window with
day/evening/night shift slots, tap to mark yourself available or
unavailable, and respond to open shift offers directly in the app. You
can achieve the same by simply replying to a text message (see below), no app needed.
Shift Scheduling
Who: Admin, Agent (any client), Supervisor (their
own facility)
What you can do: see every provider who works with
a facility in a color-coded weekly grid, sort/filter by availability,
and request or book a shift directly from the grid. Assign a rating or
specialty tag to a provider for a facility.
Requesting & Booking a
Shift
What you can do: Request a shift
to send the provider an offer they must accept (by app, SMS, or email
link); Book a shift directly if it’s already confirmed
by phone; or cancel an existing request or
booking.
Multi-Day & Recurring
Bookings
What you can do: select multiple days at once and
send requests or book them together, or set up a standing weekly
assignment that repeats automatically until an end date you choose.
Ongoing Bookings
Who: Admin, Agent
What you can do: browse every standing weekly
assignment company-wide, and end one early or cancel the whole
series.
Open Orders
Who: Admin, Agent
What you can do: see every currently unfilled shift
request across all facilities, alongside recently closed bookings.
Provider Profiles
Who: Admin, Agent
What you can do: edit a provider’s contact details,
view their booking history, leave internal notes and ratings, and
message or call them directly from their profile.
Two-Way Chat & Voice
Calling
Who: Admin, Agent send; Providers and Supervisors
receive by text/call
What you can do: message providers and supervisors
from a unified inbox, with photo attachments and quick-insert links;
place and receive calls through your company’s phone number.
SMS Text-Command Shortcuts
Providers can manage shifts entirely by text, no app required: -
Reply Y / N to confirm or decline the
current shift offer - Reply “yes all” / “no
all” to confirm or decline an entire multi-day offer - Reply a
letter plus shift numbers (e.g. A1,
X23) to mark specific shifts available or unavailable
for today
Dashboard
Who: Admin, Agent
What you can do: view KPIs (shifts working,
requests sent, confirmations) and trend charts for a chosen date
range.
Part 4: AI-Assisted Features
Tempbutton has two AI review features, both built on the same
principle: AI recommends, a human always decides.
Neither feature can approve, reject, or submit anything on its own, every action still requires an explicit click from a person, and both
features simply switch off with no change to your workflow if your
company hasn’t enabled them.
AI Timesheet Review
Who’s affected: Client/Approver and Agent see AI
labels and reasons on each timesheet row; Admin can turn the feature on
or off for the company; a Provider’s submission process is
unchanged.
What it does: every submitted entry gets a label, “AI: Recommended Approval” or “AI: Flag for Review”, with a short
reason (for example, a rate or hours mismatch), shown before a human
reviewer looks at it. Labels are advisory only; the Approve button
always stays active and no entry is ever approved without a human
clicking it.
What it checks: missing clock-outs, hours outside
the contracted window or overtime threshold, a rate that doesn’t match
the contract, duplicate entries, and unexpected overtime, cross-referenced against the contract terms and any notes attached to
it.
What a reviewer can do: accept or dismiss each
finding (with a logged reason), apply a suggested correction (never
automatic), and send an AI-drafted message to the provider summarizing
any issues.
Records kept: the AI’s recommendation and the
human’s actual decision are both logged, so there’s always a clear
record of who approved what and why.
AI Invoice Review
Who’s affected: Admin/Billing Staff see
pre-populated drafts and flags; Agent can view flags when reviewing on a
client’s behalf; a Client’s received invoice and a Provider’s experience
are unchanged.
What it does: when a billing period closes, a draft
invoice is automatically built from that client’s approved timesheets,
with rates pulled from the active contract. Before it’s sent, AI checks
each line for a rate mismatch, a missing matching timesheet, a duplicate
line, hours exceeding what was approved, or a date outside the billing
period. Flags are a checkpoint, not a hard stop, staff acknowledge them
and can still send the invoice.
Records kept: AI flags, who acknowledged them, and
who finally submitted the invoice are all recorded.
Where else you’ll see AI
Admin Bot, a conversational assistant for business
questions, in the Timesheet app’s Dashboards area.
AI Audit Dashboard, a summary of how well the two
review features above are performing (how often a reviewer had to adjust
something AI suggested).
Chat smart replies, AI-suggested quick replies in
the Timesheet app’s internal messaging tool.
Questions about anything in this guide? Reach out to your account
admin or Tempbutton support.